A cycling jersey that bunches at the shoulders. Shorts that fit great in a size medium — then the next batch arrives and they don't. These aren't small problems. They're the kind of quality failures that kill cycling apparel supplier relationships and damage brand reputations without anyone noticing until it's too late.
The root cause of both issues, more often than buyers expect, comes down to how the fabric was cut.
Straight knife cutting has become one of the most trusted methods in cycling apparel production. It answers a surprisingly tricky question: how do you get every panel, in every size, across every production run, to come out right? The answer sits in the precision of the cut.
The sections ahead break down how straight knife cutting works, what tradeoffs come with it, and how it affects fit, consistency, and the performance fabrics that modern cycling kits require.
Why Cutting Precision Impacts Cycling Apparel Fit and Performance
Cycling apparel isn't cut like a dress shirt. The tolerances are different. The stakes are different. Most buyers don't appreciate how unforgiving the physics are — until garments start failing on the road.
Here's what makes this category so demanding: high-performance cycling kits are engineered for a bent, on-bike posture — not the standing neutral position used in most apparel fitting. Every panel is drafted around the rider's torso angled forward, arms extended, thighs rotating through a full pedaling stroke. Cut a panel even a fraction off, and that error doesn't stay small. It grows with every movement.
The 0.5 mm Problem
Half a millimeter doesn't sound like much. In cycling apparel, it can be the difference between a garment that performs and one that doesn't.
Consider a race jersey torso panel built around a 90–100 cm body circumference . A 0.5 mm cutting error on each side seam produces a 1–2 mm total circumference deviation . That translates to a 1–2% shift in local compression . Two failure modes follow from this:
- Visible fabric "float" that wrinkles under aero conditions
- Over-tension that restricts shoulder rotation and breathing during high-output efforts
For compression cycling shorts, the numbers get tighter. Premium bib shorts target 10–20% fabric stretch in key zones like the thigh and torso. On a male thigh circumference of 55–60 cm, panel tolerances are held to ±1 mm per edge. A cumulative ease error greater than ±3 mm — less than the width of a fingernail — pushes compression out of spec by 2–4 percentage points. An intended 18% stretch becomes 16%. Not catastrophic on paper. You'll feel it on the saddle after 40 minutes.
Where Shape Errors Travel
The problem gets worse in structure-sensitive zones.
Armhole curves in aero jerseys are sized for 2–4% negative ease against the bicep. A 1 mm error in the armhole curve length shifts the sleeve's rotation angle by 2–3° . That's enough to create drag lines and cut off reach the moment a rider drops into an aggressive position. Shoulder and neck zones are the primary aero-critical areas . Even micro-wrinkles here create aerodynamic consequences far beyond their size. Aero jerseys need to fit like a second skin, with zero flapping material. There's no room for any dimensional drift.
Leg panels in bib shorts are just as sensitive. A 1–2 mm excess on the front thigh curve causes fabric to pool over the quadriceps. Under pedaling, those folds grow to 5–8 mm — raising chafing risk and trapping localized heat. On the other side, a 1 mm shortage on the inner-thigh curve concentrates strain on the seam itself. Seam stretch pushes past 20–25% per stroke, and stitch fatigue accelerates fast in high-compression designs.
Back seams control how the jersey wraps during riding. A 2–3 mm cumulative error across back panels shifts rear pocket position by 5–10 mm . Loaded pockets start to bounce or tilt. Cut the center-back length short by 3–5 mm and riders feel the jersey pulling at the zipper and collar the moment they go aggressive — irritation that builds over hours.
Why Compression Garments Demand Stricter Standards
Ordinary casual garments can handle cutting deviations of ±3–5 mm without any noticeable effect. They're built with 2–5 cm of ease . Fit errors have room to hide.
Cycling race fits work the other way. They run with ease values near 0–2% , or negative ease up to −5% . That pushes cutting tolerances to ±0.5–1 mm at critical seams — about 2–5 times stricter than casual sportswear standards.
The reason goes beyond feel. Compression cycling apparel depends on graded pressure distribution — a deliberate gradient from torso to limb. A local +2–3 mm circumference error breaks that gradient. Instead of smooth, consistent compression, riders hit pressure steps : bands of unexpected tightness alternating with zones that feel strangely loose. That's not just uncomfortable. Any experienced buyer or quality controller reviewing fit samples will spot it immediately — and it tells them that dimensional control in the cutting room fell short.
Stretch fabric forgives less than it appears to. Industry guidance is clear on this: elasticity may make a poor fit feel wearable, but "it may just mean that the cut is not designed for your shape." The stretch properties of the material cannot substitute for precision in the cut.
That's the hidden cost of imprecise cutting in cycling apparel manufacturing. It's also why the cutting method matters far more than buyers tend to assume when they're evaluating cycling gear suppliers.
How Straight Knife Cutting Delivers Superior Panel Shape Accuracy for Cycling Jerseys
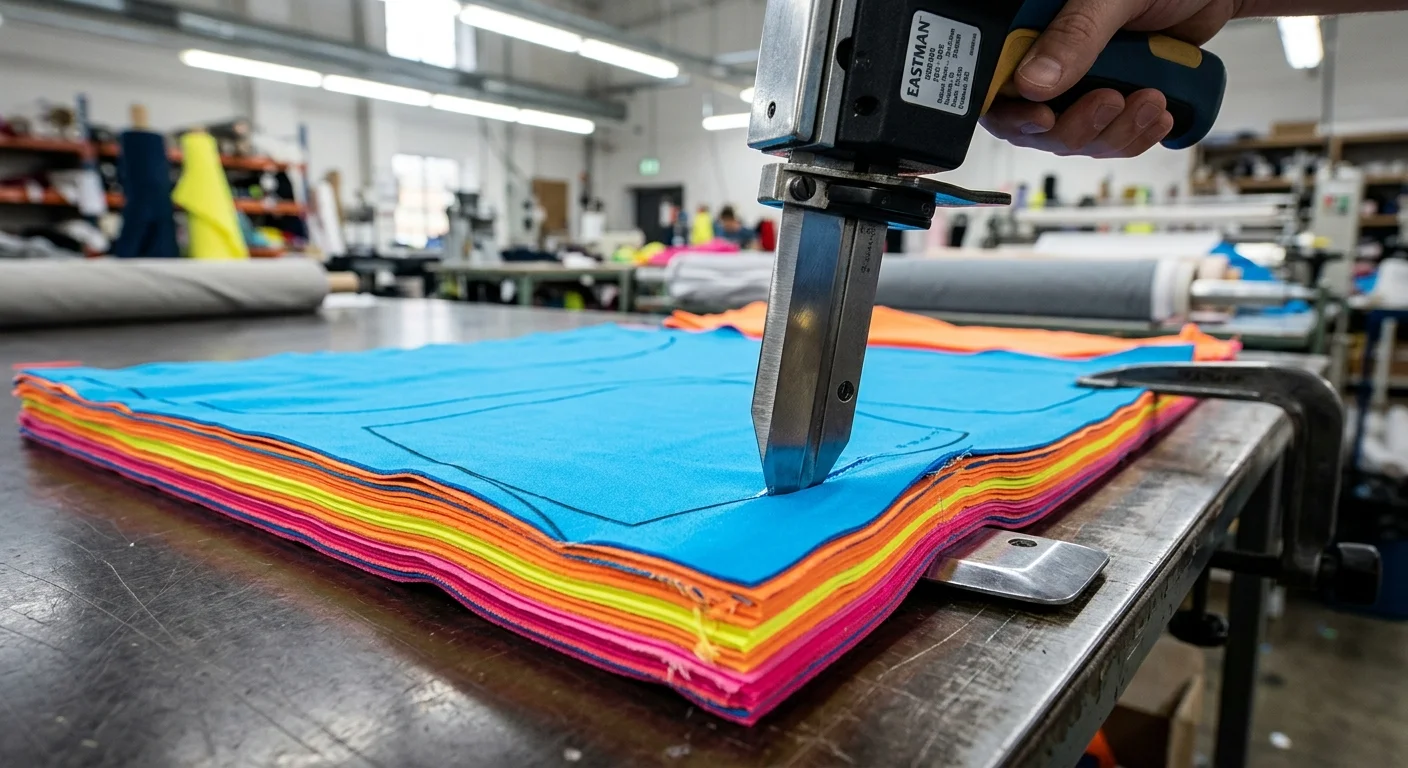
Panel shape accuracy in cycling apparel starts — and often ends — at the cutting table.
The straight knife earns its place in high-performance kit production through one core capability. A skilled operator can guide the blade through complex curves in real time, making small corrections as the cut moves forward. That matters a great deal with raglan sleeves, ergonomic side seams, and the arced front and back panels that define a well-engineered cycling jersey.
The Operator-Guided Advantage
The straight knife cuts straight down through multiple fabric layers. The operator steers with one hand, tracing the pattern line the whole way — adjusting at every curve, every taper, every armhole arc. This isn't passive cutting. It's active shape control.
That distinction becomes critical on the panels where fit lives or dies:
Armhole curves need a smooth, unbroken arc. The straight knife follows that arc in a single pass. Any drift gets caught and corrected mid-cut before it builds into a bigger problem.
Ergonomic side seams in aero jerseys are almost never straight. They follow a rider's bent posture. The operator feels the blade drift and pulls it back to the pattern line right away.
Front and back panel waist curves carry stretch in set directions. A skilled operator lines up the approach angle to the fabric's grain before the blade touches the material.
What "True Pattern Geometry" Means Here
In cycling apparel production, true pattern geometry means the finished panel copies every curve, notch point, seam path, and length measurement from the original digital pattern — with no distortion added by the cutting process.
Straight knife cutting protects that geometry through several factors you can control:
Stretch direction check before cutting lines up the fabric's elasticity with the pattern's intended orientation
Layer control keeps the fabric stack from shifting, so the top and bottom layers cut out identical panels
Blade condition — a sharp, well-kept blade produces a clean, smooth edge; a dull one drags yarn, creates small tears, and adds edge distortion that gets worse at the seam
Cut edge quality has a direct effect on seam behavior under compression. A clean, stable edge sits flat under the needle and stays flat under body movement. A well-maintained straight knife produces that kind of edge. A ragged edge does neither.
Where Round Knives and Die Presses Fall Short
This comparison is practical, not theoretical. Round knives do well on straight runs and moderate curves. On tight arcs — the kind that show up all the time in cycling jersey construction — the circular blade's shape limits how far the operator can turn. Overcutting a curve becomes a real risk.
Die press cutting handles repetitive, fixed shapes at speed. But cycling jersey panels aren't fixed shapes the way a simple pocket piece is. They respond to fabric elasticity and panel angle. Press a die into high-stretch Lycra blends and you tend to push geometric distortion at curved edges and diagonal stretch zones — the exact spots where fit precision matters most.
The straight knife doesn't remove operator skill as a factor. It puts that skill to work. That's the point.
Achieving Consistent Sizing Across Bulk Cycling Apparel Production Runs
Bulk production doesn't forgive sloppy cutting — it multiplies it.
Take a 200-piece team kit order spread across four sizes. That's dozens of chances for the same cutting error to repeat, stack up, and end up as a garment that passes inspection but fits like it belongs to someone else. Experienced buyers know to screen for this. It all starts in the cutting room.
The Numbers That Define "Consistent"
Professional cycling apparel factories target ±0.5–1.0 cm tolerance across critical dimensions — chest, waist, hip, inseam — for any single size within a production run. Push deviation past ±1.5 cm , and the complaints start. Riders wearing the same labeled size end up with garments that feel and fit like different products.
The benchmark separating a reliable cycling apparel manufacturer from a risky one: ≥95% of finished garments within spec , with a defect rate below 3–5% .
Straight knife cutting — especially with an automated straight knife bed and proper layer control — hits that target. Chest circumference deviations on jerseys cut this way average ±0.4–0.6 cm , with fewer than 3% of pieces needing rework. Manual cutting with weak alignment control pushes that defect rate to 8–10% .
Why Fabric Layers Are the Hidden Variable
High-stretch cycling fabrics — Lycra blends in the 200–260 gsm range — react to layered cutting in ways woven fabrics don't. Stack them too high or spread them with uneven tension, and the bottom layers compress and shift. The top panels look identical. The bottom panels measure 1–2 mm smaller . That error survives sewing and shows up in the finished garment.
Three controls stop this from happening:
Spreading tension held to ≤3% deviation in both warp and weft directions. Go past 5%, and top-to-bottom size differences exceed 2–3 mm per panel. That's enough to push finished measurements off by a full centimeter once the garment is assembled.
Layer height capped at 20–40 plies for performance stretch fabrics. Past that limit, lower-layer compression gets hard to control — even with solid blade technique.
Rest time of at least 1–2 hours after spreading before cutting starts. Stretch fabrics need time to recover from spreading tension. Cut too soon, and you're cutting into fabric that's still pulling back.
Blade condition matters just as much. A worn straight knife creates 0.5–1.0 mm size differences between top and bottom layers on every cut. Across a full production run, those small differences add up fast. Professional operations resharpen or replace the blade every 15–20 fabric beds to remove that variable entirely.
What "Same Size, Different Fit" Really Costs
Say within-size variation exceeds ±2 cm on a team kit order — chest measurements ranging from 98 to 104 cm across the same labeled size. That's not a theoretical problem. Survey data from club kit orders in the 50–100 piece range shows dissatisfaction rates reaching 25–35% . Riders start asking out loud why the same size fits differently across the group. Reorder confidence collapses. Cycling suit set supplier relationships rarely survive more than one or two rounds of that.
Tight cutting consistency doesn't just protect quality. It protects the repeat business that keeps bulk apparel production worthwhile for both sides.
Straight Knife Cutting vs Round Knife vs Laser Cutting: Which Is Best for Cycling Apparel?
Three cutting methods dominate cycling apparel production. Each has a place. None is superior across the board. The right answer depends on what you're cutting, how many pieces you need, and what errors you can't afford.
Here's how they stack up.
Round Knife: The Specialist for Tight Curves and Narrow Panels
Round knives do something straight knives struggle with. They trace tight, continuous curves without breaking rhythm. The rotating blade produces less vibration. Less vibration means less fabric displacement — cleaner edges, more consistent arcs.
For cycling apparel, that matters on the small parts. Shoulder straps, grip bands, side venting inserts — these are narrow, multi-arc pieces. The blade needs to keep moving through every bend without losing control. Industry data puts round knife curve deviation at ±0.5 mm on complex arcs. A straight knife on the same curves tends to run closer to ±1 mm . That gap sounds small. On a grip band or bib shoulder strap, it's the difference between a panel that sits right and one that pulls.
The catch: round knives work best in lower layer stacks. Past 40 mm of stacked fabric, lateral drift and size error become real problems. Deviations can exceed ±1.5 mm per panel. For the main compression panels that define a cycling kit, that's not acceptable.
Laser Cutting: High Precision, High Cost, Specific Use Cases
Laser cutting looks impressive on paper. Cut speeds above 40 m/min , near-zero tooling changeover, and cutting tolerances down to ±0.05–0.1 mm for fine detail work. For reflective logos, complex pattern cutouts, and intricate mesh shapes, no mechanical method comes close.
But cycling apparel is built mostly from high-stretch polyester and nylon blends — materials with melt points around 220–260°C . Laser heat creates fused edges. On compression fabric, those hardened edges restrict elastic recovery. Fine mesh panels risk pore sealing. That kills breathability. Controlling these risks takes careful power and speed calibration. Even then, lightweight mesh fabrics need test cuts before full production runs.
Equipment cost is the other issue. A laser cutting line costs 40–70% more in capital investment than an equivalent automated straight knife setup. Most custom cycling kit orders fall in the 50–500 piece per style per season range. At that volume, the overhead doesn't pay off — unless the order is loaded with complex reflective or decorative elements.
Straight Knife: The Production Workhorse for Compression Panels
For the panels that define fit and compression in a cycling kit — torso front and back, bib short legs, wide shoulder bases — straight knife cutting holds the practical edge.
Two reasons drive this:
Layer capacity. Automated straight knife systems cut through 40–80 fabric plies of compression stretch fabric while holding dimensional accuracy. That's what makes bulk production of main panels cost-effective.
Cold cutting. No heat, no fused edges, no risk to elastic structure. High-compression Lycra blends come off the straight knife table with their stretch properties fully intact.
At production scale — annual volumes of 1,000+ pieces per style — the straight knife's combination of layer efficiency, low tooling cost, and fast pattern updates via CAD makes it the lowest-cost, lowest-risk primary cutting method for cycling apparel main panels.
The Practical Answer
No single method wins across every panel type. Here's what the best factories do:
Panel Type | Best Method |
|---|---|
Main compression panels (torso, bib legs) | Straight knife |
Narrow curved straps, grip bands | Round knife |
Reflective logos, complex cutouts | Laser |
Lightweight mesh ventilation panels | Straight knife (bulk) / Laser (complex shapes) |
Straight knife cutting holds the primary position in cycling kit production for a clear reason. It handles the hardest job: cutting large, high-stretch compression panels with consistent accuracy, at volume, and with zero thermal risk. Round knife and laser fill specific gaps around it. That's not a compromise — it's how precision manufacturing works in practice.
Handling Stretch and Technical Fabrics: Straight Knife Performance on Lycra and Polyester-Spandex
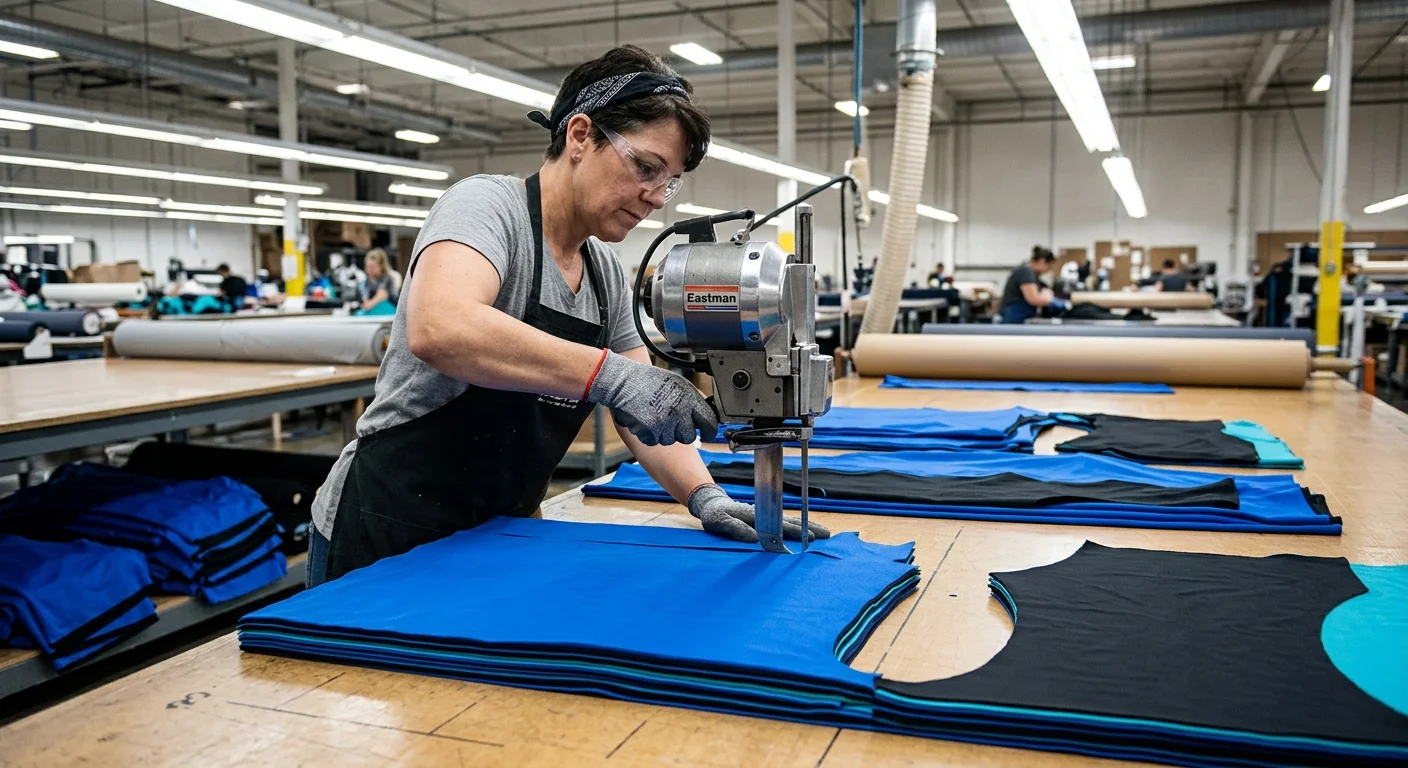
Lycra doesn't behave. Every cutter working with cycling apparel fabric learns this fast.
Polyester-spandex and Lycra blends carry internal stress from the moment they leave the roll. They want to contract. They want to recover. Cut them under tension, and the panel you think you're cutting isn't the panel you get. The fabric springs back after the blade passes. Edges wave, pull, and measure short. That's not a blade problem. It's a material physics problem. You have to manage it before the knife ever touches the cloth.
Spread First, Wait, Then Cut
The first control point comes well before cutting starts: pre-relaxation .
Spread any Lycra or polyester-spandex fabric stack at low tension. Then leave it to rest — 1–2 hours minimum — so the roll's internal stress can release. Skip this step and you're cutting into fabric that's still pulling back against itself. The panels come off the table undersized. No amount of operator skill recovers that lost dimension.
Two more controls work alongside pre-relaxation:
Spreading tension held below ±3% deviation in both warp and weft. Uneven tension across the lay creates panels that measure differently from one end of the stack to the other — even when every cut looks identical from above.
Vacuum hold-down or firm mechanical fixation throughout the cut. High-stretch knits tend to lift as the straight knife blade moves upward. Fabric lifting into the blade gap makes edges wavy and dimensions run small. A firm fabric stack stops that movement.
Blade Geometry and the 15–20° Tilt
On lightweight stretch knits, cut edge quality depends less on blade speed. It depends more on reducing friction and drag along the cut path.
The fix is a blade tilt of 15–20° relative to the fabric surface. This reduces contact between the blade and the material. Less fiber gets pulled as the knife advances. You get a cleaner edge with less distortion. That matters on compression cycling fabric — a rough or drawn edge changes how the seam sits under body load.
At corners and tight direction changes, raise the blade about 1 mm before turning. Pushing through a corner without lifting causes fabric to bunch at the turning point. This creates a small but real dimensional error right where seam geometry is most sensitive.
The Maintenance Numbers That Protect Accuracy
Blade condition and machine calibration aren't background details. They're active accuracy variables.
In professional cycling apparel production, here's the maintenance schedule that protects cut quality on stretch fabrics:
Weekly : clean guide rails and rack systems; inspect belt wear and tension
Monthly : run a 1,000 mm × 1,000 mm diagonal accuracy test on the cutting bed — diagonal error over 0.5 mm means the gantry perpendicularity needs adjustment
Ongoing : test cuts that keep running small need overcut compensation in the CAD system; a repeatable shortfall of 0.2 mm on circular panels resolves with a 0.1 mm contour offset correction
These aren't theoretical tolerances. On a compression cycling short panel, a 0.5–1.0 mm cumulative size error from a worn blade or misaligned gantry shows up as a real compression deviation in the finished garment.
Multi-Zone Panels: Where Alignment Precision Becomes Non-Negotiable
Modern cycling kit construction often combines materials in a single panel — compression zones, mesh ventilation inserts, and silicone grip bands — each with different stretch characteristics, recovery rates, and shrinkage values.
Cutting these well requires more than good blade technique. You need sequenced preparation:
Confirm the stretch direction map and shrinkage rate for each material zone before nesting and cutting
Spread all zones under low, uniform tension with vacuum fixation — this stops lighter mesh sections from shifting against the heavier compression fabric
After cutting, check key splice edges right away for length differential and corner point error — deviations beyond tolerance get overcut compensation applied before the next run
A misaligned panel boundary at the cutting stage becomes a twisted seam after sewing. Grip bands end up uneven against the skin. Mesh zones shift off their intended ventilation positions. In cycling apparel, every panel placement is functional, not decorative. So cut registration accuracy takes priority over cutting speed across every multi-zone panel in the production run.
Critical Cycling Garment Panels Where Straight Knife Cutting Makes the Biggest Difference
Not every panel in a cycling kit carries equal risk. Some pieces forgive a millimeter of drift. Others don't — and those are the panels where straight knife cutting earns its place.
Five panel categories stand above the rest.
Bib shorts crotch and chamois insert panels sit at the top of the list. These pieces have the highest body-contact sensitivity in the entire garment. They need to hold a precise 3D shape through constant pedaling motion. A small contour error doesn't stay local. It shifts seam alignment, creates uneven tension across the chamois boundary, and builds the kind of sustained discomfort riders feel within the first 20 minutes.
Bib shorts leg-curve panels follow right behind. The long, contoured inseam and side-seam pieces define compression fit. They need consistent curved cutting across every layer in the stack. Straight knife cutting handles these extended curves in one controlled pass — the kind of output bulk production of repeated size runs depends on.
Jersey sleeve and shoulder panels complete the compression-critical tier. Symmetry between left and right cuts affects both appearance and sewing load balance. An off shoulder curve shows up the moment you assemble the garment.
Beyond the main structural panels, two functional categories are worth paying attention to:
Rear pocket openings and pocket-facing pieces — small, shape-sensitive parts where notch accuracy drives topstitch alignment and controls how load spreads across the back panel under riding conditions
Reflective inserts and narrow trim panels — these need clean, unfused edges so strips sit flat and stay true during sewing. A rough edge on a 10 mm reflective band has nowhere to hide.
The priority ranking, in order of cutting precision impact:
Priority | Panel |
|---|---|
1 | Bib shorts crotch / chamois insert panels |
2 | Bib shorts leg-curve panels |
3 | Jersey sleeve and shoulder panels |
4 | Rear pocket openings and pocket-facing pieces |
5 | Reflective inserts / narrow functional trim |
One practical rule ties all five together: mirror symmetry on paired panels must be exact . Left and right leg sections, left and right shoulder pieces — any imbalance carries through sewing and shows up in the finished garment as uneven compression or a twisted hang. Straight knife cutting, backed by disciplined lay control and steady operator handling, cuts that variable out at the source.
How Professional Cycling Apparel Manufacturers Implement Straight Knife Cutting for Quality Control
Precision in cycling apparel manufacturing isn't an accident. It comes from systematic controls at every stage of the cutting process. In professional facilities, those controls follow a documented, repeatable sequence. This turns straight knife cutting from a manual skill into a measurable quality system.
CAD Marker Verification Before the First Cut
Nothing goes to the cutting table without a verified marker. Professional facilities target ≥85–88% fabric utilization on cycling apparel markers. High-end OEM cycling apparel operations push that to 90%. Before cutting begins, the pattern supervisor runs a 100% check on every size line, grain direction, and directional stretch indicator in the printed marker. Silicone grip band positions and reflective strip placements each get their own verification pass. A misaligned grain direction at the marker stage creates a compression problem. You won't catch it until the garment is on a rider.
Panel tolerances are set in the CAD system before cutting starts:
General panels : ±3 mm
Critical compression panels (thigh, calf, chamois): ±2 mm
Zipper plackets and shoulder seam positions : ≤2 mm
Layer Height Control for Stretch Fabrics
Lycra and polyester-spandex blends compress under stacking. Stack them too high and the lower layers cut small. Professional operations cap layer counts based on fabric weight:
Standard stretch knits : 15–35 plies
High-density compression fabric or silicone-printed panels : 10–20 plies maximum
Fabrics above 220 gsm or with silicone printing : maximum stack height of 8–10 cm — beyond that, switch to automated or laser cutting
Every production run includes three fabric checks — first layer, middle layer, bottom layer — for width deviation and grain angle. Acceptable limits: ≤2 mm per width , grain skew ≤1° .
Operator Standards and Blade Discipline
The straight knife doesn't make up for operator inconsistency. Professional facilities require lead cutters to have ≥3–5 years of experience on stretch fabrics. Each cutting line pairs one lead operator with one or two trim and correction workers. The lead handles every high-risk cut: armholes, crotch panels, necklines.
Machine settings for cycling stretch fabrics run at 2,800–3,200 strokes/minute blade speed. Forward travel stays at 15–25 m/min — lower on lightweight stretch materials to protect edge quality. Blade tilt must stay within ≤3° of vertical. Go beyond that and you get top-to-bottom size divergence. At tight curves — armholes, crotch pieces, necklines — operators drop travel speed by 30–50% and use auxiliary pressure boards to stop the fabric stack from drifting.
Blade maintenance follows a fixed schedule: automatic sharpening every 80–120 meters of cutting travel , plus manual edge inspection every 200–300 pieces. Teams track blade deflection and keep it at ≤1 mm . Skip this step and the cost is real — a worn blade adds 0.5–1.0 mm size error between top and bottom layers on every single cut.
Operators with three or more years of experience produce rework rates of 1–2% on cut panels. That's down from 3–5% at the one-year mark. Critical-panel miscut rates drop 40–60% with that same experience gap. Finished-garment size complaints tied to cutting fall below 0.5–1% of shipped volume . That's a KPI professional cycling brands check when qualifying cycling apparel manufacturers.
CAD and Automated Spreading Integration
CAD output in professional cutting operations contains more than panel shapes. It includes cut sequence, critical stop points, grain direction markers, and panel numbering by layer . This takes guesswork out of operator decisions entirely. Minimum curve radius on complex panels — like back mesh inserts and arced side panels — is pre-set to ≥5–8 mm to match straight knife handling capability.
Automated spreading machines hold fabric tension deviation to ±5–10% , with actual length error kept below ±0.5% . Vacuum hold-down systems run at –8 to –12 kPa during cutting. This stops lateral movement in multi-layer elastic stacks.
Each shift starts with calibration. Operators cut a 100×100 mm test square and standard arc in test fabric. Dimensional error must stay ≤1 mm . Any panel position that keeps exceeding 50% of its tolerance limit triggers a marker review, tension check, and blade speed audit before production resumes.
The results of combining CAD integration, automated spreading, and a structured straight knife SOP are measurable. Facilities making this transition report 15–30% gains in cutting throughput , 2–4% reductions in fabric consumption , and 30–50% lower dimensional defect rates — all compared to manual layout and hand-guided cutting operations.
Conclusion
Cutting precision isn't a background detail in cycling apparel manufacturing. It's where fit is won or lost — long before a stitch is made.
Straight knife cutting gives you what high-performance cycling kits need:
Panel accuracy that holds across every size
Consistent results through bulk production runs
Clean handling of technical stretch fabrics — no distortion, no edge fraying
Get those fundamentals right, and the finished garment doesn't just look right. It moves right, race after race.
For brands and buyers checking manufacturing partners, fabric cutting accuracy in sportswear isn't a spec to skip. It's the clearest signal of whether a cycling apparel factory takes quality seriously at the process level — not just at the inspection stage.
Sourcing cycling apparel? See how our straight knife cutting translates into finished product quality. Request a sample or reach out to our cycling apparel production team — the details will speak for themselves.