Every millimeter matters in performance cycling apparel. One imprecise cut across a four-way stretch lycra panel doesn't just ruin one garment. It repeats across hundreds of units, wearing down the fit consistency your brand depends on.
That's why leading cycling kit manufacturers are leaving traditional die-cutting behind. They're moving to laser-cut cycling apparel construction — a shift that affects edge sealing, aerodynamic panel alignment, and more.
This guide covers the technology, the tradeoffs, and what it's actually like to source laser bonding technology cycling wear through an OEM cycling apparel partner. You'll get real production logic — not sales talk — so you can make a faster, smarter supplier decision.
Laser-Cut vs. Traditional Cutting: A Technical Comparison for Performance Cycling Apparel
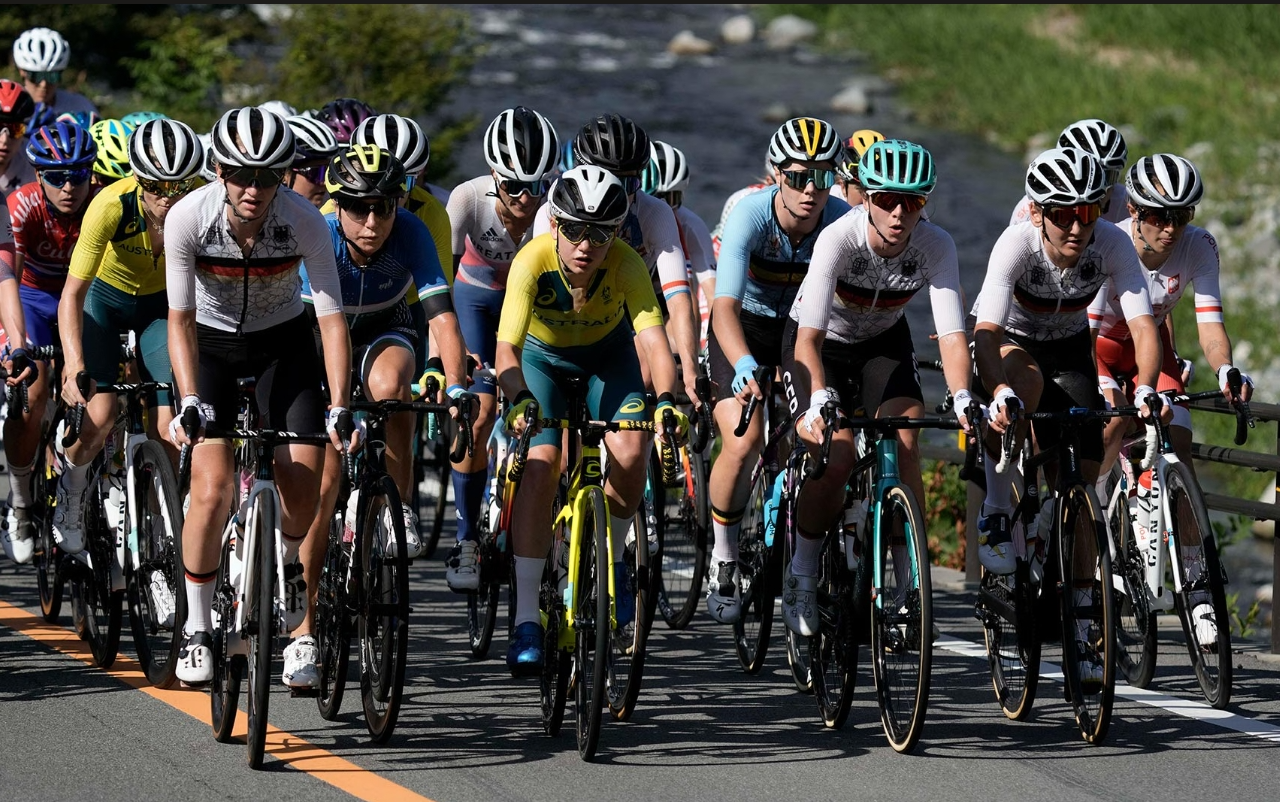
Two cutting methods. One clear winner for technical cycling apparel — but you need to understand where each one breaks down first.
Here's the core difference: traditional cutting uses blades, knives, or dies that contact the fabric directly. Laser cutting uses a computer-controlled beam that never touches the material. That single distinction affects every quality metric that matters for performance cycling kit.
Where the Gap Becomes Visible
Criterion | Laser-Cut | Traditional Cut |
|---|---|---|
Cutting tolerance | High precision, software-controlled | Blade wear introduces drift over time |
Edge quality | Sealed, minimal fraying | Raw edges require extra finishing |
Complex geometry | Curved panels, vents, grippers — handled with clean results | Labor-intensive, higher error rate |
Fabric waste | Tight nesting reduces scrap | Cutting allowances add up |
Size-run consistency | Repeatable across every unit | Degrades as tools wear |
Where Traditional Cutting Falls Short for Cycling Apparel
Three failure points show up in performance kit production:
Leg gripper bulk. Sewn constructions stack material layers. Laser-cut edges keep profiles low — critical for silicon gripper leg band cycling comfort against skin.
Fraying on aero fabrics. Tight-weave nylon and polyester used in aerodynamic cycling kit design fray under mechanical blades. Laser seals the fiber edge on contact.
Panel drift across size runs. A blade cutting its 800th unit performs different from unit one. Laser systems don't degrade that way.
The Practical Cost Logic
Laser cutting isn't a guaranteed cost-saver. For simple, high-volume jersey panels with low edge risk, traditional cutting still holds a direct cost advantage.
The economics shift as complexity grows:
Expensive performance cycling fabric technology with tight nesting requirements
Orders with multiple small or curved panel shapes
Constructions where fraying would trigger finishing labor or QC rejects
Size runs where rework scrap costs add up fast
The rule is simple: choose laser-cut for garments that need precision, clean edges, and complex geometry. Choose traditional cutting for straightforward patterns where cost-per-cut is the top priority.
How Laser Cutting Solves the Fit Problem in Bulk Custom Cycling Jerseys and Bib Shorts
Fit complaints in bulk cycling kit orders almost never come from bad design. They come from cutting drift. It builds up unit after unit, size after size, until your QC team is staring at a return rate they can't explain.
Here's what the numbers look like in practice.
A conventional straight-knife cutter holds tolerances of ±1.5–2.0 mm on stretch knit fabrics. A CNC laser system cuts that down to ±0.3–0.5 mm . That gap sounds small. Spread across a full XS–XXL size run on a team order of 100+ sets, it's the difference between consistent fit and a flood of "my Medium fits like a Large" messages.
Panel Accuracy Across the Full Size Run
Modern laser cutters paired with CAD grading don't re-draw patterns between sizes. Grade rules are applied from the digital file — chest, waist, hip, and thigh circumference scaling in 20–25 mm increments per size . Every panel is cut from that same file. No manual tracing. No variation from one operator to the next.
In bulk production, that matters at a specific level:
Panel deviation under straight-knife cutting: 2–3% at outer layers due to fabric shift and blade deflection
Panel deviation under laser cutting: within ~0.5% of intended circumference across the batch
For a bib short leg opening, the acceptable tolerance is ±3 mm . Mechanical cutting of heavy piles can drift to ±5–8 mm . That's what causes riders in the same size to report legs that feel too tight or too loose. The pattern wasn't wrong. The cut just wasn't held.
Aero Jersey Fit: Where Seam Bulk Kills Performance
Aerodynamic cycling kit design depends on negative ease — garments cut 2–6% smaller than body circumference to stay locked against skin at speed. That construction logic falls apart if edge bulk fights the stretch.
Conventional overlock finishing adds a 3–5 mm folded seam allowance at cuffs, hem, and collar. On a jersey built for negative ease, that extra material creates localized pressure bands. Riders feel it most at the biceps and shoulder on long rides.
Laser-cut edges seal the knit fiber on contact. That makes raw-cut or bonded hems possible, stripping out most of the allowance bulk. The practical result:
~2–4 mm reduction in edge build-up at cuffs and waist
30–50% reduction in cuff thickness paired with bonding or minimal coverstitch versus overlock plus folded seam
Fewer red pressure marks on athletes' arms after extended efforts
That's why several pro-level seamless cycling apparel construction manufacturers now market "laser-cut sleeves" and "laser-cut hem" as performance features. You get a smoother skin transition and less aerodynamic turbulence at the shoulder.
Bib Shorts: Grippers, Straps, and Body-Mapped Panel Geometry
Lycra cycling bib shorts have three fit-critical zones that laser cutting improves.
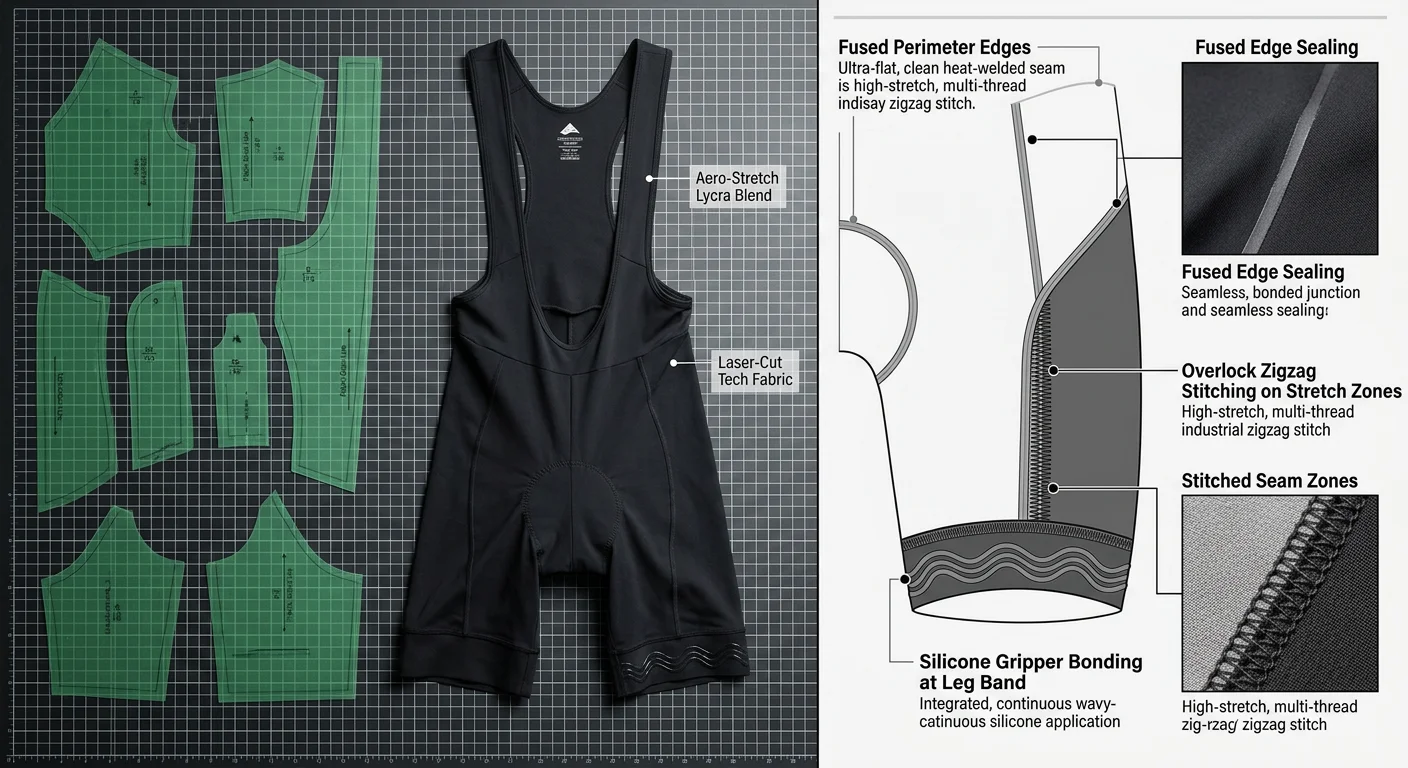
Leg grippers. A laser-cut raw edge lets silicone grippers print onto the leg opening without an extra sewn seam line per leg. Less localized compression. Less bulk against the skin. That's where silicon gripper leg band cycling construction has moved at the performance end of the market.
Bib straps. Strap width variation under laser cutting stays below ±1 mm . Mechanical cutting lets width or length drift between pieces. Strap edges start to dig into the shoulder — a pressure point riders notice on anything over two hours.
Body-mapped panel junctions. This is the most consequential fit issue in modern cycling kit. Body-mapped kits place different fabrics — compression zones, mesh ventilation panels, abrasion-resistant reinforcements — at precise anatomical locations. The hip drop angle between waist and leg panel needs to stay within ±1–2° of pattern. The front leg curve alignment must hold within 3–4 mm at the knee junction. Miss that, and fabric tents and twists during pedaling.
Straight-knife blade wander can reach 2–3 mm on curves. Fabric also creeps in lay-up. Those errors stack across multiple seams and can shift body-mapped zones by up to 1–2 cm on the finished garment. That's where you get complaints like "bib pad sitting too far forward," "jersey twisting at the torso," or "mesh panel not centered on the back" — even when the size is correct.
Laser cutting keeps contour-cut shapes within ±0.5 mm of CAD line across every size. The body-mapping layout doesn't drift. The chamois stays centered. The mesh panel stays where the pattern designer put it.
The Return Rate Difference
Manufacturers switching from manual or straight-knife systems to CNC laser report 20–40% reductions in overall garment defect and rejection rates in performance sportswear. For OEM cycling kit, laser-cut production lines target fit-related return rates below 3–5% , compared to the 5–10% range tied to conventional cutting methods.
The complaints driving those returns — tight cuffs, uneven leg grip, inconsistent sizing between batches — are cutting problems, not pattern problems. Sealed laser edges also stop seam slippage and edge fraying that causes fit distortion over time: stretched-out cuffs, collapsed leg bands, warranty returns that shouldn't have happened.
For sublimation printing cycling jersey construction, there's one more layer to consider. Sublimated fabrics need artwork to register with panel seams. At ±0.3–0.5 mm laser tolerance, logos, stripes, and color blocks land where the design file placed them. At conventional tolerances, visual asymmetry becomes another fit complaint — perceived misalignment that erodes brand confidence even when the structural fit is fine.
Durability Engineering: Materials, Fused Edges, and Long-Term Wear Performance
Seams fail before fabrics do. That's the real story when a cycling kit comes back damaged after a season of hard riding. Not blown panels. Not faded sublimation. Thread unraveling at the leg gripper. Edge curl at the cuff. Delamination creeping along a stress seam after forty washes.
Construction method decides how long a garment holds its shape. For laser bonding technology cycling wear , you're choosing between two edge-failure modes: fray progression or bond-line delamination .
Fused vs. Overlock: What Happens at the Edge
Overlock stitching wraps thread around a raw edge. It works well on untreated knit fabrics — the flex is good, the stretch stays intact. But thread-wrapped edges hit a ceiling. Every needle hole is a micro-stress point. Under repeated load and wash cycles, those points collect damage. Over time, they give out.
Laser-fused and heat-welded edges work on a different principle. The process melts and bonds thermoplastic material surfaces into one continuous sealed line. No needle holes. No thread to unravel. For performance cycling fabric technology built on polyester or nylon with thermoplastic coatings or films, you get seams that push back against both moisture and mechanical stress at the same time.
The tradeoff is material compatibility. Fusion needs thermoplastic content to work. Standard untreated knit blends with natural fibers still need stitching. This isn't a universal upgrade — it's a targeted tool for the right substrate.
The 50-Wash Benchmark and What to Test
For OEM procurement, set your durability threshold at 50+ wash cycles with zero delamination, edge curl, or seam opening at high-stress zones. Use that number as your acceptance criterion in supplier trials. Build your test package around these checkpoints:
Seam break force and stretch-return retention
Abrasion resistance at saddle contact zones
Edge fray resistance (overlock constructions) or delamination resistance (fused constructions)
Wash-cycle retention across 50 cycles minimum
For silicon gripper leg band cycling attachment, pull three metrics from your supplier before signing off. You want gripper peel and adhesion strength before and after laundering, elastic recovery after repeated stretch cycles, and anti-roll performance under sweat and wash exposure. These aren't optional extras. Gripper failure is the top post-purchase complaint in lycra cycling bib shorts — and it almost always traces back to a bonding or construction specification problem, not the material itself.
Ventilation Panels and Perforation Integrity
Anti-chafing cycling shorts and body-mapped jerseys are using perforated ventilation zones more and more. The durability risk is clear: tear growth around perforations from the repetitive flex tension of pedaling. Ask your supplier how they finish perforation edges — laser-cut, heat-stabilized, or punched by machine. Then require tensile data after cyclic loading, not only before.
For most seamless cycling apparel construction builds, the strongest procurement approach is hybrid. You want fused perimeter edges at low-fray, high-stress zones. Add overlock or zigzag stitching on stretch-critical structural seams where fusion isn't material-compatible. Then round it out with bonded or stitched silicone gripper attachment, validated through wash and stretch-retention testing. That combination covers the full failure-mode range without killing flex performance where the garment needs it most.
Bulk Quality Control: The Full Process from CAD File to Finished Cycling Kit
Production quality doesn't collapse at the sewing machine. It collapses three steps earlier — in an unlocked CAD folder, a misread marker, or a fabric roll that nobody let rest long enough before cutting.
Here's how a real OEM bulk quality control process runs, from the first digital file to the final packed garment.
CAD File Control: Where Bulk Quality Is Won or Lost
Every pattern file in a professional laser-cut cycling apparel factory carries a full identity: style code, revision number, date, fit block, and customer ID. These live in a PLM or ERP-linked CAD system — Gerber and Lectra are the industry standards. A change happens — new chamois pad, adjusted gripper height — and the factory logs it as an engineering change order. That record includes the approver's name and the effective-from PO number.
The locking mechanism matters more than most buyers realize. The approved pattern set is frozen. A separate development folder handles all edits. Bulk markers can only come from the approved folder — never the development one. That single rule stops the most common bulk error in custom cycling kits : cutting from a superseded pattern version.
Nesting optimization runs off that same approved file. For solid compression fabrics, professional OEM facilities target fabric utilization above 82–88% . For allover-sublimated performance cycling fabric technology panels — where print margins need more buffer — the target is 78–85% . Multi-size markers follow the actual size curve of a typical order (around 1:2:3:3:2:1 across XS to 3XL). This keeps off-size leftover fabric low. The cuttable width sits 10–20 mm inside the nominal roll width to cut out selvedge and skewed edges. A single marker of 25–30 meters yields around 80–120 jerseys, depending on size mix. Yield per complete kit — jersey plus lycra cycling bib shorts — benchmarks at 1.3–1.8 m² per set for lightweight sublimated polyester/spandex builds.
Inline Cutting QC: What Happens on the Laser Floor
Fabric relaxes for 12–24 hours on spreader racks before the first cut. Skip that step and you get shrinkage variation. That shows up as fit drift across the batch — the exact problem precision cutting is supposed to prevent.
Before cutting starts, every roll gets a visual inspection for shade variation, print banding, and skew. Rolls with skew above 1 cm per meter are quarantined. They don't enter production.
During laser cutting, sampling follows a structured protocol. On the first bulk production day, 100% of panels are checked across the first 10–20 sets. After that, statistical sampling drops to one set per 50 kits . Dimensional tolerances for aerodynamic cycling kit design panels are tight: ±2–3 mm on critical length and width for high-stretch fabrics, ±1–2 mm on small parts like logo tabs. QC staff measure against printed CAD outlines or physical QC templates. Every deviation gets logged with the marker ID and machine ID.
Laser-specific edge defects get their own checklist. Discoloration, yellowing, and melted beads on the cut edge point to excessive laser power or a dirty lens. The QC standard is clear: no visible burn marks at 60 cm viewing distance, and no fused sections longer than 3 mm. Defects appear — the team adjusts machine settings right away and pulls the affected plies from the bundle before they reach sewing.
Sewing QC: Seams, Grippers, and Print Alignment
Flatlock seam cycling wear and bonded constructions need continuous inline testing. End-of-line sampling alone won't catch problems early enough. Seat seams and bib strap junctions must hold a minimum 10–15 kgf grab test without thread break. Seam extension must reach ≥120–150% of original seam length without popping. That's a hard threshold for any lycra cycling bib shorts build — not a guideline.
Silicone gripper attachment for silicon gripper leg band cycling gets verified two ways. Bonded grippers must resist at least 3–5 N/cm peel force . QC places the panel on a leg form and runs 20–30 full stretch cycles , checking for silicone cracking or delamination. Coverage gets inspected for gaps — no missing sections larger than 5 mm, and correct positioning sits 10–15 mm from the hem edge.
For sublimation printing cycling jersey builds, print-to-cut alignment is checked against approved QC templates. The tolerance is ±2–3 mm from the specified edge or seam distance. Mirrored panels — left and right leg, both sleeves — must be symmetric within 3 mm side-to-side. Go beyond that threshold and it's a logged defect.
Final Inspection and the Documentation You Should Demand
Final inspection runs on two tracks at once: a 100% visual check of every unit, plus measurement spot-checks on 1–3 pieces per size per batch against the approved spec sheet. The visual pass covers correct size, colorway, artwork version, label placement, and cleanliness. Oil stains, ink marks, and sublimation ghosting all trigger rejection.
Most professional OEM cycling factories follow AQL 2.5 for major defects and AQL 4.0 for minor , per ISO 2859-1. High-end custom cycling kit buyers often push for AQL 1.5 for majors . Critical defects — wrong size label, missing pad, gross color error — carry zero tolerance regardless of AQL level.
The documentation package that comes with every bulk order isn't optional paperwork. It's the audit trail that makes the quality control system real:
Bulk QC report : cutting marker IDs, fabric utilization percentages, roll numbers, sewing defect frequencies, inline repair statistics, and final AQL pass/fail decision by lot
Measurement report : full size run measurements versus approved spec, flagging any consistent deviation (for example, +3 mm body length across all sizes)
Color and print data : sublimation delta E values versus approved Lab references, targeting ΔE ≤ 2–3 for brand colors on main panels, with any recipe adjustments on record
Traceability records : fabric batch numbers, pad supplier, production date range, and factory line ID
Graded CAD pattern PDFs and marker efficiency summaries — some OEM partners supply these so the brand can run its own audit of fabric yield against quoted consumption
That last item separates a transparent manufacturing partner from one you'll be chasing for answers six months into a quality dispute. Ask for it upfront.
Evaluating a Laser-Cut Cycling Apparel OEM Supplier: The Right Questions to Ask
Most sourcing mistakes happen before the first sample is cut. They happen in the conversation — or the lack of one.
A supplier can talk a great game about laser-cut precision and still be running three aging CO₂ machines on a shared floor with their casualwear line. The only way to separate real capability from sales language is to ask specific, technical questions — and know what a solid answer looks like.
Here's what that conversation should cover.
Equipment and Production Capacity
Start with the machines themselves. Ask for the brand, model, laser power output (watts), working table width, and stated positioning accuracy for each unit dedicated to cycling apparel. Reliable laser-cut cycling apparel OEMs use equipment from manufacturers like GCC LaserPro, Han's Laser, or Mitsubishi — and they'll answer without hesitation.
Two follow-up questions matter more than the spec sheet:
Does the factory run separate sample and bulk cutting lines ? A dedicated sample line puts out 50–100 multi-size sets per day. Bulk lines should hit 300–800 sets per line, depending on pattern complexity. A supplier running samples and bulk on the same machine has a bottleneck they haven't told you about.
What was their total cycling apparel output over the last 12 months? Strong OEM partners hit ≥50,000 units per year in cycling-specific production. Ask for a single-buyer reference — something like "10,000 sets for a European brand, 60-day lead time" — and ask to see a production schedule sample that backs it up.
Also confirm whether their system includes CCD vision registration for sublimated panels. For sublimation printing cycling jersey production, cutting to a printed artwork reference is non-negotiable. No CCD registration means panel placement is guesswork. Your stripe alignment will drift.
Tech Pack Handling and Pattern Development
A factory's ability to process your tech pack without errors determines whether the aerodynamic cycling kit design you've built makes it into production intact.
Ask which file formats they accept for direct import into their cutting system — DXF/DWG for patterns, AI/PDF for artwork, Excel for BOM and size charts. Then ask the harder question: can they import DXF files directly, or do they need manual conversion? Manual conversion is a version-control risk. Each translation step is a point where a chamois position or gripper height can shift without anyone catching it.
For brands without a complete tech pack, ask whether the factory offers cycling-specific block development — not generic sportswear blocks. You want patterns built for road position: pre-curved shoulder seams, forward-rotating bib strap geometry, leg-opening angles set for silicon gripper leg band cycling attachment. Ask how many new cycling patterns they developed in the past 12 months. A factory that answers "eight new skinsuit blocks and three women's bib short variations" is operating at a different level from one that reworks a compression legging template.
The standard industry timeline from tech pack receipt to first sample is 7–21 days . Beyond 30 days points to capacity problems or process friction — and you'll be dealing with both throughout the relationship.
Red Flags Worth Stopping For
Three patterns should end the conversation.
They can't state a cutting tolerance. Any competent laser bonding technology cycling wear manufacturer can give you their operational tolerance — ±0.5–1.0 mm depending on fabric. "Cutting tolerance" drawing a blank stare means the technical depth isn't there.
Cutting is outsourced. For lycra cycling bib shorts and skinsuits, flatlock seam cycling wear alignment depends on panel-to-panel precision. Third-party cutting takes away your main quality control lever. That's a structural risk, not a minor preference.
QC documentation is vague. "We do random checks" is not a quality system. Ask about AQL sampling standards — ISO 2859-1, AQL 2.5 for majors, AQL 4.0 for minors. Ask for a historical defect rate on cycling apparel. Established factories can pull batch-level rejection data on request. A credible number runs below 1.5–2% for performance cycling fabric technology builds. A factory that can't produce that data doesn't have a functioning quality system.
Certifications to Verify Before You Sign
For moisture wicking cycling fabric going to European or North American markets, certifications aren't marketing copy — they're compliance infrastructure.
ISO 9001 : Confirms standardized production processes and documented change control. Ask for the certificate scope — it should cover garment manufacturing and laser cutting operations clearly.
OEKO-TEX Standard 100 : Check that the certification covers the full bill of materials — main fabric, silicone grippers, sublimation inks, bonding films — not just the base textile. For anti-chafing cycling shorts with direct skin contact, Product Class I or II is the right standard.
REACH compliance : Required for EU market entry. Ask for a declaration confirming restricted substances are absent from dyes and coatings.
BSCI or SEDEX audit : A standard expectation from larger brand buyers. Ask whether they've been audited, by whom, and when.
The last question to ask any prospective OEM partner is also the most straightforward: can you provide an anonymous reference from a brand in a comparable market — similar volume, garment type, and compliance requirements — that you've supplied for at least two years? A factory with real cycling apparel experience at commercial scale can answer that without hesitation. The ones who can't will give you a very different kind of answer.
OEM Cooperation Workflow: From Inquiry to Bulk Delivery for Laser-Cut Cycling Kits
The clock starts the moment you send that first message. Speed and clarity depend on one thing: whether your OEM partner has a real workflow or just a polished website.
Here's what the actual timeline looks like with a serious laser-cut Cycling apparel manufacturer .
Stage 1: Initial Inquiry and Consultation (1–3 Working Days)
A competent factory responds fast. Within one to three working days, you get a rough price band — US$35–80 FOB per set (jersey plus bib) — based on fabric specification and laser construction scope. They'll ask three things right away: your target retail price, your annual volume, and your target markets.
That last point matters more than most buyers expect. EU and North American markets require REACH-compliant dyes and EN ISO 13688 conformity. A factory that skips this question upfront doesn't understand compliance. That's a red flag.
Stage 2: Tech Pack Review and Feasibility (3–7 Days)
This is the supplier's first credibility test. They review your fabric specs — jersey main body runs 110–150 g/m² , bib short compression fabric 180–220 g/m² — and confirm whether your panel geometry is laser-cuttable.
Clean laser edges need corner radii of at least 2–3 mm . Go tighter and you get burn concentration and edge distortion.
They'll also check your sublimation print files. Anything below 150 dpi at full size won't hold detail through the cutting-to-seam registration process. Plus, they'll confirm what share of construction uses laser-cut or bonded edges versus sewn — a serious performance kit targets 60% or more laser-cut and bonded edges on sleeves and leg openings.
Stage 3: Laser-Cut Sampling (10–25 Days)
Sampling for laser bonding technology cycling wear isn't just cutting a prototype. It's a full technical validation run. Here's the breakdown:
Pattern refinement and marker making: 2–4 days
Digital print and sublimation: 2–5 days
Laser cutting and bonding: 1–3 days, based on queue and size count
Sewing and assembly: 40–45 minutes per garment in batch flow, plus 1–2 days for line scheduling
Courier to your door: 3–7 days
Add it all up and the realistic window is 10–25 days from artwork confirmation and deposit. Rush samples in non-peak season can ship in 7 days from design lock — but treat that as the exception, not the baseline.
One requirement that separates proper sampling from a shortcut: the sample must use the exact same fabric lot, silicone gripper, bonding film, and laser parameters as bulk production. Different materials or adjusted power settings during sampling kill your approval data. Everything you learn from the sample means nothing if the factory swaps inputs for bulk.
Stage 4: Fit Feedback and Revision Cycles (7–21 Days Per Round)
Fit testing on a single body type isn't enough. Test across at least three body types per gender — S, M, and L, for example — and record stretch percentages and gripper pressure at the thigh and arm in millimeters of elongation.
Check the laser-cut edges closely: no edge rolling beyond 2–3 mm , and no skin irritation after two to three hours of actual ride time.
Most brands need one to two revision rounds before bulk approval. Each round adds 10–20 days including shipping. Build that into your calendar before committing to a launch date.
Stage 5: Bulk Production (30–60 Days After Pre-Production Sample Approval and Deposit)
For standard custom lycra cycling bib shorts and jersey sets, plan for four to six weeks from component confirmation. Complex builds — bonded hems, multiple colorways, body-mapped panel construction — push that to six to eight weeks at mid-volume runs of 500–2,000 sets.
Here's how those weeks break down:
Production Phase | Timeframe |
|---|---|
Raw material booking (if not in stock) | 7–14 days |
Sublimation printing | 5–10 days for 500–2,000 sets |
Laser cutting | 300–800 pieces per shift per machine |
Sewing, bonding, and finishing | 2–3 weeks including inline QC |
One detail worth knowing: a full kit contains 20–30 individual laser-cut pieces per set . That volume adds up fast across a 1,000-set order. Factory output per shift per machine controls whether your delivery window holds.
Stage 6: Final QC and Packing (3–7 Days)
Every unit passes a structured final inspection before anything ships. For laser-cut cycling apparel , inspectors check:
Edge quality: no charring, edge burn length under 1 mm , no delamination at bonded hems after a manual 10–15× stretch test
Gripper function: elongation tested to 120–130% , recovery at 95% or better after one minute
Wash performance: three to five cycles at 30–40°C ; seam debonding zero, edge curl under 3 mm , colorfastness at grade 4 or above
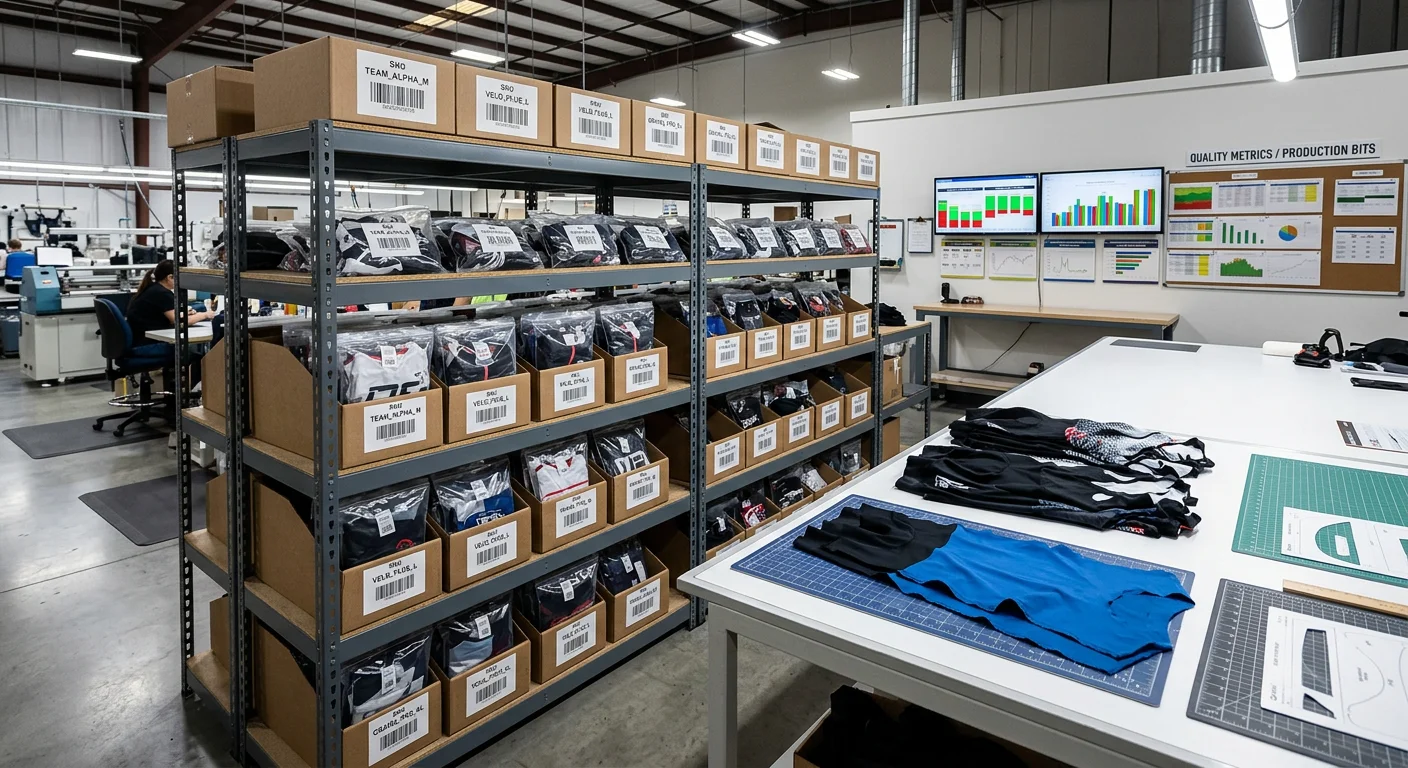
Packing goes by style, size, and color. Barcode or QR coding follows your ERP requirements — specify this at the PO stage, not at final inspection.
Stage 7: Shipping
Air freight to the EU or US runs 5–10 days door to door . Sea freight is 25–40 days depending on routing. Most brands planning for race season launches work backward from their event calendar to set the bulk production start date. That math starts with shipping, not the factory floor.
MOQ Structure for Laser-Cut Cycling Kits
Laser cutting changes the MOQ logic compared to traditional die-cutting. No physical dies means pattern changes cost less. But machine-hour costs run higher, which shifts the floor.
For most seamless cycling apparel construction OEM factories, the structure looks like this:
Standard MOQ: 50–100 pieces per style per color
Per-size minimum: 5–10 pieces per size
Very small runs (10–20 pieces total): treated as semi-bulk, at 20–40% higher unit cost
Men's/women's split: most factories allow a 50/50 split across genders, provided the per-size minimum is met
Premium European cycling apparel manufacturers — Italian houses running bonded hem construction in particular — set style MOQs at 100–200 pieces to cover laser and bonding setup costs. For brands entering the market, Chinese OEM partners with dedicated cycling lines tend to offer the 50–100 piece threshold at standard pricing.
Customization Scope Within the OEM Workflow
The workflow above applies no matter how complex your spec is. What changes is where the friction shows up. A few variables most buyers underestimate:
Gripper configuration. Options include silicone micro-dot, continuous silicone strip, or woven-in gripper yarns. Heights run 3–7 cm at sleeves and 4–8 cm at leg openings . Silicone surface coverage — 30–70% — affects both grip strength and breathability. Lock this in your tech pack, not in an email after sampling.
Perforation layout. Custom ventilation perforations use 0.5–2.0 mm hole diameters with spacing defined in the tech pack. Back panels, underarms, and upper thighs are the standard placement zones. Keep structural seams clear of perforation fields. Get this geometry confirmed before marker-making starts — changes after that point reset the clock.
Hem construction. Bonded hems produce a cleaner aerodynamic edge and work well with laser-cut sleeves and legs . They need thermoplastic bonding film applied at 130–170°C . Sewn cover-stitch hems are a bit heavier but easier to repair in the field. The most common high-performance solution is a hybrid: laser-cut edge plus internal bonding film plus minimal cover-stitch tacks at stress points to stop rolling under repeated wear.
Packaging. Decide on individual kit packing — jersey and bib together in one bag — versus bulk per SKU before the purchase order is confirmed. Changing that at final inspection adds days and unplanned cost.
Case Benchmark: What a High-Performance Laser-Cut Cycling OEM Order Looks Like
Numbers tell the story faster than any spec sheet. Here's one worth studying: 12,000 bib shorts, one Munich-based cycling event apparel supplier, and a switch from conventional cutting to laser-cut construction that cut fit-related returns by more than half.
The Order Anatomy
The batch covered men's and women's patterns across four to five sizes per gender. Size curve skewed toward M and L — about 55–65% of total volume. That's standard for European amateur racing and gran-fondo markets. Here's how the construction broke down:
Leg openings: Raw laser-cut edge, no folded hem. Bonded silicone gripper goes straight onto the inner side. Target stretch at hem: 120–130% of relaxed circumference before distortion.
Shoulder straps: Laser-cut micro-perforations (1.0–1.5 mm diameter, 4–6 mm spacing). Width tolerance held to ±1.0 mm after cutting and bonding.
Back panel: Perforated laser-cut mesh, ~40–60 holes/cm² depending on size. Bonded junctions connect to the main body panels. No stitched seams in the upper back. This removes bulk at the highest-movement zone.
Chamois attachment: Flatlock or zigzag stitch, kept clear of laser-cut edges to avoid stress in the heat-affected zone. Stitch density held at 3.5–4.5 stitches/cm.
Main body fabric: 180–210 g/m² warp-knit nylon/elastane, compression grade at ~15–20% stretch under 10 N load. Bonding film activation window: 140–160°C, 12–18 seconds dwell, 2–4 bar pressure.
What the Numbers Showed
Before this order, the same client used conventional stitched-hem bib shorts. The comparison data is clear:
Fit consistency:
- Leg opening deviation dropped from ±6–8 mm (stitched hem) to ±2–3 mm
- Inseam panel length deviation fell from ±5 mm to ±2 mm
Returns and complaints:
- "Too tight / too loose" returns dropped from ~4.5–5.0% to ~1.5–2.0% of shipped units
- Negative consumer reviews citing "hem discomfort / sausage-leg effect" fell from ~25–30% of all negatives to under 10%
- B2B credit notes for quality complaints shrank from ~2–3% of invoice value per season to ~0.8–1.2%
Factory efficiency:
- Hem operation time per pair of legs dropped from 2.5–3.0 minutes (folded double-needle) to 1.3–1.6 minutes (laser-cut + bonded) — a 35–45% reduction
- Total SMV per bib fell from 23–26 minutes to 19–21 minutes — about 15–20% overall labor efficiency gain
- Fabric utilization improved 2–4% from tighter nesting (buffer reduced from 7–10 mm to 3–4 mm between pieces)
- First-pass AQL fail rate dropped from ~12–15% of lots to under 5%
The Jersey Side of the Same Order
Most high-performance kit orders come as a full set, not individual pieces. The same client also ran a matching aero jersey with laser-cut sleeves alongside the bib shorts — a batch of 3,000–8,000 pieces, which is common for mid-size European race-oriented brands.
Sleeve fabric: 130–150 g/m² polyamide/elastane. Interior bonding tape ran 15–20 mm wide. The bonding line sat 3–5 mm from the cut edge. Target mid-bicep compression: 8–12% extension at wear versus relaxed circumference.
The sleeve station results matched the bib short findings closely. The old overlock plus cover-stitch hem took 1.8–2.2 minutes per jersey. Laser-cut plus bond brought that down to 0.9–1.1 minutes — about 45–50% faster. Sleeve opening circumference variance tightened from ±5 mm to ±2 mm. Plus, "sleeve riding up" complaints dropped 40–60% year-over-year based on client feedback.
What This Means for OEM Buyers
Laser-cut capability plays out in different ways depending on where you sit in the market:
EU performance brands in Germany, Italy, and the Nordics use it to hit the €120–200 bib short price point with a construction story that justifies the margin
US DTC brands at US$180–260 treat the clean raw-cut edge as a visible quality signal — logo transfers near the cut edge read as premium to the end buyer
Team kit and event apparel companies use it to hold fit consistency across mixed-size orders in the hundreds to thousands — that's the core problem the Munich benchmark solved
Private-label startups entering at 300–1,000 pieces use laser-cut finishing to stand apart from generic club kit without hitting the MOQs that top-tier sewn construction requires
The FOB premium for laser-cut construction runs 8–15% above base model pricing of cycling apparel. Look at the return rate, labor savings, and AQL improvement data from the 12,000-piece order — most buyers recover that premium well before the second season.
Conclusion
Every millimeter matters in competitive cycling. The same precision logic applies to how your apparel is built.
Laser-cut cycling apparel isn't just a manufacturing upgrade. It's the difference between a kit riders trust through 200-kilometer stages and one that fails them at kilometer 80. The fused edges hold. The fit replicates. The quality scales — whether you're ordering 300 pieces or 3,000.
What you've read here is the framework serious OEM cycling apparel buyers use to separate capable suppliers from convincing ones. Master that distinction. Your sourcing decision gets less risky, fast.
The next step is simple : bring your design files, your performance fabric requirements, and your hardest questions. A supplier worth partnering with on laser bonding technology cycling wear won't just answer them — they'll see them coming.
Precision at scale isn't accidental. It's built in from the first cut.