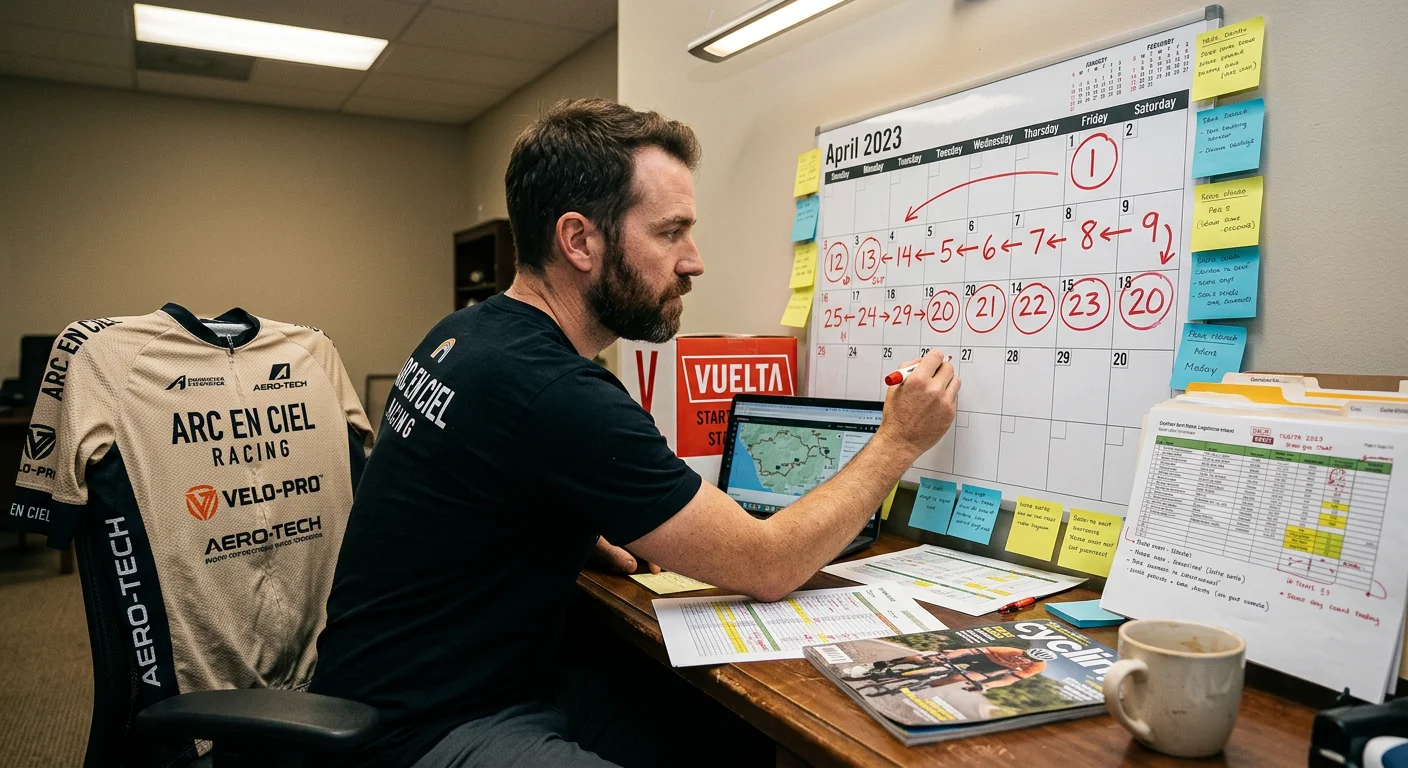
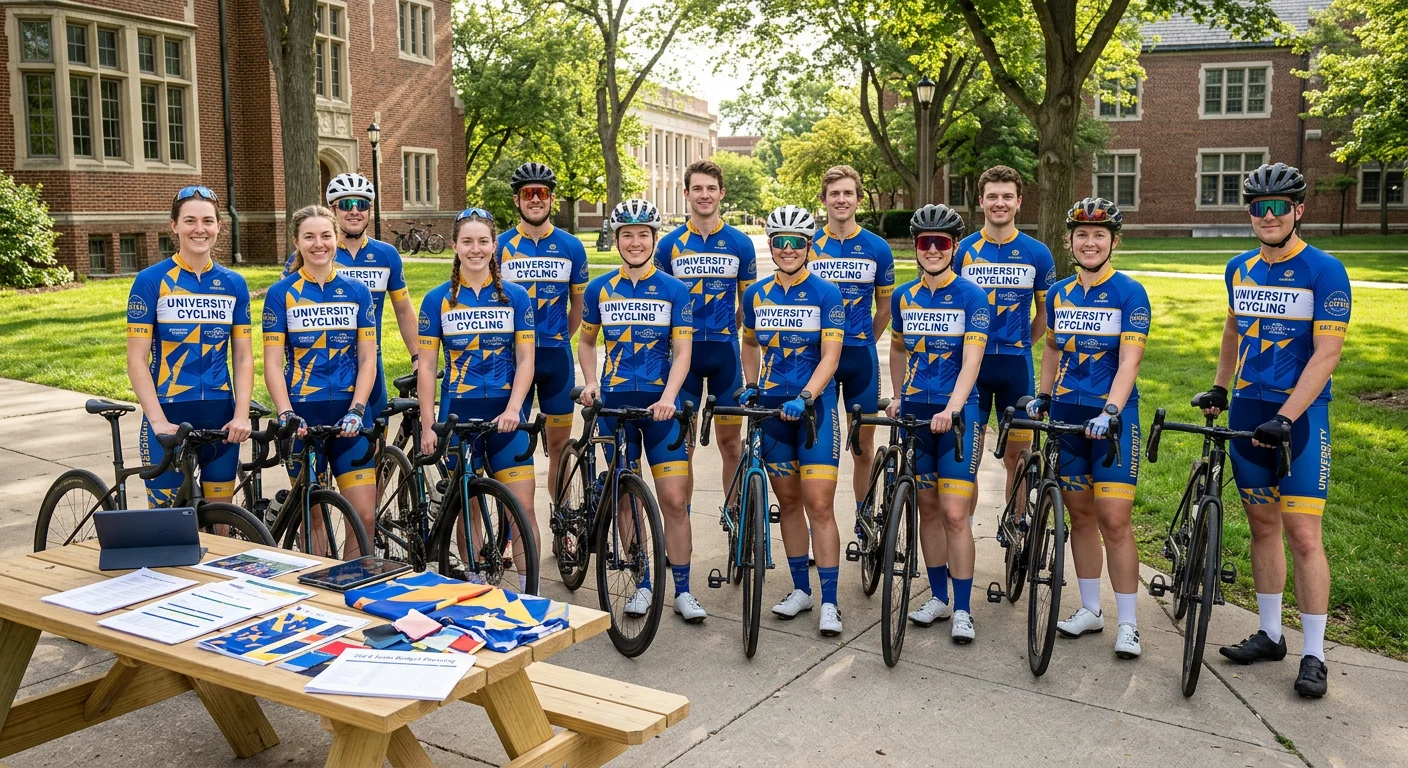
Getting a collegiate cycling team into custom cycling team kit sounds simple. Then reality hits: you're three weeks from the season opener, your supplier just told you the minimum order quantity doubled your budget, and half your riders are asking why their jerseys fit like a garbage bag.
Most university cycling programs learn this the hard way. Vendor quotes, design approvals, and size spreadsheets get scattered across group chats and missed emails. It turns into a mess fast.
This guide cuts through that. What follows is a complete, field-tested procurement framework for building a bulk Custom cycling kits program from zero. It covers:
Locking down your budget sources
Vetting sublimation printing vendors
Meeting campus brand compliance requirements
Setting up a 补单 replenishment system that holds up through the full season
Section 1: Defining Your Program Scope Before You Touch a Catalog
Before a single vendor quote lands in your inbox, answer one question most programs skip: What kind of team are you outfitting?
That answer shapes everything — your budget ceiling, your MOQ strategy, your design approval chain, and whether your niversities cycling team apparel supplier qualifies under campus procurement rules.
Identify Your Team Type First
Three distinct program types exist in university cycling. Each runs under different constraints:
Varsity / NCAA-registered teams run 15–30 riders. Add coaching staff, and you're ordering 30–40 kits. Per-unit pricing for competition-grade jersey + bib combinations lands between US$80–150/set after team volume discounts. These programs face the strictest requirements — league number placement, sponsor logo size restrictions, and institutional branding rules. Compliance sign-off is required before any design file moves forward.
Cycling clubs present a different math problem. Active membership might show 40 people on paper, but first-order confirmed payers tend to settle around 15–30 . Most clubs run on a member-pays model with modest subsidies. Know your MOQ floor before setting expectations. Standard minimums run 10–15 pieces per style per colorway . Drop below that, and per-unit costs spike fast.
Campus recreation programs face the widest sizing spread (XS through 4XL). Expect 20–40% actual order conversion from expressed interest. Budget-tier team sets in the US$60–90/set range fit here. Procurement flows through the intramural office, not athletics.
Match Your Race Calendar to Your Kit Specs
Confirm your team type first. Then map your events to equipment decisions:
Race Type | Key Functional Priority | Core Kit Requirement |
|---|---|---|
Road (60–180 km) | Aerodynamics, ventilation | Race jersey + bib shorts |
Track | Skin-tight fit, minimal seams | Full skinsuit (with backup) |
MTB XC/Trail | Durability, abrasion resistance | Trail-cut jersey, darker colorways |
Gran Fondo / Endurance | Multi-hour comfort | High-density chamois (≥120 kg/m³), UPF 50+ |
Say your team splits 70% road, 20% track, 10% MTB. Weight your fabric and cut decisions toward the majority. Don't let the minority use case drive the majority budget.
Define Your Coverage Scope Now, Not Later
Lock down your project boundary in writing before outreach begins:
Option A (Race-only): Jersey + bib, 1–2 sets per rider. Fastest to execute, lowest initial cost. Training and cold-weather needs stay unaddressed.
Option B (Race + Training layers): Adds thermal long-sleeve and a wind shell. A standard three-layer breakdown runs 1.5–2 short-sleeve kits per person, 0.8–1 long-sleeve, 0.5–0.8 jackets.
Option C (Full system): Includes socks, caps, gloves, and overshoes. The upfront investment is highest — but strong visual cohesion pays off in recruitment materials and social media.
⚠ Common Trap — The New Member Buffer Problem: Programs that order for confirmed current members alone face a 20–50% membership surge after fall orientation. Reorder runs on small batches cost 15–40% more per unit and add 2–4 weeks to delivery. Build a 1.2–1.4× safety multiplier into your initial quantity. Or budget a reserved blank-size inventory line from day one.
Clarify Decision Authority Before Anyone Talks to a Vendor
Unclear approval chains cause more delayed orders than any cycling team kits supplier issue. Design revisions that need one round stretch to 3–5 rounds when three people each think they hold final say.
Set a simple RACI before your first vendor call:
Design & colorway final approval: One person. The head coach or a designated athletics administrator works best.
Size collection & quantity confirmation: Student team captain collects, coach reviews.
Contract sign-off & payment: Athletics department or campus purchasing office — no exceptions.
This isn't bureaucracy for its own sake. It's the fastest way to cut two to three weeks off your timeline before the season starts.
Section 2: Budget Breakdown and Multi-Channel Funding
Budget failures in collegiate cycling programs follow a pattern. Someone gets a quote, does quick math, and presents a number to administration. Then the real costs hit — customs clearance fees, expedited shipping for wrong sizes, a late-joining recruit who needs a rush order. You're $800 over ceiling with no room left.
The fix isn't a bigger budget. It's a more honest one.
Build Your Budget in Layers, Not Lump Sums
Stop treating "cost per kit" as your one number. A solid team apparel procurement budget splits into seven separate cost lines:
Per-unit kit cost (jersey + bib shorts, your anchor figure)
Sampling and design fees
International freight (origin to port)
Customs duties and import tax
Customs clearance agent fees + last-mile delivery
Brand compliance / logo approval costs
Risk reserve (10–15% of total)
Each line needs its own cell in your spreadsheet. Collapsing them hides the real number.
Per-Kit Price Reference by Order Volume
Standard bulk custom cycling kits pricing — sublimation printing, club-grade fabric — breaks down like this:
Order Size | Club-Grade Set (Jersey + Bibs) | Performance-Grade Set |
|---|---|---|
20 kits | $75–$100/set | $110–$140/set |
50 kits | $65–$85/set | $95–$120/set |
100+ kits | $55–$75/set | $85–$110/set |
Ordering at 100+ units drops your per-unit cost 20–30% versus a 20-kit run . That's the main case for consolidating orders across club divisions or coordinating with campus recreation.
Sampling fees run $50–$150 per style . Many vendors absorb this cost for a minimum 50-unit order. A vendor who won't move on sampling costs — that's useful information before you sign anything.
Freight and Customs: The Budget Lines Programs Always Undercount
Sourcing from an overseas cycling team apparel manufacturer is the standard path for most collegiate cycling team branding programs. Your landed cost is not your CIF quote.
Use these freight ranges for China-origin shipments to North American universities:
20 kits: ~$150–$250 total shipping ($7–$12/set)
50 kits: ~$250–$400 ($5–$8/set)
100 kits: ~$400–$700 ($4–$7/set)
Add import duties on top. Most countries tax apparel imports at 10–20% of CIF value . Budget a flat 15% of product cost as your customs line. Then add clearance agent fees ($50–$150 per shipment) and last-mile campus delivery ($1–$3/set). These three lines often add $15–$25 per kit that never appears in a vendor quote.
⚠ Critical Rule: Never let your budget sheet show a single "shipping" line. Break it into four rows: international freight / customs duty / clearance fees / last-mile delivery . Programs that collapse these are the ones calling vendors in a panic two weeks before the season.
Fund the Program from Multiple Sources
A solid campus recreation cycling program budget draws from more than one channel. A practical four-source model:
Funding Source | Typical Share | Best Used For |
|---|---|---|
Athletics Department allocation | 30–60% | Base kit procurement, mandatory uniform items |
Student government activity funds | 10–25% | Event apparel, race-day accessories |
Member annual dues / self-pay | 20–40% | Upgrade kits, second sets, optional items |
Local corporate / alumni sponsorship | 10–30% | Supplemental branding, equipment |
Set your member self-pay ceiling up front — $60–$120 per rider per season is a workable range that doesn't block access. For sponsorship, keep any single sponsor below 40–50% of total program cost . A sponsor covering more than half tends to push logo placement demands that clash with campus brand compliance rules.
On payment timing: most sublimation printing cycling wear vendors ask for a 30–50% deposit at order and the balance before shipping. Your athletics department allocation and student government funds need to be secured and in hand before you place the order — not still being processed.
The 10–15% Reserve Is Not Optional
Treat your risk reserve as a fixed budget line, not a bonus. Split it this way:
3–5% for size exchanges and small replenishment orders
3–5% for late-joining members or roster changes
2–4% for exchange rate shifts on USD-denominated invoices or expedited shipping upgrades
Add a three-scenario column to your budget template: baseline, optimistic (higher sponsor intake, stable forex), and conservative (one sponsor delayed, currency moves 6%). Once actual spend reaches 85–90% of your baseline budget , that's your signal to pause upgrade orders or secondary kit purchases.
Scaled Budget Framework: 20 / 50 / 100 Riders
Budget Line | 20-Person Team | 50-Person Team | 100-Person Team |
|---|---|---|---|
Base kits (club grade) | $1,500–$2,000 | $3,250–$4,250 | $5,500–$7,500 |
Sampling / design | $100–$300 | $0–$200 | $0–$150 |
International freight | $150–$250 | $250–$400 | $400–$700 |
Customs + clearance + delivery | $200–$350 | $350–$550 | $550–$900 |
Brand compliance admin | $100–$300 | $100–$300 | $100–$300 |
Risk reserve (12%) | $250–$390 | $510–$660 | $800–$1,130 |
Estimated Total | $2,300–$3,590 | $4,460–$6,360 | $7,350–$10,680 |
These figures cover one jersey + bib set per rider at club-grade pricing. Specifying performance-grade fabric or adding a second training set pushes the total up by 40–60%.
Section 3: Vendor Qualification and MOQ Strategy
Picking the wrong Universities cycling team kits supplier at this stage doesn't just cost money — it costs you the season.
Most procurement mistakes in collegiate cycling team branding programs happen before a single design file gets approved. A vendor looks legitimate on paper. Their sample photos are clean. Their response time is fast. Then your order arrives with jerseys that fit three sizes off from what you confirmed. Their "quality guarantee" turns out to mean a 5% defect tolerance they never disclosed.
Here's how to avoid that.
The MOQ Reality Check
Minimum order quantities for custom sublimation cycling wear are more complicated than any vendor's front page suggests. The headline number — "30 pieces minimum" — rarely tells the full story.
What determines your real MOQ threshold:
Single colorway, single style: Most suppliers set a true floor of 30–50 pieces per design per colorway for full-panel sublimation. Below that, setup cost per unit climbs fast.
Full size run (XS through XXL): Spreading across six sizes means many factories require a combined minimum of 60–100 units to keep production efficient. Your 30-person team ordering one jersey style might not clear that bar. Splitting across men's and women's cuts is a common reason — those often count as separate production batches.
This is where teams get caught. Someone quotes 50 units and assumes they're hitting the volume discount tier. But 28 jerseys in a men's cut and 22 in a women's cut can mean neither batch clears the threshold for tiered pricing. The result: you pay small-batch rates on both.
Ask every vendor this exact question before requesting a formal quote:
"Do men's and women's cuts in the same design count toward a shared MOQ, or are they calculated separately?"
That answer decides whether your 50-person team gets 50-unit pricing.
MOQ Pricing Tiers: What the Multipliers Look Like
Vendor pricing in the bulk custom cycling kits market follows a consistent pattern. Use these multipliers as a benchmark for comparing quotes:
Order Volume | Price Multiplier vs. Standard |
|---|---|
Under 30 pieces | 1.4×–1.8× standard unit price |
31–80 pieces | 1.1×–1.3× |
80+ pieces | 1.0×–1.1× (near-standard rate) |
A 100-unit order at the base tier costs 30–40% less per unit than a 25-unit rush order at peak multiplier. That gap is big enough to justify consolidating orders across club divisions or running a joint purchase with your campus recreation intramural program.
Three negotiation levers worth using before you accept any quote:
Cross-style MOQ pooling — Ask if jerseys and bib shorts in the same colorway can combine toward a shared production count.
First-order trial policy — Some vendors allow a first order at 70% of standard MOQ, as long as you commit to a second replenishment run within six months. Get this in writing.
Sample fee absorption — Sampling costs run $50–$150 per style . A vendor taking 50+ units who won't absorb sampling fees is showing you their flexibility limit right there.
The Vendor Scorecard: Five Dimensions That Matter
Standard cycling apparel supplier scorecards miss the specifics of student athlete cycling gear procurement. Here's a weighted model built for this context:
1. Collegiate Program Track Record (25 points)
- 5+ university or collegiate team references: 20–25 pts
- 1–4 institutional clients: 10–20 pts
- Club or OEM cycling apparel work only, no campus program experience: 0–10 pts
A supplier with no experience in campus brand compliance sign-off, student government payment timelines, or mid-season roster changes will create friction at every one of those touchpoints.
2. MOQ Flexibility and Tiered Pricing Transparency (20 points)
- Allows cross-gender, cross-style batch consolidation: 10–12 pts
- Offers first-order trial below standard MOQ: 5–6 pts
- Provides a clear tiered quote template you can test against different roster sizes: 3–4 pts
3. Design Response and Sampling Speed (15 points)
- Initial design draft within 24 hours of brief: 10–12 pts
- Physical sample delivered within 3–5 business days of design approval: 4–5 pts
- 3D interactive preview system available (color swap, logo placement, size model view): 3 pts
4. Defect and Quality Control Terms (20 points)
This is the section most programs skip until something goes wrong.
Quality benchmarks for sublimation printing cycling wear :
Outgoing defect rate: ≥98–99% pass rate (i.e., <1–2% defects per shipment)
Color deviation: △E ≤ 3 versus approved digital color reference — anything above that is open to dispute under contract
Wash durability: 25–50 machine washes at 30–40°C with no visible fading, cracking, or delamination (Grade 4+ color fastness)
Contract language matters here. Push for this tiered defect resolution structure:
Defect rate ≤2%: per-unit refund or credit toward next order
Defect rate >2–3%: free remake with expedited shipping at the supplier's cost
5. Logistics and Delivery Timeline (20 points)
Match every vendor's timeline against your race calendar — not their standard lead time promise.
Benchmarks for team apparel procurement in university settings:
Design-confirmed to production start: 3–5 business days
Production run (bulk order): 7–15 days depending on season load
International air freight to North American campus: 3–7 days
Economy freight + customs clearance: 15–30 days
Warehouse-to-campus last-mile distribution: ≤48 hours from clearance
⚠ Procurement Trap — The Defect Rate That Hides in Aggregate Numbers: A supplier quoting "99% quality rate" on 100 units means one defective kit. On a 50-person team, that could be your team captain's jersey for the season opener. Push for defect-rate guarantees broken down by item category — not just overall shipment. Bib shorts chamois delamination and jersey zipper failure carry very different costs down the line.
One More Qualification Filter: The Team Store Capability
Large clubs and campus recreation cycling programs often have riders picking their own sizes and customization options. For those programs, a vendor's ability to run a team online store isn't a bonus — it's a core logistics tool.
Here's what a solid team store setup handles:
Riders pick their size, name, and number on their own. No more size-collection spreadsheets.
Orders roll into a single production batch. MOQ thresholds clear even when riders trickle in over two weeks.
Multi-address shipping splits on its own. The coordinator doesn't have to manage distribution.
Exportable order summary Excel files feed straight into your athletics department expense reporting.
Ask vendors point-blank: "Do you offer a team store or group order portal for university clients?" The answer matters. So does how fast they can demo it. Both tell you whether they've served institutional buyers before — or whether you'd be their first.
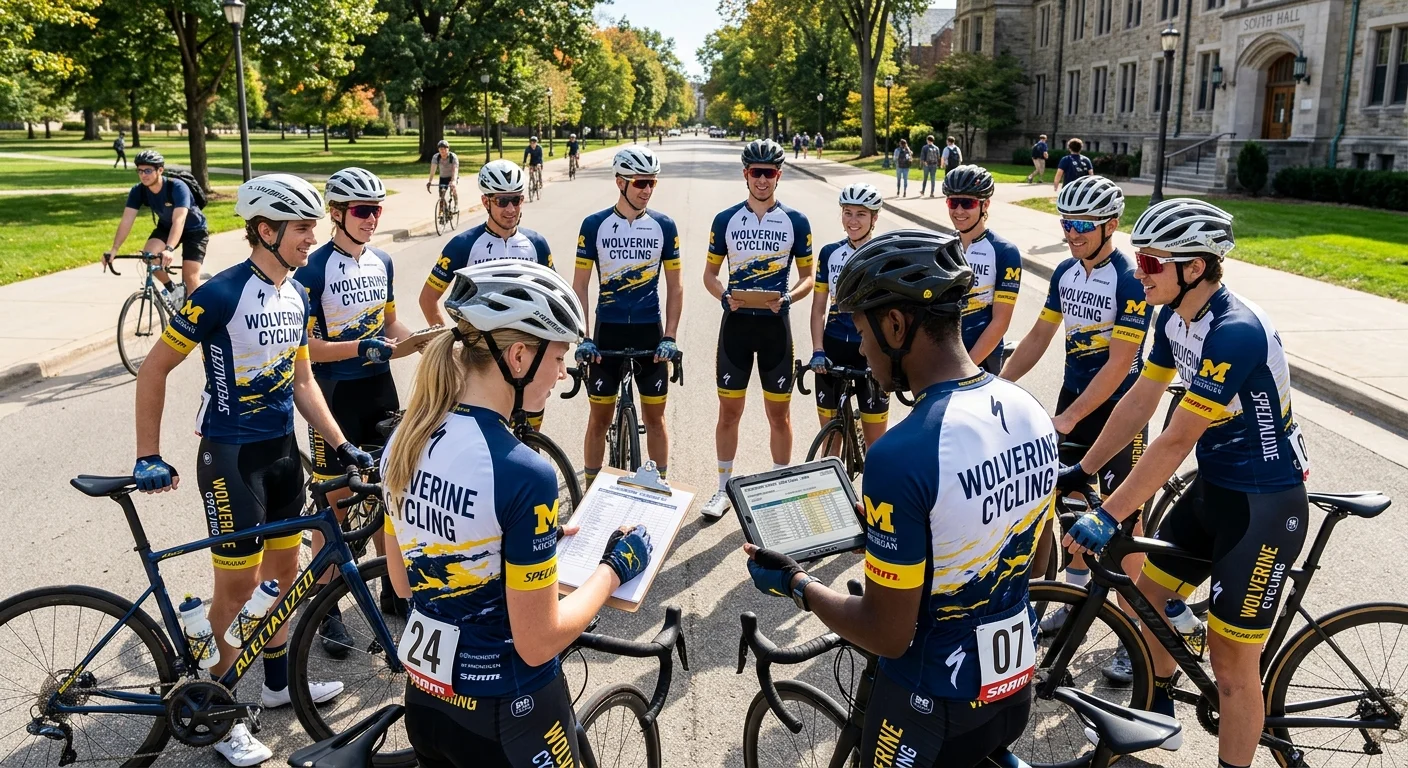
Section 4: Design Collaboration and Campus Brand Compliance
The design phase is where well-organized programs fall apart — not because of bad taste, but because nobody mapped the approval chain before the first mockup hit someone's inbox.
Here's what actually happens. A student designer submits a jersey concept with the university logo resized, recolored to match the new sponsor's palette, and dropped into a gradient background. It looks sharp. The team loves it. Then the trademark office sees it and sends back a one-line rejection. Three revision rounds and two weeks later, you're ordering in a panic.
The fix is a structured six-stage workflow. Run it in this order every time.
Stage 1: Secure Your Official Brand Assets Before Anyone Opens Illustrator
This is the step most teams skip. Don't.
Contact your university's trademark and licensing office — or your athletics communications department — and request the official brand asset package before any design work starts. Here's what you need:
University logo in vector format: AI, EPS, and SVG versions at minimum. Both positive and reversed (light-on-dark and dark-on-light)
Official Pantone color codes: Coated and uncoated variants. Get the matching CMYK, RGB, and HEX values for digital sublimation reference
The university VI manual: This document contains the rules. Logo minimum size (no smaller than 8mm height in print), required clear space (0.25× to 0.5× logo height on all sides), and the full list of prohibited modifications
Standard prohibited modifications in most university VI systems:
Stretching, skewing, or distorting the logo geometry
Recoloring, adding outlines, drop shadows, or glow effects
Merging the university mark with sponsor graphics or masking it inside another shape
Using low-resolution raster exports (PNG from a website) instead of vector files
Say a teammate pulled the logo off the athletics department homepage and saved it as a PNG. That file cannot go to your vendor. Full stop.
Stage 2: Set Your Visual Hierarchy Before the Design Brief
Every element on a collegiate cycling team kit competes for visibility. Set a priority ranking before the designer starts. Skip this step and you'll end up refereeing a dispute between the team captain, the sponsorship lead, and the compliance officer over a 2cm logo placement.
Use this hierarchy as your internal design brief:
Priority | Element | Recommended Placement | Size Guidance |
|---|---|---|---|
1 | University mark (logo + name) | Front center / upper back center | 30–40% of visible chest width |
2 | Team name / mascot | Below university mark (front or back) | Subordinate to university mark |
3 | Sponsor logos | Chest sides, shoulders, sleeves, lower back | Each sponsor logo < 60–80% of university logo area |
4 | Rider name / race number | Upper back (name) / center back (number) | Number height ≥ 6–8 cm for race visibility |
Three hard rules — these hold regardless of any sponsor agreement:
No sponsor logo may outrank or sit above the university mark
University name and logo must appear at least once on both front and back
Safety certification zones — reflective strips, race number areas — cannot be covered by any graphic element
Put these rules in writing as a one-page internal design brief. Send it to your vendor and your designer at the same time, before the first mockup is created. This document is your reference point if anyone disputes a revision later.
Stage 3: The Six-Stage Production Workflow
Map your timeline to this sequence. Each stage has a fixed owner and a defined output.
Stage 3a — Project Brief and Asset Collection (Days 0–2)
Collect from internal stakeholders:
- Race schedule and wear scenarios (competition vs. training vs. campus events)
- Confirmed headcount and estimated size distribution
- Official brand asset package from trademark office
- Sponsor logo files — vector format only (AI or EPS). A sponsor sends you a JPEG? Send it back.
Assign two named roles at this stage:
- Internal design lead: One person. This person makes aesthetic decisions and owns revision tracking.
- Campus compliance contact: One named person at the trademark or licensing office. Get a direct email address.
Stage 3b — Initial Design Draft (Days 3–7)
Your vendor or in-house designer produces:
- Full-color renders: front, back, left side, right side — minimum 300 dpi
- Pantone and CMYK color proposal matched against official university color references
- Logo placement diagram with exact dimensions and edge distances noted
Before this file goes anywhere for external review, run an internal VI compliance check:
- Is every logo in the correct file format and resolution?
- Does the university mark meet the minimum size and clear space requirements?
- Are any sponsor graphics encroaching on the race number zone or reflective strip area?
Stage 3c — Internal Review and Revision (Days 8–14)
Involve: team captain, sponsorship lead, at least one riding member, and the design lead.
Focus the review on three specific questions:
1. Does the visual hierarchy match the brief — university mark dominant, sponsors subordinate?
2. Do all sponsor logo placements match the signed sponsorship agreements?
3. Has the vendor confirmed that all graphic positions are achievable given seam placement, zipper location, and sublimation boundary limits?
Cap this round at two revision cycles. Still adjusting color saturation on the third pass? The brief wasn't specific enough at the start.
Stage 3d — Campus Brand Compliance Submission (Days 15–21)
Submit to your university trademark and licensing office — or athletics department, depending on your institution's structure. Build in a 7 full business days buffer. Some offices run weekly review cycles. Miss a window and you lose a full week.
Submit everything in one complete package:
High-resolution renders (front/back/side, 300 dpi minimum)
Pantone-to-CMYK-to-HEX color reference table
Exact logo placement diagram: coordinates, dimensions, distance from seam edges
Sponsor logo files with matching authorization letters if required
A short note confirming compliance with VI manual requirements — this cuts down on back-and-forth
Your kit involves commercial sponsorship? A separate review path often applies. The trademark office will likely ask for copies of the sponsor agreement and a formal logo usage authorization letter. Have these ready before you submit.
⚠ Brand Compliance Trap — The Downloaded Logo Problem: The most common compliance rejection isn't a bad design. It's a correct design built on the wrong source file. A PNG pulled from the athletics website carries JPEG compression artifacts. A trademark officer will catch this right away. Start the process by requesting the official asset package. The trademark office says they don't have an accessible vector file? Escalate. That file exists somewhere in your institution.
Stage 3e — Final Lockdown and Version Control (Days 22–24)
Once campus approval comes back:
- Make any required adjustments (these are minor: clear space, logo sizing)
- Output the locked final file with version number, date, and reviewer name recorded
- Store the campus approval confirmation — email chain, PDF, or stamped document — as a permanent project record
This file is now frozen. No further design changes. Any stakeholder who asks for modifications after this point restarts the campus approval process from scratch.
Stage 3f — Vendor Technical Handoff and Sample Confirmation (Days 25–30)
Send the locked file to your vendor for production pattern development. Your vendor produces:
- A 1:1 scaled layout file with all graphic dimensions and seam/edge distances labeled
- A sample garment for physical review
On sample review, check four things:
- Logo color accuracy against your Pantone reference — acceptable deviation is ΔE ≤ 3
- Clear space around the university mark stays intact after seams and binding are applied
- Number zone is unobstructed and race-legible
- Sponsor logos haven't shifted from the approved layout diagram
The physical sample needs changes? Document them in writing before you approve production start. Verbal sign-off creates disputes.
The Full-Phase Timeline at a Glance
Phase | Duration | Owner |
|---|---|---|
Asset collection + brief | 2 days | Design lead |
Initial design draft | 5 days | Designer / vendor |
Internal review + revisions | 7 days | Design lead + team captain |
Campus compliance review | 7 business days | Trademark office |
Final file lockdown | 2 days | Design lead |
Vendor sample + confirmation | 5 days | Design lead + vendor |
Total design-to-production-start | ~28–30 days | — |
Count back at least 45–60 days from your target delivery date before starting this process. Programs that start 30 days out skip the sample stage, skip the compliance review, or both. Neither shortcut ends well.
Two Risk Scenarios Worth Pre-Planning
Scenario A — Compliance rejection after internal approval
This happens. The trademark office returns a rejection on logo sizing or color deviation. You've already told your team an order date.
Pre-plan your response now. Keep one named contact at the trademark office throughout the project. Talk to them before your official submission — an informal heads-up, not a formal review. A five-minute conversation about your design direction can surface potential objections early, before they turn into a formal rejection on Day 18.
Scenario B — Sponsor logo added after design lockdown
A new sponsor commits after the final file is frozen. This happens more than it should.
Your policy: any new sponsor logo added post-lockdown triggers a compressed re-review cycle (internal only, 3 days maximum). Re-submission to the trademark office is required if the logo placement affects the university mark's clear space. No exceptions. Put this policy in your sponsorship agreement template so sponsors understand the timeline implications before they sign.
Section 5: Size Data Collection and Sample Fitting
Size errors are the most expensive mistake a collegiate cycling team procurement coordinator can make. Not expensive in the dramatic sense — no single jersey costs a fortune. The real cost hits in the aggregate: reorders at small-batch rates, two-week delays, riders showing up to the season opener in borrowed kit because their bib shorts came in two sizes off.
The fix is a two-stage system. First, collect the right body measurements. Second, test the fit on real bodies before locking any quantity.
Build Your Size Data Collection Matrix
Most teams collect the wrong information. "What size do you wear?" is not a useful question. European and Asian cut patterns differ from North American sizing in big ways. A rider who buys a medium at REI may need a large from a Taiwanese cycling team kits manufacturer — or a small from an Italian one.
Collect these fields, and treat net body measurements as required:
Field | Format | Notes |
|---|---|---|
Gender | Select | Determines cut pattern |
Height | cm or inch | Force one unit system |
Net body weight | kg | Reference for chamois density recommendation |
Chest circumference | cm or inch | Net measurement, not over clothing |
Waist circumference | cm or inch | Net measurement |
Upper thigh circumference | cm or inch | Critical for bib short fit |
Chamois preference | Thin / Medium / Thick | Affects bib short selection |
Primary size | S / M / L / XL / XXL | Must match the vendor's specific chart |
Backup size | S / M / L / XL / XXL | Required — do not let riders skip this |
Fit preference | Race-fit / Training-fit | Determines cut type |
Special notes | Free text | Unusual proportions, injury considerations |
Validation rules matter as much as the fields themselves. Set your form to reject any submission that leaves net circumference measurements blank. Require both primary and backup size selections. Lock the unit system too — a spreadsheet mixing centimeters and inches in the same column creates mapping errors later. After collection, net measurements should auto-map against your vendor's size chart and produce a recommended size output.
⚠ Common Trap — Everyday Clothing Size Bias: Riders who self-report based on their wardrobe size — rather than net body measurements — create the most problems. A team of 50 riders picking sizes by "what I wear" can produce a 15–20% misfit rate on delivery. Net circumference measurements cut that out. Build it into the form as a required field, not a suggestion.
Sample Fitting: The Step You Cannot Skip
A size matrix tells you what the data says. A sample fitting tells you what happens when a real body moves through four hours of hard effort in that fabric.
Before confirming your production order, request S, M, L, and XL physical samples from your vendor. These must be actual production-spec garments — same fabric, same sublimation, same chamois density — not showroom display pieces.
Assign sample testers to cover three variables:
Body type range: Include riders across your full size distribution, not just average builds
Fit preference range: At least one race-fit and one training-fit tester per size
Seasonal use case: Test each piece in the conditions your team will race in
Run testers through a structured protocol:
Short-duration sprint and high-cadence effort (20–30 minutes)
Long-duration endurance ride (90+ minutes minimum)
Cold-weather layering test: custom cycling bib shorts and jersey worn over a base thermal layer
High-temperature sustained effort where ventilation and moisture transfer matter most
Use a standardized scoring sheet to collect feedback — not open-ended comments, which are hard to act on with a vendor:
Fit Parameter | Score (1–5) | Notes |
|---|---|---|
Shoulder strap pressure | ||
Leg gripper adhesion | ||
Zipper operation | ||
Breathability / moisture transfer | ||
Movement restriction at hip/thigh | ||
Overall chamois comfort (long effort) |
Any score below 3 on a structural dimension — strap pressure, gripper adhesion, chamois comfort — flags a re-pattern request before full production starts. Send the completed scoring sheets to your vendor with specific revision notes. Verbal feedback gets forgotten. Written scoring gets acted on.
Reserve Stock and Mid-Season Coverage
After sample fitting confirms the size chart mapping is accurate, lock your per-size order quantities. Then add an 8–10% buffer of M and L sizes as a shared pool.
This reserve pool covers three situations across the season: late-joining members who missed the collection window, riders whose fit preference shifts after their first race, and temporary borrows during kit transit for new registrants. Do not hand out this pool at initial kit distribution. Keep it with the equipment coordinator and track usage in a simple log.
The correct execution sequence:
Collect net body measurement matrix via validated form
Auto-map against vendor size chart to generate recommended sizes
Request S/M/L/XL physical samples for core rider testing
Run structured fit protocol across body types and use scenarios
Score and return feedback to vendor — revise pattern if structural issues come up
Lock final per-size quantities and place production order
Teams that skip sample testing to save time end up paying more in reorders than the test would have cost. Two weeks saved at this stage often turns into three weeks lost at distribution.
Section 6: Order Confirmation, Production Tracking, and Pre-Shipment Quality Control
Here's the part most procurement guides skip: what happens after you click send on that purchase order.
The design is locked. The sizes are confirmed. Your vendor has the files. For the next three to four weeks, your order disappears into a production facility you've never visited. People you've never met run it. They're producing garments that need to be on your riders' backs before the season opener. That gap — between order placement and delivery — is where collegiate cycling programs lose the most time, money, and credibility.
Close it with a structured control framework. Not trust. Not hope. A framework.
Lock the Contract Before You Lock the Timeline
Two things must be in writing before production starts: a milestone schedule and a quality acceptance standard. Neither is complicated. Both are missing from almost every first-time procurement contract.
On the milestone schedule , map your contract to a T-plus calendar anchored to deposit receipt:
T+0: Deposit clears → production slot confirmed
T+7: Pattern approval, pre-production sample signed off
T+15: Bulk fabric cut begins
T+25: Full garment inspection complete
T+30: Goods leave factory
Ask your vendor to share production status updates every two to three days against this schedule. No broad weekly summaries. No "everything is on track" messages. You want actual milestone confirmation with photos or system screenshots.
On the quality standard, the contract needs specific thresholds. General language like "high quality" does nothing. Three parameters matter most for custom cycling bib shorts and jerseys:
Quality Parameter | Acceptable Threshold |
|---|---|
Color deviation (ΔE, D65/10°) | ≤ 1.0–1.5 |
Chamois center offset | ≤ 5 mm from panel centerline |
Stitch density (stress seams) | 3–4 stitches/cm minimum |
Specify zipper hardware by brand — YKK or equivalent certified hardware, rated for 300+ open-close cycles without failure. A vendor who swaps in unnamed hardware to cut costs creates a defect you won't find until your team captain's jersey splits at mile 40.
On delay penalties , write in a penalty clause: 0.5–1% of undelivered order value per day of delay , capped at 10% of total order value. This isn't punitive. It's the mechanism that stops your order from getting bumped down the priority list when the factory lands a bigger client mid-production.
The Five Production Checkpoints
Tracking a bulk custom cycling kits order isn't about micromanaging a supplier. It's about catching problems while they're still fixable.
Five checkpoints cover the full production arc:
Checkpoint 1 — Pattern and Sample Sign-Off
Before a single meter of race fabric gets cut, confirm the production pattern against your locked design file. Check size measurements against your collected data, chamois position, and seam placement relative to sublimation boundaries. This is your last free correction. After this point, changes cost money and time.
Checkpoint 2 — Fabric Batch Verification
Confirm the production fabric matches your spec: weight tolerance within ±5%, color fastness Grade 4+, elasticity recovery ≥90%. Request the batch test report from the mill. A vendor who can't produce one has already told you something important.
Checkpoint 3 — Mid-Production IPQC
At 30–50% completion, request an in-process quality control inspection. Focus on three things: color deviation across the production run, logo and number placement against the approved spec sheet, and leg gripper adhesion. Problems caught here affect half the order. Problems caught at final inspection affect all of it.
Checkpoint 4 — Full Garment Final Inspection
For personalized team orders — unique names, numbers, sponsor placements — a 100% visual check of every garment is not excessive. It's the only reliable way to catch the wrong name on a jersey before it ships. Structural quality (stitching, zippers, silicone grippers) can run on an AQL 1.5–2.5 sampling basis. Individual identity details cannot.
Checkpoint 5 — Release Authorization
Every shipment needs a written release document. It must be signed by the vendor's QA lead, and reference the order number, batch number, inspection result, and authorizing signatory. No release document means no wire transfer for the balance payment. Simple as that.
What to Check When the Box Arrives
Most programs make the same receiving inspection mistake: they count the packages, check names on a few jerseys, and call it done.
Pull 10–15% of packages at random. Focus on different size groups and different personalization combinations. Run four tests your vendor quote will never mention:
Stitch pull test: Grip the seam at the shoulder and chamois panel. Apply firm lateral tension. Any skip-stitch or gap under moderate force is a structural failure.
Zipper cycle test: On five to ten random jerseys, open and close the zipper 20 times fast. Stiffness, tooth skipping, or pull-head wobble — reject and escalate.
Silicone gripper adhesion: Fold the leg band back on itself 20–30 times. Delamination or cracking at this stage means field failure within a season.
Color accuracy spot-check: Pull your approved Pantone reference. Hold it against the delivered garment under consistent lighting. ΔE variance you can see with the naked eye is already outside acceptable range.
⚠ Procurement Trap — The Aggregate Quality Rate: A vendor reporting a "99% pass rate" on a 100-unit order means one defective garment exists. That garment could be a personalized jersey with the wrong name or a bib with a shifted chamois. At that point, the pass rate means nothing. Push for defect reporting broken down by category — personalization accuracy, structural integrity, aesthetic quality — not rolled into a single headline number.
A confirmed defect rate above 2% triggers the escalation terms in your contract: free remake with expedited shipping at the supplier's cost. Document every defect with photos before starting that conversation. Solid evidence ends disputes far faster than back-and-forth email chains.
Section 7: Kit Distribution Execution and In-Season Replenishment
Distribution day is not a celebration. It's a logistics operation. Programs that treat it like one avoid the chaos that turns a well-managed procurement into a credibility problem.
The Distribution Minimum: Pre-Label, Sign-In, Sign-Off
Every kit goes out pre-packaged and labeled by name and size before anyone walks through the door. Not sorted on a table for riders to dig through. Pre-packaged. The distribution sequence is three steps:
Rider checks in at the sign-in sheet
Rider receives their labeled package
Rider signs the distribution ledger on the spot — not later, not by email
That ledger is not optional. It's your financial audit trail, your loss-tracking tool, and your proof of delivery if anyone disputes what they received. Build it with these fields: name / student or staff ID / size / item SKU / quantity / distribution date / recipient signature / distributor signature / notes (wrong size, replacement issued, returned).
The key design principle: signature and accountability on the same row . One line, one rider, one paper trail.
In-Season Replenishment: Three Triggers, One Channel
Mid-season replenishment orders cover three reasons. Keep them contained to three:
New member joins after initial order
Size mismatch requiring exchange (original size was a poor structural fit, not just a preference)
Abnormal loss — damage in training or racing, theft, irreparable wear
Anything outside these three categories waits for next season. The reason is simple supply chain math. A one-off replenishment order outside your contracted volume almost always triggers small-batch pricing. Small-batch pricing on cycling apparel runs 30–45% above your standard tier . A four-jersey emergency order can cost more per unit than your entire original run.
The fix is a contract clause, not a prayer. Negotiate a mid-season replenishment channel into your main order. It should:
Apply a 30–50% MOQ waiver relative to the standard minimum
Use blank inventory + localized digital print or embroidery to cut lead time to 7–10 days
Require sign-off from three parties before any replenishment order goes through: the procurement coordinator, team captain, and a finance contact
No three-party confirmation, no order. This stops the "can we just order two more for the new guys" conversation from turning into an unbudgeted $400 line item.
⚠ Common Trap — The Headcount-Only Buffer: Some programs buffer by total quantity alone — without tracking size distribution. They end up with ten extra larges and zero smalls. Pure waste. Set your initial order buffer (the 1.2–1.4× multiplier from Section 1) per size group, not just across the total. Your M and L sizes absorb most mid-season demand. Stock those sizes deeper than the rest.
End-of-Season Inventory Review
Run one structured inventory review before next year's procurement cycle starts. It takes two hours and saves three weeks of guesswork later.
Track five numbers:
Metric | What It Tells You |
|---|---|
Actual spend vs. budget variance | Whether your cost model needs recalibration |
Per-item wear feedback score (breathability / durability / fit) | Which specs to upgrade next cycle |
Wrong-item resolution time (days from discovery to replacement) | Whether your replenishment channel did its job |
Inventory turnover by item type | Which seasonal pieces (thermal, vest, arm warmers) underperformed |
Next-cycle upgrade priority | Material / print process / sizing range / accessories |
Thermal layers and wind vests are where inventory goes to die in poorly managed programs. Don't fold them into your overall turnover calculation. Track them on their own. A vest that moved at 40% of expected volume this season is not a reorder candidate next fall — unless the team's race calendar changes.
This review feeds straight into Section 1 of next year's procurement cycle. That's the loop. Close it every season, and the program builds on itself — each cycle faster, cheaper, and better fitted than the last.
Conclusion
You came here looking for a roadmap. Here it is.
Building a custom university cycling team apparel program isn't a procurement task — it's a systems design problem. Get the foundation right: budget alignment, supplier vetting, and brand compliance sign-off. Do that, and every season after this one runs smoother. Skip a step at the start, and you'll spend six weeks before conference championships chasing size disputes and reorder headaches.
The teams that do this well share one habit. They treat the first season as a documented pilot , not a one-off purchase. They record what worked. They note what the sizing data showed. They track which supplier communication held up under deadline pressure.
Now you have the same framework.
Start here:
Grab the timeline template
Run your first needs-assessment meeting
Get the brand compliance conversation going with your university's licensing office
Do all of this before a designer touches a single jersey mockup.
The kit that represents your program on race day? It starts with the decision you make this week.