A GC contender unzips his jersey three-quarters of the way up Alpe d'Huez. That's not a comfort move. That's a thermal decision made hours earlier on the team bus — checked against a weather model and a soigneur's stopwatch.
Pro cycling teams don't layer clothing by feel. They layer by system. Altitude checkpoints. Sweat-rate thresholds. Descent wind-chill projections. All mapped against a kit matrix that most riders never have to think about — because someone already thought about it for them.Partnering with a reliable cycling apparel supplier ensures that each kit is prepped and consistent across every rider and stage.
You've probably boiled alive grinding up a 2,000-meter climb, then seized up on the descent with no idea what went wrong. This framework fixes that. It's built from the real decisions DS directors and soigneurs make during Grand Tour mountain stages — translated into something you can apply before your next alpine ride.
DS Weather Briefing and Baseline Kit Matrix for Mountain Stages
Race morning, the DS isn't watching the riders warm up. He's watching a forecast matrix.
Every Grand Tour mountain stage briefing runs on the same four variables: wind, precipitation, visibility, and temperature trend . Each one gets weighted. Each one shifts the kit plan. The matrix scores conditions on a green/yellow/red scale — not as a gut-feel check, but as a structured go/no-go tool. It determines what goes into the team car before the peloton rolls out.Working with a trusted cycling apparel factory allows teams to source high-performance gear that meets these precise specifications.
The temperature math alone justifies the system. Standard atmospheric lapse rate drops 6.5°C per 1,000 meters of elevation gain. A typical Grand Tour mountain stage swings 10–20°C from valley to summit. A 28°C base at the start village becomes a 10°C summit. That's not a wardrobe inconvenience — that's a physiological threat if the kit plan is wrong.
The Baseline Four-Layer Matrix
The soigneur stages a per-rider car loadout before any rider touches their bike. It's built around four components:
Layer | Spec | Function | When It's Live |
|---|---|---|---|
Base layer | Synthetic mesh or Merino-blend, 20–50 g/m² | Sweat evacuation, moisture off skin | Start through lower climb |
Race jersey | Short sleeve, full mesh back | Core breathability, pocket storage | Neutral zone to mid-climb |
Wind vest | Ultra-light, 60–90 g, front wind membrane | Chest protection against chill | Pre-climb staging, summit prep |
Rain cape | Lightweight Gore-Tex, 100–140 g | Rain and wind defense combined | Any forecast >8°C sudden drop or precipitation |
The soigneur doesn't load two options. They load the correct option plus one contingency . Per rider, that breaks down to:
One dry thermal base layer
Two wind gilets or rain capes
Two pairs of descent gloves
One set of arm and leg warmers
All of it sits staged and ready for a mid-stage musette swap. Live radar can trigger that swap around the ~50 km mark .
The DS radio call isn't distance-based. It's weather-based — precipitation onset, summit cooling, live radar shift. That distinction matters more than any fixed-kilometer rule.
Three-Layer Architecture for Cycling Clothing Strategy Mountains
Three layers. That's the entire system. Everything else — the newspaper trick, the mid-descent gilet grab, the precision pocket placement — is execution detail. It all builds on this foundation.
Each layer has one job. That's why the system works.
Layer One: The Base Does One Thing
The base layer is not for warmth. Drop that idea completely.
Its one job is moisture management . It pulls sweat away from skin fast. Fast enough that evaporative cooling doesn't turn into evaporative freezing the moment your output drops. On a long alpine climb, you soak through with serious effort. That moisture against your skin turns the summit into a cold-exposure event, not a checkpoint.This level of precision is why most professional teams opt for OEM/ODM cycling teams layer partners to customize base layer construction for each rider.
Material selection follows a simple rule:
- Synthetic mesh (40–80 g) for warm, high-intensity efforts
- Light merino-blend (120–150 g/m²) for cold or wet conditions where moisture buffering matters more than pure speed-wicking
Fit should be race-snug — minimal seams, no dead air gaps. The base layer works through direct contact, not loft.
Layer Two: The Jersey as Active Mid-Layer
Most riders treat the jersey as just a jersey. Pro teams treat it as a dynamic thermal valve .
The zipper isn't decorative. Crack it two inches to vent heat on steep gradients. Close it as effort eases or temperature drops. The jersey fabric (150–200 g/m²) gives enough insulation for most mid-climb conditions. You don't need an extra thermal mid-layer unless ambient temperature drops below 12–15°C at altitude .
Adding bulk here is the most common amateur mistake. A thick thermal jersey traps sweat, adds weight, and you can't pull it off mid-ride. One thin brushed jersey, used in cold conditions only, is the ceiling for this layer.
Layer Three: Packable Shells, Deployed in Under 15 Seconds
The outer layer is the modular layer. It sits in a pocket until the environment demands it. The deployment window is short.
Pro soigneurs hold to a clear standard: any outer shell must be retrievable, shaken out, and zipped within 15 seconds — without stopping. That single constraint cuts most jackets from the list straight away.
What passes that filter:
Wind gilets : 60–90 g, windproof front panel, breathable mesh rear, single full zip with a large puller
Lightweight rain capes : 130–200 g, Gore-Tex or equivalent, packable to a 12 cm roll
The breathable rear panel isn't optional — it's structural. The windproof front blocks chest chill on descents. The mesh back keeps venting residual climb heat. Lose that rear breathability and the shell becomes a sweat trap on any extended effort.
The Weight Targets That Drive Every Decision
Pro teams work from specific gram targets, not guesswork.
Condition | Torso Carry Target | What Fits |
|---|---|---|
Warm climb | <350 g total | Mesh base ~50 g + race jersey ~130 g + sub-70 g gilet stowed |
Transitional | 350–450 g | Thermal base ~120 g + jersey ~180 g + gilet carried |
Cold/wet descent lock-in | <500 g complete | Add shell 130–200 g + gloves 60–100 g + headgear 40–60 g |
Hitting the <350 g climbing target takes discipline: ultra-mesh base, lightweight race jersey, sub-70 g gilet. Anything heavier stays in the team car — or gets left behind.
The descent "lock-in" ceiling of <500 g means no heavy winter jacket. Ever. Protection comes from pairing a thin jersey with a shell. Not from adding bulk. That combination beats a single heavy jacket on every metric that counts in a mountain stage — packability, deployability, and thermal adaptability across a 20°C swing.
Neutral Zone to Lower Slope: Aerothermal Tradeoffs and Zipper Micro-Control
The neutral zone is where most amateur riders lose the climb before it even starts.
At 45–50 km/h on a fast valley approach, aero drag accounts for over 80–85% of total resistive force . That number flips once gradient bites and speed drops to 15 km/h. At that point, aero drag falls below 25–30% of resistance. Your clothing strategy has to flip with it. The transition between those two physical realities isn't at the foot of the climb. It's 10–15 minutes earlier. Your body is already trending warm. The zipper decisions are already overdue.Top teams often negotiate custom cycling teams layer solutions for zippers and vents to maintain performance under these conditions.
The Four Venting States (and When to Hit Each One)
Pro riders don't toggle between "zipped" and "open." They work through four distinct aerothermal states across the neutral zone and lower slope. Each state ties to heart rate and ambient temperature — not distance markers.
State A — Fully covered
- Heart rate: below Zone 2 (<65% HRmax)
- Ambient: 10–16°C, valley floor, minimal sun
- Jersey zipper: closed. Gilet: closed.
- Why: Metabolic heat output is moderate here. Keeping everything closed holds warmth and maintains a clean frontal profile. No need to vent yet.
State B — First crack
- Heart rate: Zone 2–3 (65–80% HRmax)
- Ambient: above 14°C, climb speed settling into 12–18 km/h
- Jersey zipper: open to sternum level — 10–15 cm on a standard 45–50 cm front zip. Gilet: stays closed, but let the fabric "balloon" a touch to create a chimney effect up the torso.
- Why: This one adjustment can deliver a 10–20% perceived cooling increase with minimal aero cost at climbing speeds. It's the highest-ROI move on the lower slope.
State C — Cooling priority
- Heart rate: above Zone 3 (≥80% HRmax), sustained climbing effort
- Ambient: above 12°C, speed 10–15 km/h
- Jersey: fully unzipped . Gilet: unfastened and pulled back to the shoulders — front open, back still covering rear pockets.
- Why: At sub-20 km/h climbing speeds, a fully open torso raises evaporative heat-loss capacity by 20–40% compared to a closed jersey . The aero penalty at this speed is negligible. You're not losing watts to drag — you're saving watts by not cooking.
The 2–3 cm Rule
The mechanic connecting these states isn't intuition — it's incremental adjustment.
Move the zipper in 2–3 cm steps per 1 km of gradient as effort ramps. On a typical 10 km climb with a grade that rises steadily, that produces 4–6 distinct venting states rather than one crude open/close toggle. Here's a practical sequence for a 30–40 minute climb:
Km 0–2, Zone 2–low 3: crack zip 3–4 cm
Km 2–4, solid Zone 3: open to 8–10 cm (sternum)
Km 4–6, upper Zone 3: extend to 15–20 cm
Beyond Km 6 or above Zone 3.5: full unzip, then reassess gilet position against wind and air temperature
Make those adjustments at crest points or brief gradient respites — not mid-effort on a steep pitch where upper-body movement breaks your rhythm. Better yet, pair each zipper increment with a drink sip. Tie your thermal management to your hydration schedule. Both get done. Neither gets skipped.
Why Staging Matters More Than You Think
All this micro-control has one goal: avoid a 0.5–1.0°C core temperature spike in the first 20 minutes of climbing. That spike drives high sweat rates before you reach altitude, where cooler air and stronger convective cooling can handle the load. Your base layer saturates earlier. Electrolyte loss builds faster. The descent — still an hour away — turns into a real cold exposure problem because your kit is already soaked through.
Research on heat-induced power decline puts the cost at 2–5% per degree Celsius of core temperature rise during prolonged efforts. That's a real number, not a theoretical one. On a 40-minute climb, an unmanaged early heat spike can drain 8–12 watts before the gradient even turns serious.
The neutral zone and lower slope aren't where the race gets won. But they're exactly where it can slip away.
Mid-Climb Thermal Regulation and Sweat Evaporation Management
Somewhere past the first third of the climb, the math changes on you. You're no longer fighting to stay warm — you're fighting to stay dry. Those are two different problems. Professional squads frequently consolidate orders with a specialized cycling apparel wholesaler to secure consistent quality and rapid turnaround.Those are two different problems.
The core rule mid-climb is simple but harsh: evaporative capacity must exceed sweat production . The moment that equation flips, you've lost control of your descent before it begins. Trained endurance athletes generate 0.8–1.4 L/h of sweat during hard climbing efforts. Larger or heat-acclimated riders push toward 2.0 L/h . Your clothing isn't storing that moisture — it's either moving it out or letting it pool. There's no middle ground at altitude.
The Saturation Warning Signs You Can't Ignore
Pro soigneurs watch for three field cues that riders often miss:
Back panel heaviness — a downward drag at the lower back as you stand or accelerate. The fabric should "snap" off your skin as you straighten up. No snap means it's soaked through, not just surface-damp.
Paradoxical cold patches — a localized chill between the shoulder blades while your heart rate is still pinned high. That's evaporation taking over heat balance in one spot. On the descent, that spot breaks down first.
HR suppression with goosebumps — you're down 5–10 bpm at a set power output near the summit and you feel chills. Treat that as overcooling risk right now. Don't wait.
The Single-Hand Vent and Dry Zone Protocol
Above 8% gradient, airspeed drops enough that opening the front zip alone doesn't move enough air. Pro riders shift focus to side and armpit vents instead.
Here's the move: slide your thumb under the right hem panel, lift 5–10 cm, and hold for 20–40 pedal strokes after a surge. That short exposure clears built-up humidity from the armpit — one of the highest sweat-output zones on the torso. It also restores a wicking pull from skin outward.
DS coordinators push this further by marking "dry zones" — open ridge sections, valley crosswinds, road bends with direct airflow. At those spots, the radio call goes out: open the front zip to 70–100% for 10–15 seconds at steady power. You can also stand 5–10 strokes to push more air under the jersey. Short, targeted, and timed to where natural airflow does the heavy lifting.
The Final 2 km Intervention Sequence
Catch saturation in the last 10–20 minutes of climbing? Run this sequence:
Drop to high Zone 3 (80–90% FTP) for 2–3 minutes. This cuts sweat rate a bit while keeping enough output to keep drying the fabric.
Open zip one stage further and add short 10–20 second surges at 105–110% FTP. The power spike lifts local skin temperature and pushes a fast evaporation burst through already-wet panels.
At the last sheltered section before the summit , close the zip back to 30–50%. Then pull a dry gilet over the damp jersey before you crest the gradient.
That last move is the whole game. The damp base layer stays against your skin and holds residual warmth. The shell cuts the high-speed airflow that would strip that heat through forced evaporation at 65+ km/h. No gilet? Close the zip to 100% 1–2 minutes before the top. Hold sweet-spot power to pre-warm the wet fabric. Stay in the drops for the first two minutes of descent until the shivering risk clears.
The climb doesn't end at the summit. Your thermal management does.
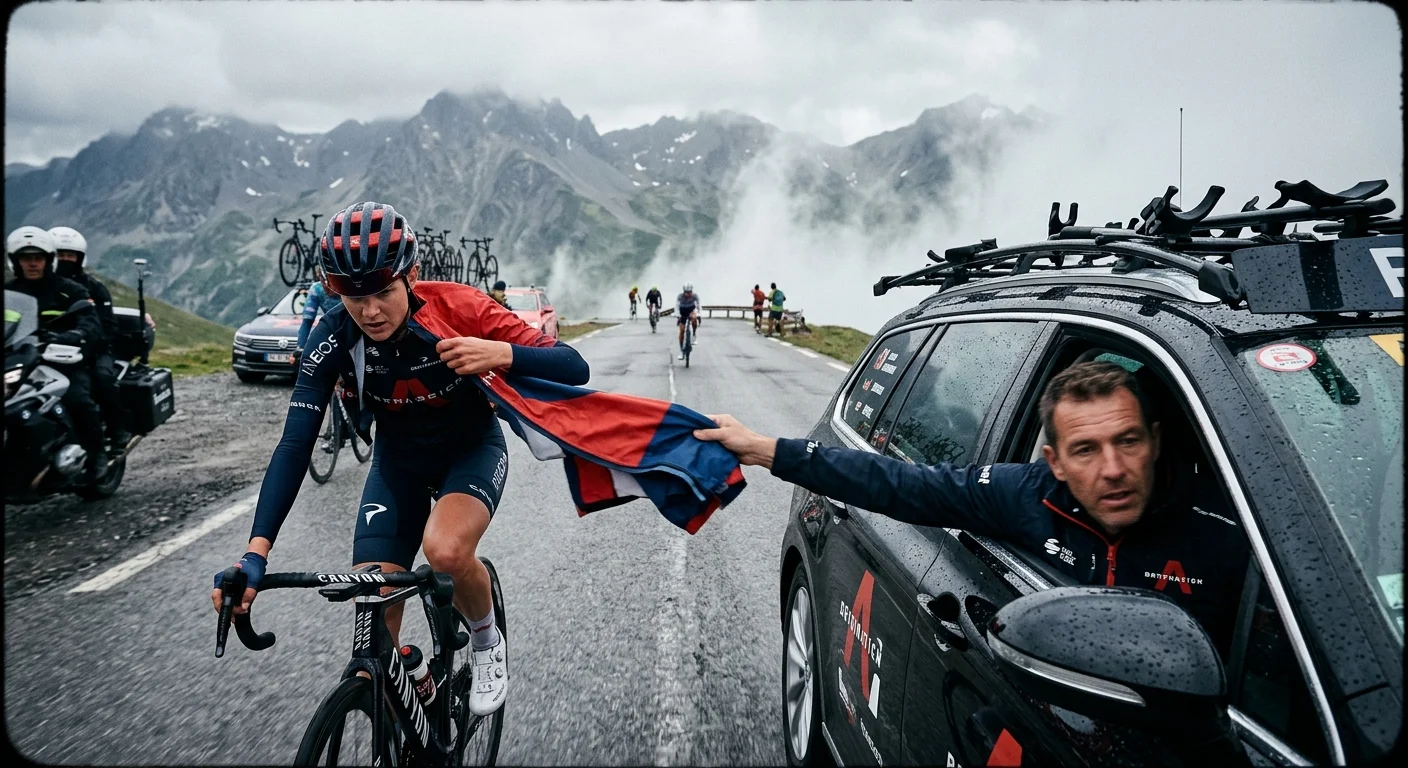
Summit Transition Window: Team Car Handoff and Gear Swapping
The 3 km-to-summit marker isn't scenery. It's a clock starting.Each rider's cape, base layer, and gloves are prepared according to cycling teams wear whole price agreements with suppliers to control costs and maintain uniformity across the team.
That checkpoint passes, and the DS keys the radio with a precise information package — not encouragement, not tactics. Just data: "Summit in 3 km, descent temp 6°C, rain probability 40%, road surface damp." That call triggers a sequence rehearsed on the team bus. There's no room for improvisation.
The Transition Domestique
One rider in the group gets assigned a different job before the stage starts. Not climbing. Not GC. Gear logistics.
The transition domestique needs two things: strong descending skills, and enough threshold power to close a 30-second gap after dropping back to the team car. The DS radio call comes in. That rider raises a hand, drifts from the front third of the group toward the rear, and waits for the car to pull up alongside.
The handoff zone runs from 3.0 to 2.0 km before the summit , on gradients of 8% or less. Speeds sit around 20–25 km/h. Tight corners, tunnels, and narrow bridges are off-limits — commissaire rules and basic physics both rule them out.
From the car window, the domestique picks up a pre-sorted loadout for each protected rider:
Rain cape or jacket (pre-folded, labeled by rider initials and size)
Waterproof or neoprene gloves
Dry arm warmers or thermal sleeves
Optional: neck gaiter, light gilet, spare clear lenses
Items stack in the car in summit usage sequence — gaiter first, gloves second, cape third. No fumbling. No asking.
Moving Gear Back to the Leaders
Loaded up, the domestique drafts behind the team car at 35–40 km/h on the climb's easier upper section. The DS paces them back to the tail of the leaders' group. Then the car drops back per race convoy rules.
From there, the domestique moves through the group using half-wheel pacing — pulling parallel to each rider for one to two seconds as that rider reaches for gear. Items go high and forward , not behind the hip. Each recipient keeps cadence steady and uses the inside hand to grab — away from traffic, away from collision risk.
Priority order is fixed:
1. GC leader and protected riders
2. Key descent-positioning domestiques
3. Remaining riders if road and time allow
The Final 1.5 km Sequence
Gear is distributed. Now there's a short execution window before the crest:
At 1.5 km to summit: Glove swap — summer gloves into the left jersey pocket, winter or waterproof gloves on. Right glove first to hold brake control. Target time: under 20 seconds , without losing the group wheel. The swap happens this early on purpose. Two to four minutes of climbing still ahead means body heat warms the glove interior before the descent hits. Cold hands on the first technical hairpin is a problem of a different order.
At 1.0–0.5 km: Pull the neck gaiter up over the collarbone and lower face. This isn't about comfort. It shields the trachea and upper airways from the sudden cold-air rush that triggers coughing and bronchospasm at the top of a fast descent. Get it on while heart rate is still high and core temperature is still up. Check it clears helmet straps and doesn't fog glasses.
At 0.5–0.0 km: Pull the pre-folded cape from the center jersey pocket. The fold geometry matters. A well-packed cape rolls into an 8 × 4 cm cylinder , sits flat across the lower back, and opens in three to five seconds — the wind does most of the work. Zip to 80–100% before the actual crest. A cape still flapping open at 60+ km/h on the first descent meter is not something you recover from.
Right After the Summit Line
Three checks, in order:
Cape or gilet fully zipped , no ballooning
Glove cuffs over jacket sleeves — sealed against wind and water intrusion
Neck gaiter covering the collarbone and front of neck
Hands go straight to the drops. Fingers on levers before the first bend. The team car holds position just behind the leader group, carrying one extra jacket if rain picks up, and stays on radio for any "too cold / too hot" calls as valley temperature rises.
The summit is not the finish. It's the dividing line between two different thermal worlds — and the team that runs this window clean is the team that reaches the bottom with riders who can still produce power.
Peak Micro-Operations and 5 Pro-Specific Layer Adjustments
The summit handoff is clean. The cape is zipped. Most riders think that's where the system ends.
It doesn't. The real precision work starts now.
A Grand Tour domestique and a well-prepared amateur make different decisions — but not about big gear choices. The gap comes down to five micro-adjustments in margins most people never notice. None of them need expensive kit. All of them need you to know when and why.
Adjustment 1: The Single-Side Warmer Protocol
A sustained crosswind from the left for 10–15 minutes or more? A descent forecast showing gusts above 25–30 km/h off one side? Pro riders don't add warmers on both arms. They add one .
Left crosswind: left arm warmer, left leg warmer. That's it.
Here's the physics. Unilateral coverage in 5–10°C ambient raises skin temperature on the covered limb by 0.3–0.6°C over 20–30 minutes . That's enough to preserve muscle function and keep braking grip solid. Bilateral warmers go further than you need. They spike your whole-body sweat rate during any climbing that follows.
Spec matters here. Look for 200–260 g/m² brushed Lycra with a silicone grip cuff that holds within 2–3 cm over 60 minutes at race cadence. Keep compression mild — about 10–15 mmHg. You're shielding one limb from lateral wind chill. You're not cutting off blood flow.
Removal trigger: 5 km-to-go descent board , once speed drops below 45 km/h. Roll from cuff to hem into a compact 5 × 8 cm cylinder. Stow in a dedicated dry-bag in the center pocket. Target handling time: under 20 seconds.
Total added mass for single-side use: ≤40 g .
Adjustment 2: The Newspaper Insert
This one looks ridiculous until you see what it actually does.
Take 2–3 sheets of standard newsprint. Fold them to A5 size (148 × 210 mm). Slip them between your base layer and jersey, centered on the sternum. Total mass: 8–18 grams . Total cost: whatever yesterday's paper runs at the race village tabac.
That paper creates a dead-air micro-layer with a partial vapor barrier . It works on the same principle as expensive windproof fabrics — just disposable. At 0–10°C and descent speeds above 65 km/h, that paper layer adds 3–4°C of equivalent frontal insulation beyond what a jersey-and-base combo provides on its own. On a 15-minute no-pedal descent, that gap decides whether you arrive at the bottom functional — or arrive with a core temperature already below 36°C.
Placement is precise:
- Bottom edge 3–5 cm above jersey hem (stops bunching in aero tuck)
- Top edge below the sternum notch (no throat contact as you look down)
- Smooth the paper flat with your palm after insertion — any bulge or lateral overlap adds flutter drag
Discard at the first feed zone or designated litter zone. Your jersey and base layer dry faster without the vapor barrier once the descent is done. That matters for whatever effort comes next.
Adjustment 3: Pocket Weight Offload Before the Summit
Rear pocket load changes bike handling at speed. Most riders underestimate by how much.
Pro teams target under 150 grams in rear pockets before a technical descent. Some GC riders go further — phone moved to a top-tube case, one gel plus an ID card — dropping carried mass to under 60 grams .
This isn't about comfort. It's physics. Above 70 km/h, a loaded rear pocket creates jersey flap. It adds top-rear weight that amplifies oscillation in crosswinds. It introduces micro-vibrations that wear out your upper body over 20–40 minutes of braking. None of that shows up on training rides. All of it shows up on an 8 km alpine descent in a crosswind.
Offload timing: last feed zone or team car contact within 5–10 km of the summit . Anything not needed for the descent or the next short valley section goes straight into the car.
Adjustment 4: Saddle Cover Removal in Wet Conditions
Forecast shows sustained rain on a long alpine descent — the kind with 8–12% gradient and 20–40 minutes of continuous seated braking? The saddle cover comes off before the wet section starts.
A wet fabric cover increases friction and micro-movement between the shorts pad and saddle surface. That raises chafing risk on extended downhills. There's a bigger problem too. A smooth wet cover acts as a sliding layer . It breaks your stable descending position — the locked-forward, low-torso stance that makes cornering at speed both safe and repeatable.
Modern microfibres and textured saddle surfaces shed water and hold consistent contact. The cover doesn't. Pull it off at the last team car contact or feed zone on dry road. Store it wrung-out in the team car. Also, skip the chamois cream mid-stage in rain. Over-lubrication creates the same instability problem the cover removal just fixed.
Adjustment 5: The Zipper-to-Pocket Pre-Load Sequence
TV cameras won't catch this one. You'll see it in the time gap between riders who stay warm and riders who don't.
Run the pre-load sequence in the final 5–10 minutes before the summit , while you're still generating heat and have both hands free for brief non-braking moments:
Identify wind direction from team car radio or head unit. Pick the warmer side.
Receive newspaper sheets from the soigneur at the summit feed. Fold to A5 on the bike — four folds, about 15 seconds.
Insert paper between base and jersey at the sternum while still climbing. Keep the jersey partially open during insertion, then zip to within 2 cm of the collar.
Confirm pocket sequence : gloves accessible in left pocket, gaiter already around the neck, cape in center pocket in its 8 × 4 cm roll.
None of this happens at the summit. At the summit, you're already in the tuck.
The Quick-Reference Sequence
Checkpoint | Action | Mass Impact |
|---|---|---|
Base of final climb | No saddle cover if rain forecast; trim pocket load to <150 g | −80–200 g |
Last 5–10 min climbing | Fit single-side warmer (crosswind side) | +≤40 g |
Summit feed zone | Insert 2–3 newspaper sheets at sternum; zip to collar | +8–18 g |
5 km-to-go descent board | Remove single-side warmers; roll and stow | −≤40 g |
First feed zone post-descent | Discard newspaper; rebuild pocket load for next climb | −8–18 g |
Five adjustments. None of them on the equipment list. All of them on the checklist.
High-Speed Descent: Wind Chill and Hypothermia Risk Control
The descent doesn't forgive what the climb built up.
All that sweat-soaked jersey you earned grinding up the final pitch? It becomes a liability the second the gradient tips negative and speed pushes past 60 km/h. This isn't discomfort. It's physics with a hard deadline.
Here's the number that changes everything: water pulls heat away from the body 25 times faster than air . That damp base layer — the one that felt fine at Zone 4 output — becomes a danger the moment moving air takes over. At 60 km/h, wind chill strips heat from exposed skin at a serious rate. At 80 km/h, the NOAA wind-chill penalty gets much worse. You're no longer cold-weather riding. You're managing an active heat-loss event at speed.
The Two Variables That Define Descent Risk
Ambient temperature is only half the picture. Wind speed and moisture state are the real multipliers. They decide whether a descent turns into a hypothermia situation.
Pro team directors treat wet-kit exposure on a cold descent as a danger upgrade — not just "chilly" but "active risk." The response protocol reflects that:
Cape sealed at the collar, no exceptions. Lower-back gaps and loose collars bleed heat fast at 70+ km/h. Seal them before the crest — not after the first hairpin.
Gloves covering jacket sleeve cuffs. Wind getting in at the wrist causes more heat loss than its small gap suggests.
Speed reduction is a real tool. Shivering starts? Drop from 75 to 50 km/h. That cut reduces wind-chill exposure by a significant margin. Shivering is a hard stop signal — not a mild warning.
Red Lines You Don't Cross
Body temperature at or below 35°C / 95°F is a medical emergency. The warning signs before it — uncontrollable shivering, confusion, slurred speech, sudden drowsiness — are not discomfort signals. They mean the body is failing. Any of these appear mid-descent? Act fast: cut speed, seal all wind gaps, get behind the team car's draft, and radio for convoy support.
The descent ends when you say it does, not when the road flattens.
Altitude-Temperature Decision Tree for Amateur Riders
The pro system works because it cuts guesswork at the worst possible moment. You can build the same thing for yourself — stripped down, no soigneur needed.
Three numbers drive every decision: your valley temperature, your altitude gain, and your estimated descent speed. Get those three before you roll out. The rest follows a clear, simple logic chain.
Calculate Your Summit Temperature First
Run this before every mountain ride:
summit_temp ≈ valley_temp − (altitude gain in 100 m × 0.7°C)
Round down. Every time. A 1,200 m climb from a 22°C valley floor puts you at 13°C at the top — before wind chill. Add a 60+ km/h descent and the effective temperature drops another 6–8°C . That's a 15°C swing from start to summit. Perceived temperature on the way down sits near 5°C .
That math decides your kit before you leave the car park.
The Decision Tree by Valley Start Temperature
Valley ≥ 20°C, climb gradient ≥ 7%, altitude gain ≥ 800 m
- Start: short-sleeve jersey + ultra-light mesh base — nothing extra
- Carry: gilet folded to phone-size in center pocket; packable shell in frame bag or car
- Summit protocol: shell on at 2 km to go; full zip + newspaper chest insert if descent exceeds 15 minutes
- Non-negotiable: thin full-finger gloves on before the crest
Valley 15–20°C, gradient 5–8%
- Start: light base + jersey + gilet half-zipped
- Unzip the gilet in the first 10 minutes if HR climbs past Zone 3 — don't let the base soak through
- At mid-climb: stop and reassess. Trees moving and summit above 1,500 m? Swap the gilet for a shell before you need it
- Summit: gloves on + sealed zip by 1.5 km out
Valley 10–15°C, altitude gain ≥ 600 m
- Start: base + jersey, gilet stowed in pocket from the start
- Add leg warmers if summit forecast drops below 8°C
- At 2–3 km before the top: put on a thermal headband or buff under the helmet if summit wind tops 25 km/h
Five-Point Ride Checklist (Save This)
Checkpoint | Trigger | Action |
|---|---|---|
Pre-ride | summit_temp < 10°C OR rain risk ≥ 40% | Mandatory: gilet + shell + full-finger gloves |
Lower climb | First 10–20 min, HR rising | Open jersey now — aim to feel a touch cool, not comfortable |
Mid-climb | Base feels damp, wind visible in trees | Zip gilet for 5–10 min; pull the shell out if it keeps building |
Last 2–3 km | Approaching summit | Shell on and zipped tight; gloves on; newspaper insert if descent > 15 min |
First 5 min descent | Speed building | Stay sealed; no venting until speed drops below 40 km/h |
The One Rule That Covers Most Situations
Altitude gain over 1,000 m ? Treat it as a mountain ride. Full stop. No matter how warm the valley feels at the start. That single rule catches more riders off-guard than any other factor. A 28°C start feels like a casual summer spin. At 2,100 m, with a soaked base layer and no shell, that feeling disappears fast.
Carry the gilet. Carry the shell. The 130 grams is not the problem. Arriving at the bottom hypothermic is.
Pro Cycling Layering Quick-Reference Matrix
Cut the guesswork. This table covers every decision in one place — altitude band, ambient temperature, trigger point, micro-operation, and handoff timing. Screenshot it. Check it the morning before any alpine ride.
Altitude Band | Temp | Wind / Speed | Action Trigger | Key Micro-Op | Handoff Timing |
|---|---|---|---|---|---|
0–800 m | 22–30°C | <30 km/h | HR upper Z2–Z3, jersey front damp | Unzip to sternum; gilet zip at ⅓ | Empty rear pockets at start; mesh base layer |
800–1,800 m | 15–21°C | 30–50 km/h | Speed <20 km/h, sweat rising | Stow gilet in center pocket; flush armpits every 5–10 min | Pack descent gloves in musette 40–60 km before the climb |
1,800–2,400 m | 9–14°C | 45–65 km/h | 3 km from summit or fog band | Deploy gilet; pre-fold cape; windward warmer on that side | Car handoff at ~30–35 km/h before KOM |
2,400 m–Summit | 4–9°C | >60 km/h | Final 500–800 m before crest | Full zip lock; newspaper insert; glove swap | Swap before first hairpin |
Descent >10 km | 2–8°C | 70–90 km/h | Wet surface or rain within 15 min | Gore-Tex on at <40 km/h; micro-tuck pedaling intervals | Unzip cape top-third once speed drops below 30 km/h |
Temperature coverage at a glance:
- ≥21°C — shorts, short-sleeve jersey, nothing else
- 15–20°C — arm warmers, light gilet on exposed sections
- 10–14°C — knee warmers, gilet on all long descents
- 4–9°C — full tights, thermal jersey, lined jacket, full-finger gloves
- ≤4°C — winter bibs, insulated softshell, shoe covers, winter gloves
One pocket rule worth knowing: center pocket holds the cape . Side pockets hold food and gloves. At 65 km/h on a wet hairpin, reaching for the wrong pocket is a mistake you can't fix.
Conclusion
Freezing on a descent or riding it with control — the difference is one thing: having a plan before the mountain forces one on you.
Pro teams learned this through decades of Grand Tour punishment and soigneur trial-and-error. Thermal regulation cycling climbing is not reactive guesswork. It's a pre-mapped decision tree. You hit specific altitude checkpoints. A team car, a folded rain cape, and sometimes a crumpled sheet of newspaper do the real work.
You now have that same framework.
The night before your next alpine ride, build your personal kit matrix using the quick-reference table. Mark your handoff points on the route. Practice the rain cape fold. Know your Zone 3 threshold. Respect it the moment your jersey zipper starts sending signals.
The mountain doesn't care how prepared you feel. It cares how prepared you are.It cares how prepared you are. Every kit, every calculation, every contingency ultimately relies on the cycling apparel manufacturer behind the gear.
Ride it like you planned it.