You've Googled "sublimation vs screen printing" and landed on a dozen articles explaining ink molecules and mesh counts — like you're studying for a chemistry exam. None of that helps you decide what to put on your team's backs before the next race.
Here's what those articles miss: cycling kits aren't just branded apparel, they're performance equipment . The printing method you choose shapes how your jersey breathes on a 90-minute climb. It determines whether the fabric survives 50 wash cycles. And it decides whether your sponsor's logo still looks sharp at the finish line.
This guide is different. It goes straight to the decisions that matter:
Outfitting a 12-person club squad? You'll find clear, practical answers here.
Coordinating full-color cycling kit customization for a 50-rider corporate event? Same.
Plus, this guide covers the stress-zone details most cycling clothing suppliers skip — zipper edges, underarm panels, rear pockets — the parts that fail first, and the parts you'll wish you'd asked about before placing the order.
How Sublimation and Screen Printing Interact with Cycling Polyester
Polyester doesn't behave like cotton. That one fact drives nearly every performance difference between these two printing methods — and the wrong choice can quietly destroy a jersey before the season ends.
Most race-cut cycling jerseys fall between 120–160 g/m². They use lightweight polyester mesh or interlock knits. That fabric wicks moisture, stretches under load, and snaps back to shape. Any decoration method you choose has to work with those properties. Not against them.
Sublimation: The Ink Goes Inside the Fiber
Here's the core science without the jargon. Sublimation ink starts as a solid on transfer paper. Heat — 380–400°F (193–204°C) — skips the liquid phase and turns it straight into gas. At that temperature, the polyester fiber pores open. The gaseous dye moves in and bonds at the polymer level.
The press lifts. The fabric cools. The pores close. The dye is now locked inside the fiber itself.
For a moisture-wicking printed jersey , that matters a lot:
No surface film exists. Nothing sits on top of the fabric to trap heat or block airflow.
Handfeel matches unprinted fabric. A sublimated panel and a blank panel feel the same in your hand — because structurally, they are the same.
Stretch stays fully intact. Your torso expands on a hard climb. The colored fibers stretch right along with it. Nothing cracks. Nothing lifts.
Color holds long-term. Sublimated kits hold color across multiple seasons and weekly wash cycles. Fading comes from fiber wear or UV exposure — not from a breaking ink film.
One real limitation: sublimation works on white or very light polyester base fabric only. White areas in your design aren't printed — they're just bare jersey. Dark team colors? Sublimation won't work. Flag that with your cycling kit supplier before the artwork is locked in.
There's an environmental angle worth noting too. The process uses milliliters of water-based, low-toxicity ink per jersey. Traditional bath dyeing burns through hundreds of liters. Your club has a sustainability message? That's a real selling point. Plus, sublimation works just as well on recycled polyester (rPET) — it holds ink the same way virgin polyester does.
Screen Printing: The Ink Sits on Top — and Polyester Fights Back
Screen printing pushes ink through a mesh stencil onto the jersey surface. On cotton, that's simple. On polyester jersey fabric , the fabric becomes an active obstacle.
Here's the problem. Polyester's synthetic dyes activate and start to gas out at 270–300°F (132–149°C) . Plastisol curing happens in that same temperature range. The result is dye bleed — or dye migration. The base fabric's color bleeds into the ink layer. Your sponsor's white logo shifts toward pink or gray.
Skilled printers handle this with low-bleed polyester plastisols and a sublimation-blocking underbase laid down first. But fixing migration creates a new issue. That underbase needs thicker ink deposits, heavier mesh coatings, and an extra flash-cure step. The full layer stack — blocker base → flash cure → color ink → final cure — builds real film thickness on a fabric built to weigh almost nothing.
For all-over print cycling bib shorts or full race jerseys, that film creates real problems:
Added weight on ultralight 120–140 g/m² panels
Reduced breathability across printed zones — right where airflow matters most during hard efforts
Restricted stretch and recovery — especially sharp on race-fit jerseys already cut under tension
Cracking and crazing over time as the film bends through thousands of flex cycles — shoulder seams, torso expansion, breathing load
That's why dye sublimation sportswear leads performance cycling. Screen printing isn't inferior — it's built for a different fabric. It works great on cotton or poly-cotton casual pieces — the team hoodie, the event polo, the training tee — where breathability and stretch aren't critical.
For on-bike polyester jersey printing , screen printing shows up only on small logos or placement prints in low-stress zones. A chest number on a heavier training top. A small badge on the upper back yoke. Never a full-panel graphic on a race skinsuit.
The bottom line on fabric interaction: Sublimation works with polyester's chemistry — it uses the fiber's own structure to hold color. Screen printing fights polyester's properties, adding a surface layer to a fabric built to have none. That fit — or lack of it — drives every performance difference that follows.
Real Budget Scenario: 20-Piece Full-Color Custom Kit Cost Analysis

Twenty jerseys. Full color. Individual names on every back. That's the order most club managers are staring at right now. The price gap between sublimation and screen printing will either back up your decision — or wreck your budget for the rest of the season.
Let's run the actual numbers.
The Order Spec (So We're Comparing Apples to Apples)
The baseline matters before the math. This analysis assumes:
20 short-sleeve, race-fit cycling jerseys
140 g/m², 100% technical polyester knit
Full-front gradient sponsor block + multi-logo back panel
Individual rider names and numbers on the lower back
Delivery to a EU or US club address, mixed sizes, one design template
This is a real-world club order — not a simplified thought experiment. Every cost figure below reflects actual market pricing at this volume.
Option A: Full Sublimation — Two Sourcing Paths
Path 1: Dealer-Tier (US/EU Reseller Brands)
Buying through an established team program — Castelli Custom, Pactimo, Cuore, or similar — means trading price for simplicity. Artwork support, brand quality assurance, and local customer service of cycling apparel all come built in.
Line Item | Cost |
|---|---|
20 jerseys × $55/pc (club pricing) | $1,100 |
Setup / design fee | $0 |
Rider names + numbers | Included |
Shipping to one address | $50 |
Total landed | ≈ $1,150 |
Per-jersey cost | ≈ $57.50 |
That $55/pc figure lands in the middle of the $45–$70 range typical for race-fit jerseys at 20-piece volume through retail team programs. Names and numbers are baked into the artwork file — no vinyl, no extra line item.
Path 2: Direct OEM (Asia / Eastern EU)
This is where experienced club managers with a few ordering rounds under their belt tend to end up. Yes, there's more communication overhead and longer lead times. The savings make it worth it.
Line Item | Cost |
|---|---|
20 jerseys × $28/pc (OEM mid-point) | $560 |
Setup fee | $0 |
Rider names + numbers | Included |
Air freight + customs to EU/US | $100 |
Total landed | ≈ $660 |
Per-jersey cost | ≈ $33 |
The $22–$32/pc OEM range for sublimated club jerseys at 10–50 pieces is consistent across factory quotes. $28 is a solid mid-point — not the cheapest option out there, not the premium tier either.
Lead time reality check: Budget 21–28 days door-to-door. That breaks down to 14–21 days for artwork approval and production, plus 7–10 days for international shipping and customs clearance. Plan for your race series opener, not the week before it.
What you get on performance: Soft hand on every panel. Zero added stiffness on the vents. Gradients and complex sponsor artwork cost nothing extra once the template is locked. Rider names and numbers? Same story. The ink bonds inside the fiber — no cracking, no peeling across 50+ wash cycles.
Option B: Screen Printing + Heat Transfer Vinyl
This path looks cheaper at first glance. It rarely holds that edge for a full-color race kit.
Line Item | Cost |
|---|---|
20 blank tech jerseys × $22/pc | $440 |
Screen setup: 4 screens × $25 | $100 |
Print execution: 4 areas × $4 × 20 pcs | $320 |
Names + numbers (HTV): 20 × $4 | $80 |
Shipping (local/regional) | $40 |
Total landed | ≈ $980 |
Per-jersey cost | ≈ $49 |
The screen setup assumes two colors on the front logo and two on the back sponsor block — four screens total at $25 each. Print execution at $4 per area per garment covers the low-bleed polyester inks and flash-cure steps that 140 g/m² technical fabric demands. Skip those steps, and dye migration turns your sponsor's white logo gray.
What the cost summary doesn't show is the performance drag. Plastisol ink on top of 140 g/m² race polyester creates stiffness across mesh side panels, underarm vents, and micro-perforated back zones. Those are the zones your riders depend on for airflow during hard efforts. Heat-pressed vinyl names and numbers add another stiff layer on the lower back. Wash them with any heat, and delamination is a matter of time — not a possibility.
The Side-by-Side
OEM Sublimation | Dealer Sublimation | Screen + Vinyl | |
|---|---|---|---|
Total for 20 jerseys | ≈ $660 | ≈ $1,150 | ≈ $980 |
Per-jersey cost | ≈ $33 | ≈ $57.50 | ≈ $49 |
Full-color gradients | ✅ No extra cost | ✅ No extra cost | ❌ Not feasible |
Individual names included | ✅ | ✅ | ⚠️ $80 extra |
Breathability impact | None | None | Reduced on print zones |
Long-term durability | High | High | Moderate–Low |
Lead time | 21–28 days | 14–21 days | 7–14 days |
When Does Screen Printing Win on Cost?
Screen printing can undercut sublimation — but only with a stripped-down order.
Drop the design to two solid colors, no gradients . Switch to heavier stock blanks ($8–$12 generic poly tees instead of $22 technical jerseys). Limit personalization to one shared team name , no individual names or numbers. At that point, the math shifts fast.
A lean example: $10 blank × 20 + $25 setup (2 screens) + $3/location × 2 locations × 20 pcs = $345 total, about $17/jersey.
That's a real number. But look at what you've given up: the technical jersey blank, full-color artwork, and every rider's individual identity on the kit. For a full-color, race-fit, personalized cycling jersey — the exact spec this scenario covers — screen printing offers no price advantage. It costs more and performs worse.
The verdict for a 20-piece full-color kit: Direct OEM sublimation saves $320 over the screen-plus-vinyl route and delivers a lighter, softer, more breathable jersey with no durability trade-offs. Dealer-tier sublimation costs more per jersey than screen printing — but the gap in breathability, gradient capability, and long-term wear still favors sublimation for any club racing competitively. The extra cost buys real performance. Screen printing, at this spec, buys neither the savings nor the results.
Scenario-Based Process Recommendations
Three squads. Three different answers to the same question.
That's the reality of cycling kit procurement. "Which process is better" depends on who's wearing the jersey and what they're doing in it. Here's how the decision breaks down across the scenarios most club managers face.
Scenario 1: Amateur Club Weekend Rides (15–40 Riders)
Your roster shifts every season. New members join mid-year. Sizes change. Someone always needs an extra jersey by next month.
Go full sublimation. No exceptions for the technical pieces.
This isn't about aesthetics — it's about operational sanity. Sublimation uses one master template. Three new riders join in October? You don't re-burn screens or hit a minimum order wall. Just run a top-up order of five to ten jerseys — same artwork, same colors, zero setup fees.
Screen printing hits you with fresh setup costs on every small reorder. Every single time.
The durability math also favors sublimation here. Weekend club riders wash kits each week — that's 52-plus wash cycles per year . Plastisol ink on stretch polyester panels starts showing stress by cycle 30. Sublimated dye bonds inside the fiber itself. It doesn't crack or fade from washing. It wears out when the fabric wears out. Not before.
Practical process tip: Lock one master sublimation template and run rolling reorders every one to two months. Keep heat-transfer elements — if any — off the torso and bib panels.
Scenario 2: Amateur Competition Squad / Race Team
Gran fondos. Stage races. Six to eight hours of UV exposure, sustained power output, and a kit that needs to feel like a second skin at hour five.
Sublimation is non-negotiable here. It's not a preference — it's a performance requirement.
Race-fit jerseys are cut under tension. Every panel already works against the rider's body to reduce drag. Add a plastisol ink film on top — even a thin one — and you've introduced stiffness right where hip flexion, shoulder rotation, and torso expansion need free movement. You won't feel it at the bike shop. You'll feel it at kilometer 140.
Sublimation adds zero surface stiffness relative to the base fabric. The colored fibers stretch the same as uncolored fibers. That's not a marketing claim — that's the physics of dye that lives inside the polymer, not on top of it.
Race-specific process decisions to lock in:
Lock all artwork into sublimation from day one. No vinyl names on the lower back. No screen-printed chest badge. One process, full panel, no compromises.
Build number pockets into the sublimation pattern rather than adding post-production prints. Pre-designed attachment zones protect both the artwork and the fabric structure.
Specify UV-stable sublimation inks for kits used in multi-hour outdoor events. Standard sublimation holds well — UV-stable formulations push that durability across a full competitive season.
Scenario 3: Corporate Team-Building / Charity Ride Events
This is where screen printing earns its place — but only on the right garments.
Corporate ride events run on compressed timelines, tight budgets, and simple two-color logos. Many participants aren't serious cyclists. The jersey is branded event merchandise that happens to go on a bike.
Split the order into two separate tracks:
Track | Garment Type | Process | Lead Time |
|---|---|---|---|
Event merch | Cotton tee or poly-cotton polo | Screen print, 1–2 colors | 7–10 days |
Official ride kit | Technical polyester jersey | Full sublimation | 5–6 weeks |
Local screen printers can deliver 50 to 500 branded tees in under two weeks at low unit cost. That works well for expo booths, post-ride celebrations, and participant giveaways. Keep the corporate color palette to one or two colors. Each extra color means another screen, another setup charge, another line item cutting into your margin.
For the on-bike kit worn by VIPs, serious riders, or anyone doing real mileage — sublimation. A full-front screen-printed logo on a stretch performance jersey will restrict airflow and movement just as it does for a race team. The event stakes are different. The physics aren't.
The segment rule: Goes on a bike for more than thirty minutes? It gets sublimation. Everything else can go to the local screen shop.
Quick-reference: Club weekend rides → sublimation, rolling small-batch reorders. Race squad → sublimation locked from artwork stage, UV-stable inks, no post-production additions. Corporate event → screen print the merch, sublimate the actual kit. The process doesn't change based on budget. It changes based on what the garment has to do.
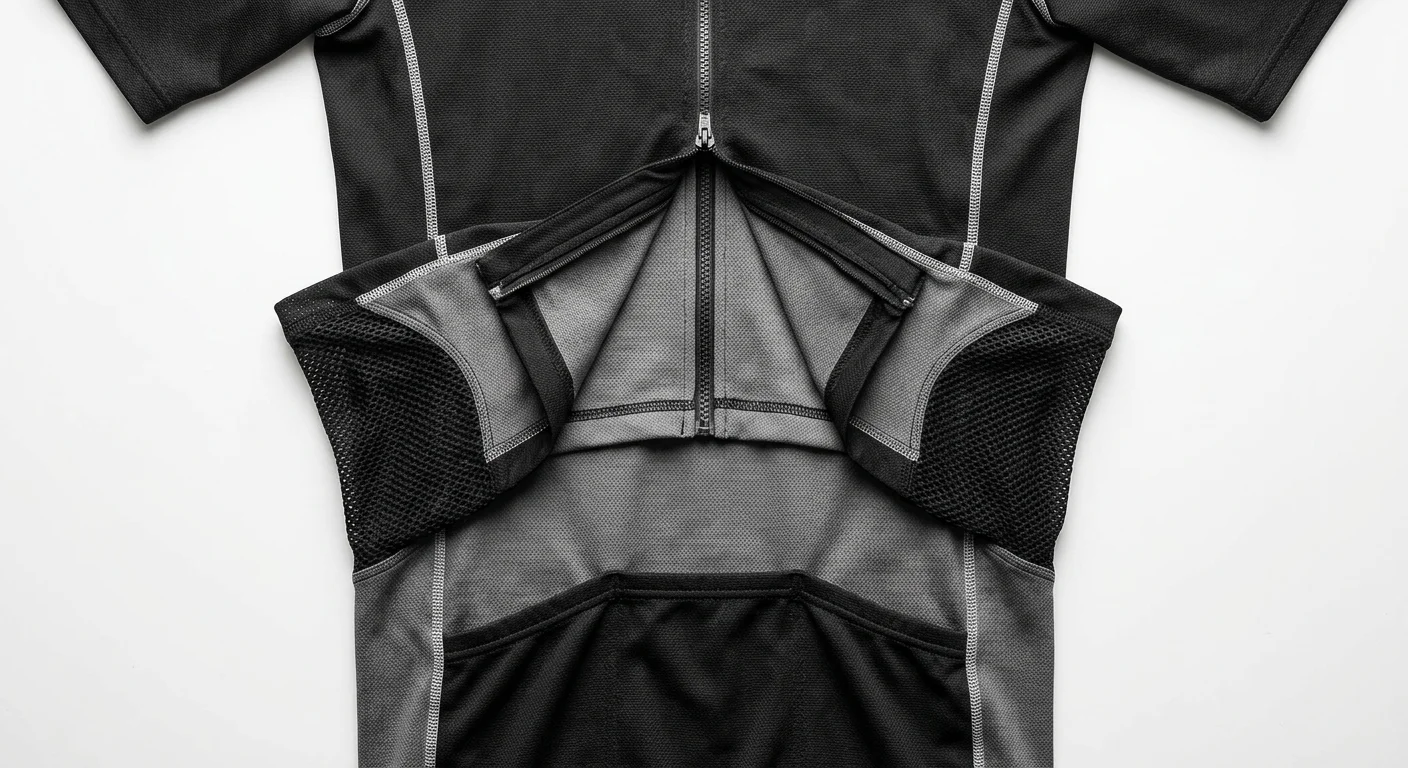
Engineering High-Stress Zones: Zippers, Underarms & Pocket Panels
Most cycling apparel suppliers won't tell you this. The zipper placket, underarm panels, and rear pocket mouths — these are the spots where your custom cycling kit proves itself. Or falls apart by week six.
These zones fail first. Not because of bad fabric. Because of bad decisions about which printing process touches them.
The Zipper Placket: Where Ink Films Go to Die
Run your finger down a screen-printed center-front zipper placket. Feel that slight ridge where the ink film meets the teeth? That's not a cosmetic quirk. That ridge adds friction against the slider. In lab fatigue testing, that surface stiffness along the placket speeds up slider wear through repeated open-close cycles.
Sublimation fixes this problem at the source. The dye bonds inside the polyester fiber — not on top of it. So the placket area stays identical in texture to unprinted fabric. The slider moves clean. No film buildup. No ink layer stacking against the zipper tape.
Practical rule: For any custom bike team clothing with a full-length front zipper, keep screen printing off the placket zone. You need a minimum 10mm clearance from the tape edge on both sides.
Underarm Panels: The Ventilation Zone You Can't Afford to Block
Your underarm panels handle two jobs at once: allowing 20–40% stretch through arm rotation, and pushing sweat-heavy air away from your core. A plastisol ink film disrupts both.
Flatlock seams in this zone already reduce bulk and chafing. Put a screen-printed graphic on top of a flatlock underarm join, and you get a stiff ridge right where the fabric needs to flex the most. On a moisture-wicking printed jersey , that blocked airflow shows up as a heat patch mid-ride. Not dramatic — just steady discomfort across a three-hour effort.
Sublimated panels stay soft through the full range of arm motion. The breathable mesh structure stays intact because nothing sits on the surface.
Rear Pocket Panels: Three Openings, Three Stress Points
The rear pocket mouth is a lever. Every time a rider reaches back — at speed, one-handed — the pocket entry corner takes a sharp directional load. Bar tacking at those corners is non-negotiable. But printing choice matters here too.
Screen ink on the lower back panel stiffens the fabric right above the pocket mouths. That pushes flex stress into the pocket corners instead of spreading it across the panel. After 50+ wash cycles and thousands of in-ride reach cycles, that focused stress breaks down the corners faster.
For full-color cycling team kit customization , sublimate the entire rear panel — including the pocket surround — and specify bar tacking at all three pocket mouth corners. You get print durability and structural durability working together, not against each other.
Zone-by-zone rule:
- Zipper placket → sublimation only, 10mm clearance minimum
- Underarm panels → no screen film, flatlock seams, sublimated color only
- Rear pockets → sublimate the full panel, bar-tack every cornerThese aren't preferences. These are the details that separate a kit that lasts two seasons from one that lets you down halfway through season one.
Pre-Order Procurement Checklist for Team Managers

Your desk decisions matter more than you think. Get them wrong, and your kit order turns into three weeks of back-and-forth — wrong sizes, missed deadlines, frustrated riders. Get them right, and everything moves fast.
Run through this checklist before you send the first inquiry.
Lock Your Design Requirements First
Your artwork file drives everything. Suppliers can't give you a real quote without it.
-Confirm your base color. Sublimation needs a white or light-colored polyester base. Team colors in navy or black? Flag that before the artwork is final — not after.
-Identify all logo zones. Front chest, back panel, sleeve cuffs, rear pocket surround. Know which zones carry sponsor marks and which are team identity.
-Decide on personalization. Individual names and numbers? Lock down the full roster — sizes included — before submission. Late changes after artwork approval add a week to your lead time.
-Specify zipper placket clearance. Ask for a minimum 10mm ink-free zone on both sides of the center-front zipper tape. Most first-time buyers skip this detail. Don't.
Define Your Order Parameters
Parameter | What to Confirm |
|---|---|
Quantity | Exact headcount — no "roughly 20" |
Size breakdown | Full size run with individual assignments |
Fabric weight | 120–160 g/m² technical polyester for race-fit |
Delivery deadline | Work back from your event date, not toward it |
Budget ceiling | Per-jersey or total — state it upfront, no guessing |
Vet Your Supplier Before Committing
Ask for physical wash-test samples , not digital mockups. Request an actual jersey they've produced before — similar weight, similar color profile.
Check that the cycling apparel manufacturer uses low-bleed polyester inks for any screen printing. Ask straight out — don't guess.
Make sure turnaround time covers artwork approval cycles , not just production days.
Find out whether individual rider names are in the base price or billed as a separate line item.
The one question worth asking every supplier: "What happens to the zipper placket, underarm panels, and rear pocket zones under your standard process?" A supplier who can't answer that in detail hasn't made enough cycling kits to handle yours.
Decision Flowchart: Matching Team Requirements to Print Method
Five questions. Answer them in order, and your decision makes itself.
Question 1: Does your design include gradients, photos, or more than two solid colors?
Yes → sublimation, full stop . Screen printing maxes out at six to eight colors. Beyond that, registration complexity and per-screen setup costs ($15–40 per color, per size) make the math work against you. Major custom cycling team uniforms suppliers — Jakroo, Pactimo, Champion System — restrict gradients and photo-realistic artwork to sublimation. That's not a preference. It's a technical spec.
No → move to Question 2.
Question 2: Is this garment worn on the bike?
Race-fit polyester, mesh ventilation panels, 4-way stretch? → sublimation . Heavy screen ink deposits cut breathability by 20–40% on technical knits. The fiber chemistry is non-negotiable.
Off-bike merch — cotton tees, hoodies, event polos? → screen printing can work. Move to Question 3.
Question 3: Does each rider need a unique name or number?
Yes → sublimation . Each jersey gets personalized through a digital file at zero extra cost. Screen printing charges $3–8 per name through vinyl transfers — and that adds up fast across 20 riders.
No → Question 4.
Question 4: Is your order under 30 pieces?
Under 30 → sublimation wins on economics . No screen setup fees offset the higher per-unit cost right away. You pay less upfront, and the numbers hold up.
30-plus identical pieces, simple logo, standard blank → screen printing starts to make sense here. The setup costs spread across a larger run, and the per-unit price drops enough to be competitive.
Question 5: Do you anticipate reorders?
Small top-ups — five, ten jerseys mid-season — go with sublimation. Same digital file, zero re-setup. Screen printing hits you with fresh setup costs each time you reorder, no exceptions.
The honest summary: 90–95% of performance cycling kit orders belong in sublimation. Screen printing owns one lane — high-volume, identical, off-bike merchandise with simple logos. Everything else? Sublimation.
Conclusion
The decision was never complicated — it just felt that way before you had the right framework.
For serious teamwear cycling , dye sublimation wins on every dimension that matters:
Color fidelity that holds through 100+ wash cycles
Zero hand-feel penalty on moisture-wicking fabrics
Design freedom to wrap graphics around every high-stress zone — underarm panels, rear pockets, all of it
Screen printing has its place. It works for five-jersey orders for a casual weekend crew with a simple two-color logo. That's about it.
Here's what to keep in mind: the uniform your team wears is the first thing the peloton sees. A $3-per-piece cost saving sounds good now. By season two, that saving shows up as faded, cracked fabric. That's not the impression you want.
You now have the cost breakdowns, the scenario matches, and the procurement checklist. Pull up that cycling team wear supplier conversation and go in knowing what to ask for. The next move is yours.