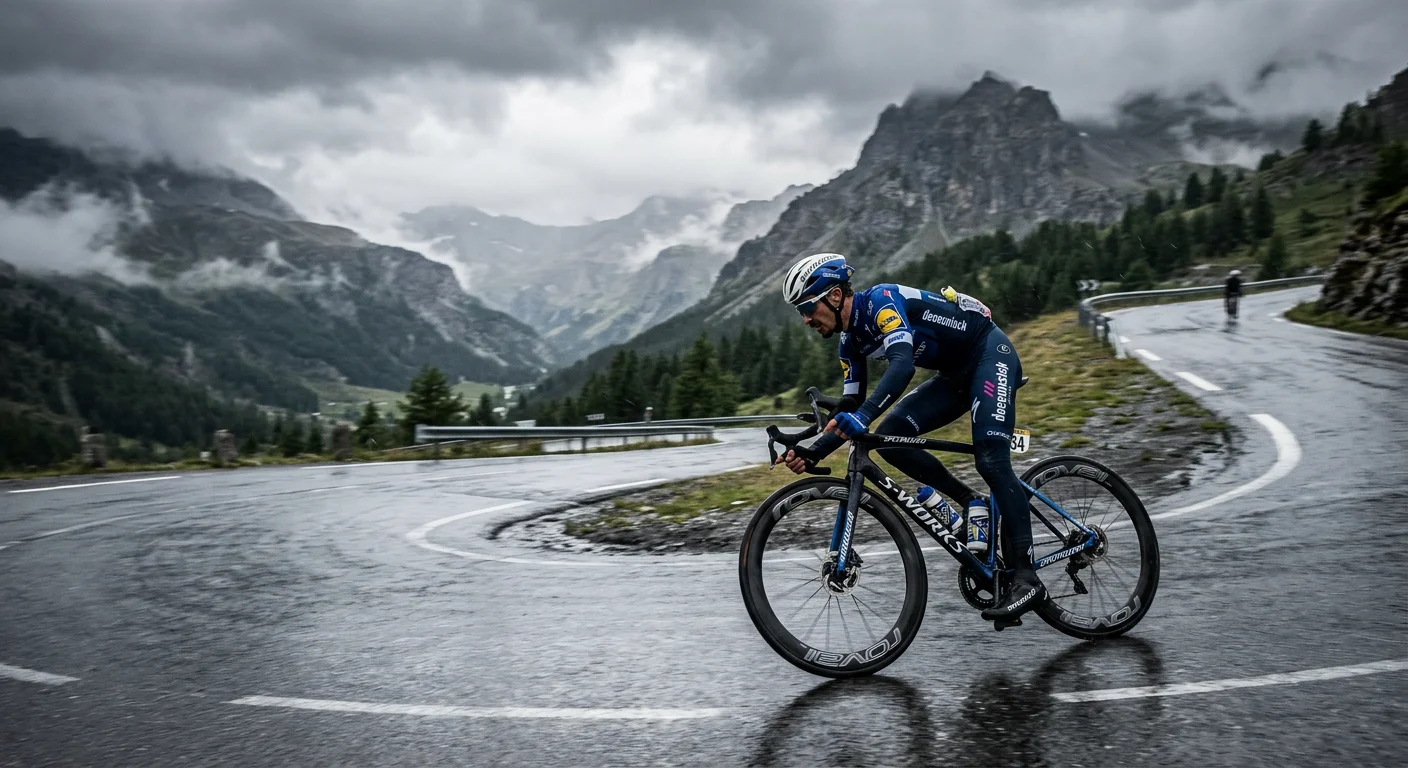
Rain sweeps across the Col du Tourmalet in gray sheets. Somewhere in the peloton, a mechanic's radio crackles to life. Number 47 wants the rain cape — now.
The next ninety seconds decide everything. A frantic hand-off through a car window at 40 km/h. That exchange determines whether a GC contender stays warm enough to contest the finish — or loses four minutes to hypothermia and panic.
You've watched those moments on television. You've wondered: what did they hand him, and why that and not something else?
This guide answers those questions straight. For brands developing OEM/ODM professional cycling rainwear programs, understanding how WorldTour teams layer and deploy wet-weather gear offers valuable product development insights.Real gear. Real race stages. Real technical parameters. Everything here comes from the wet-weather kit that WorldTour teams have tested across the worst Grand Tour conditions on record. Plus, for riders without a team car following them uphill, you'll find direct alternatives for every piece of equipment covered.
Pre-Race Preparation: Professional Cycling Rain Clothing & Rain Capes

Before a single pedal stroke turns, the weather has already been fought — and either won or lost — inside the team car.
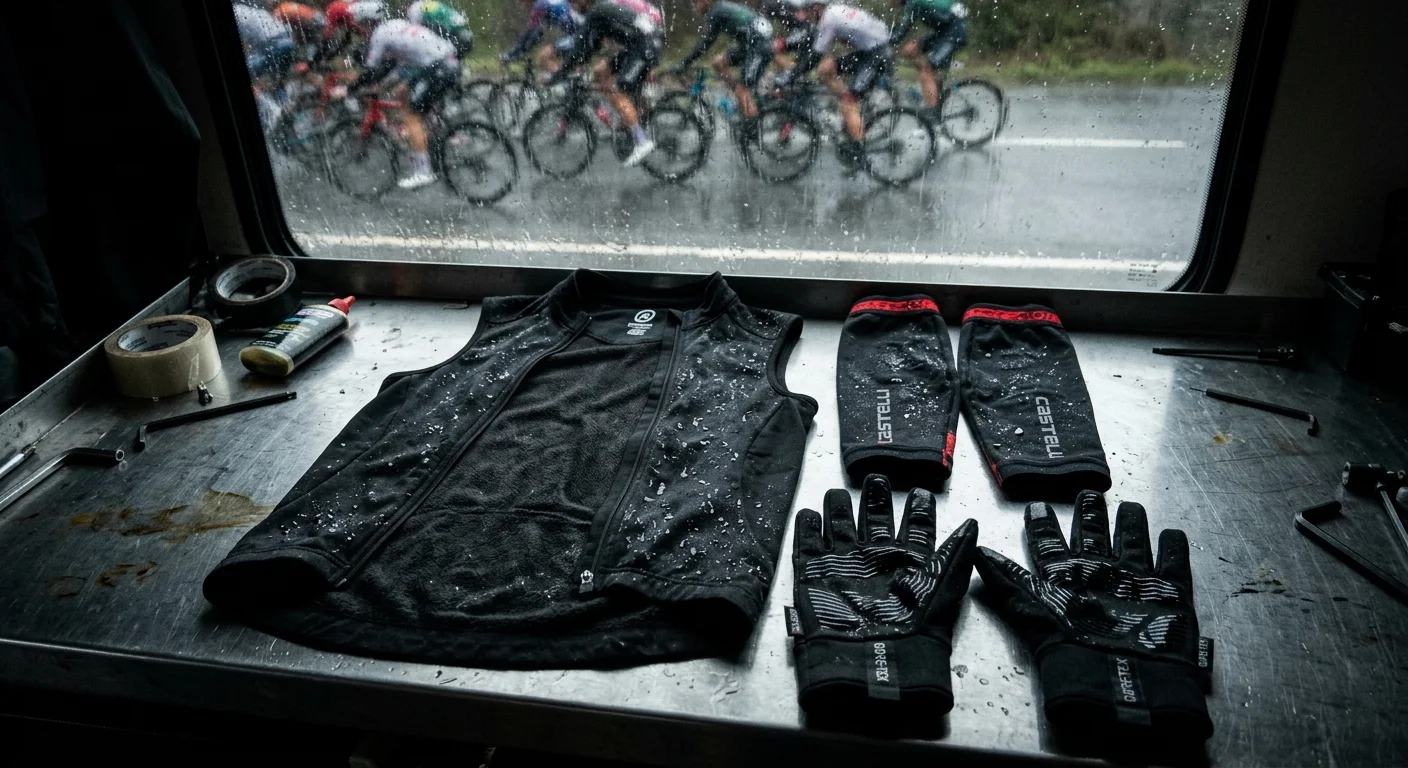
WorldTour mechanics don't improvise rain kit. Every item gets staged, labeled, and pre-positioned hours before the start gun. The same level of preparation is often replicated by a specialized cycling apparel factory when producing race-day wet-weather kits for elite teams and performance-focused brands.Each rider gets a dedicated rain bag with their name and race number on it. Inside: a transparent cape, a Gabba-style water-resistant jersey, a heavier waterproof jacket for mountain stages, spare gloves, a skullcap, extra socks. The bag doesn't get opened at the last minute. It gets built the night before.
The Transparent Cape: Why Clear Wins
The first cape peloton mechanics reach for is almost always transparent — not for looks, but for function. Clear PU-coated nylon lets the DS spot riders by number and jersey in a rain-blurred convoy. Sponsor logos stay visible. The DS keeps control even in the worst conditions.
Technical parameters that matter:
- Fabric weight: 40–60 g/m² — light enough to roll tight and elastic-band into a single hand-off
- Total garment weight: under 180 g
- Waterproof rating: ≥10,000 mm water column for genuine heavy-rain protection
- Construction: seam-taped on every seam, minimal panel count, reversed coil full-length zipper you can work with gloved hands
- Cuffs: narrow elastic, designed to seal inside glove gauntlets — not over them — so cold water can't get in at the wrist
The rear drop tail matters too. It covers jersey pockets and deflects rear-wheel spray when a rider is tucked on the drops at 50 km/h. The short front hem keeps fabric clear of the hands.
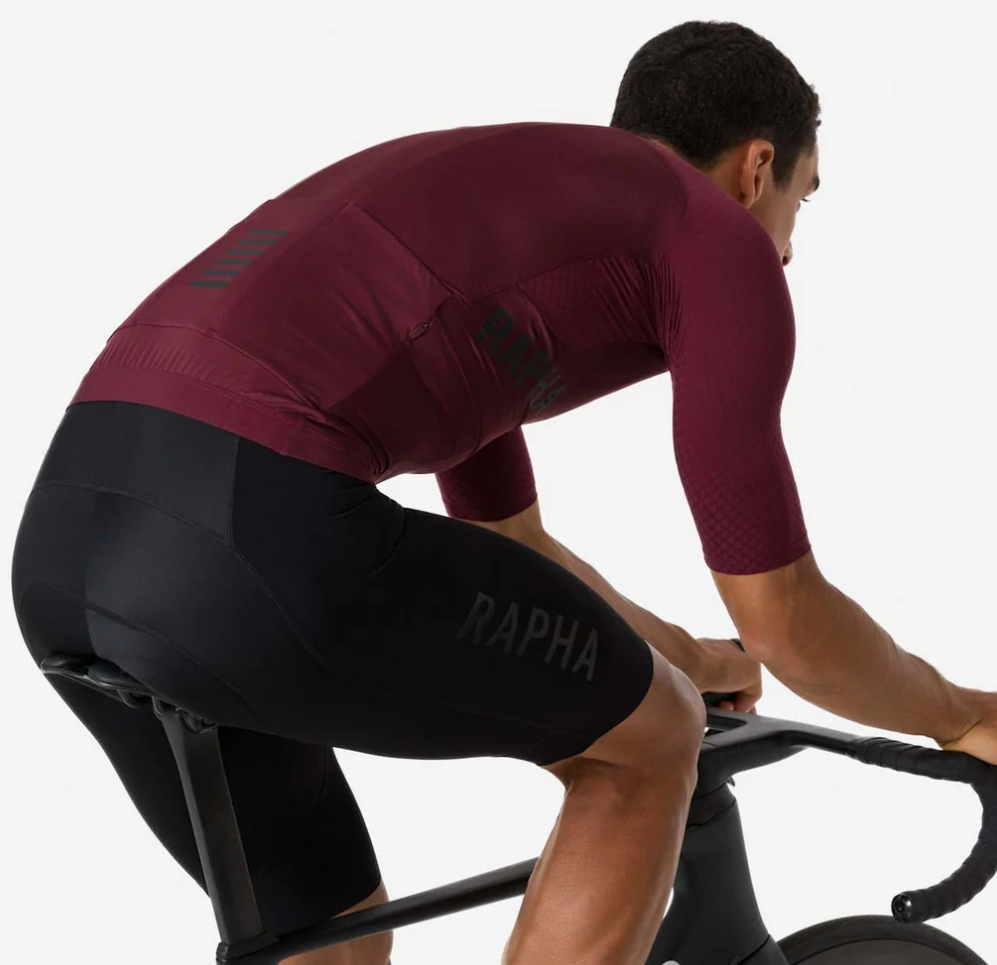
The Gabba Jersey: When Capes Aren't Enough
Two hours of wet descending is not a passing shower. That's where the Castelli Gabba RS or Perfetto replaces or supplements the cape. You get a Gore Windstopper / Gore-Tex Infinium membrane on the front panels. The back uses a breathable stretch fabric. The face gets DWR treatment. Water column sits around 10,000–20,000 mm at the front — right where rain hits hardest.
Weight runs 200–280 g depending on size and generation. The cut follows race geometry: close sleeves, extended drop tail, laser-cut cuffs that fit neatly under gloves. At speeds above 35 km/h, airflow moves through the stretch back panels and underarm zones to pull heat away. Rain still can't get through the front.
The 2014 Tour de France Stage 5 is a clear example. Torrential rain hit the cobbled northern sectors and forced constant kit changes. Teams ran transparent capes on the approach sections to keep sponsor logos visible. Before the critical pavé, riders stripped to Gabba-style jerseys. That move cut cape flap and removed water-weight drag on 50 km/h crosswind sectors. Mechanics pre-opened zipper pulls and, in some cases, trimmed cape tails to stop them snagging in rear wheels mid-chaos.
Deployment Protocol: The 90-Second Window
Mechanics pre-stack capes on the rear-seat bench in rider order — GC leaders first, domestiques last. Race radio signals heavy rain ahead. The DS calls riders back in waves of two or three. Car speed and rider speed get matched within 5 km/h. The cape comes through the rear window. One arm hooks it. Done.
A brief shower or a high-power sector changes the plan. Mechanics hand over only a gilet and cap first, saving the full cape for the next car contact. The whole protocol gets set before the stage starts: "First call is cape plus gloves. Second call is heavier jacket at the next drop." No decisions under pressure. No wasted time.
Three Price Tiers: What to Buy
Level | Option | Notes |
|---|---|---|
Pro | Castelli Gabba RS / Gore Shakedry | Race cut, Windstopper/Shakedry membrane, 100–150 g for Shakedry |
Intermediate | Maap Escape Pro / Assos Equipe RS Rain | Full seam taping, laminated fabric, race-leaning fit |
Entry | Van Rysel 500 Rain Cape (Decathlon) | Transparent, seam-taped, low cost — solid for emergency use and easy to keep several on hand |
Core buying criteria at any budget: seam-taped construction, cuffs that seal inside gloves, a zipper pull large enough for full-finger gloves, packable to half a jersey pocket. Everything else is just a variation of those four things.
Core Insulation: Thermal Base Layer Cycling Rain & Hydrophobic Fabrics
Most riders obsess over the outer layer. Mechanics know the real work happens underneath.
The base layer's job in cold rain is not to keep you warm in any traditional sense. Many professional squads now rely on custom cycling thermal base layers engineered around specific climate conditions and rider preferences.It blocks evaporative cooling at the skin — that sharp, brutal chill that hits a soaked rider who crests a summit and drops straight into a 25-minute descent. Get this layer wrong, and no cape in the world saves you.
Fabric Science That Makes a Real Difference
The physics are simple. Skin-tight contact stops sweat from pooling. An inner hydrophilic face pulls moisture off your skin. An outer hydrophobic face dries fast and sheds water weight. The whole system targets minimal water retention + maximum dry speed — a base layer holding 80 g of absorbed water acts like a refrigeration unit strapped to your chest.
Material benchmarks for wet racing:
- Hydrophobic synthetics (polyester/nylon): lowest water retention, fastest dry time, hold insulation even when soaked
- Merino-synthetic blends (~90% merino / 10% nylon): better odor control across multi-day stages, stronger than pure wool, noticeably faster dry time
- Polartec Alpha Direct panels : open-structure insulation that stays warm when wet, keeps much of the fabric off the skin — the mechanic's top pick for cold mountain stages
Weight follows temperature, not personal taste:
- 120–150 gsm : showery days, high-intensity shorter stages
- 160–200 gsm : sustained cold rain, long mountain descents like the Stelvio or Tourmalet
Construction Details Teams Specify
Flatlock or seamless stitching at every shoulder and underarm contact point — non-negotiable under tight race capes that create friction over hours of movement. Brushed interior traps small air pockets against your core without adding bulk under a shell. Elastic-bound neck and armholes seal the microclimate without restricting your riding position.
Soigneurs sort base layers by rider and temperature band the night before. Cold, wet mountain stages call for at least two to three identical hydrophobic layers per rider — one on the body, dry backups vacuum-packed in the team car for a mid-stage swap if temperatures fall lower than forecast.
Three Price Tiers
Level | Option | Key Spec |
|---|---|---|
Pro | Pactimo Alpha Core SL / Castelli Alpha Base | Alpha Direct core panels, mesh sides, ~USD $80–130 |
Intermediate | Merino-synthetic long sleeve (~150–200 gsm) | Flatlock seams, anti-odor, USD $60–100 |
Entry | Hydrophobic polyester compression base | Quick-dry, flatlock seams essential, USD $30–60 |
Core buying criteria: hydrophobic or low-absorption fabric, flatlock or seamless construction, skin-tight race fit with no bunching under a shell, brushed or lofted interior over the chest and back. Sleeve length matters less than those four. A sleeveless Alpha-style core base paired with arm warmers beats a heavier full-sleeve wool piece on any sustained wet descent — less water weight, same core protection, much faster to dry between stages.
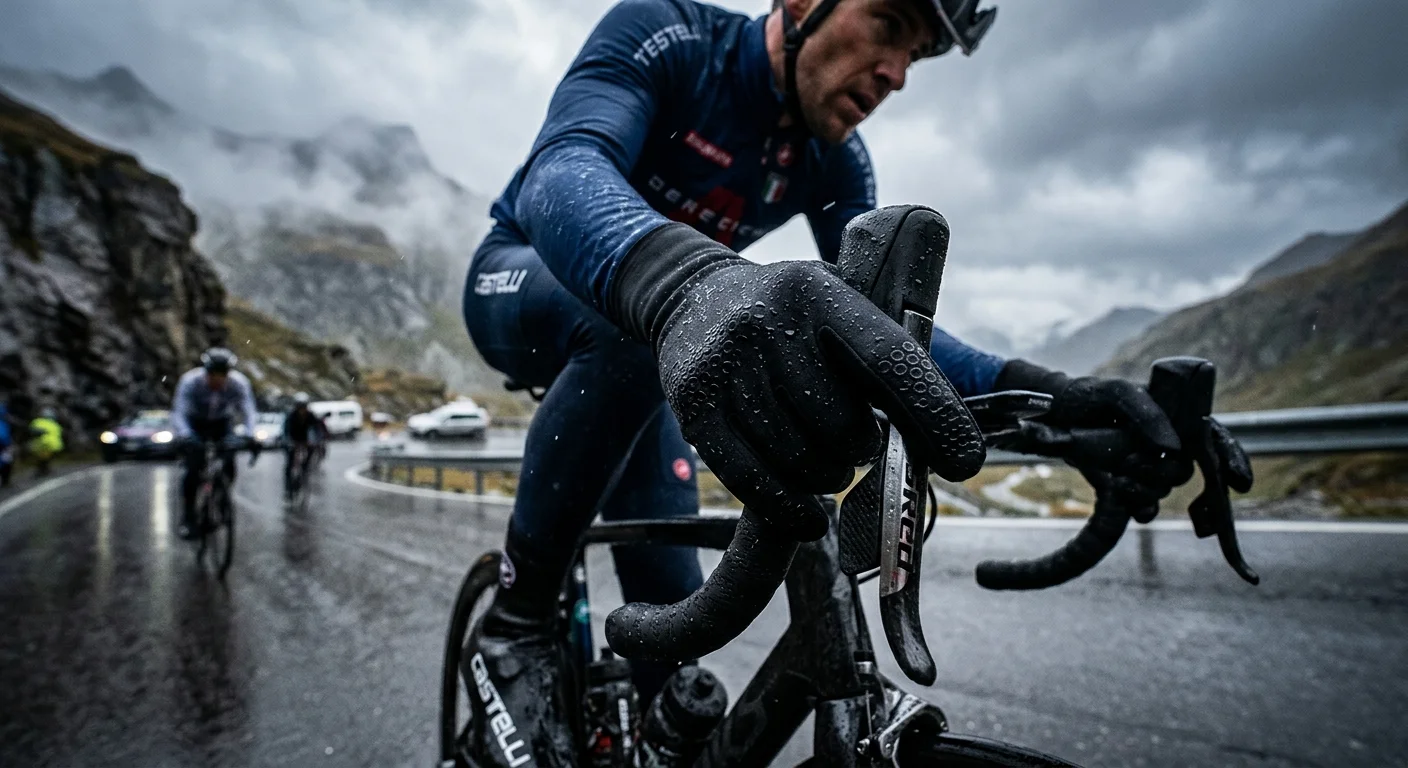
Handlebar & Shift Control: Wet-Weather Cycling Gloves for Peloton Riding
Mechanics don't gamble on gloves. A soaked palm slipping across carbon hoods at 65 km/h into a switchback — that's not a comfort problem. That's a crash waiting to take down twelve riders.
The requirement is simple but strict: maintain friction and full dexterity in a soaking downpour .Retailers looking to expand their wet-weather cycling collections often source performance gloves through a specialized cycling gear wholesaler with race-proven product lines. The wrist seal also matters. Water from jacket sleeves will pool in your palm on a long descent if the cuff doesn't block it.
What Pro-Tier Gloves Do Differently
Palm construction separates real wet-weather gloves from everything else. Synthetic suede or PU microfibre palms with laser perforations and printed silicone grip zones hold friction on wet bar tape. Smooth leather loses grip on a wet surface. Pro palms don't.
Grip coverage targets three zones:
- Index and middle fingertips — for lever blades
- The thenar eminence (the fleshy base of your thumb) — for hood tops
- The ulnar edge (the pinky side of your hand) — for drops
Skip the big gel pads. They make lever throws harder and kill feel in the wet.
Finger construction matters just as much. Thin, high-stretch panels let your fingers close around hoods without fabric bunching at the knuckles. One-finger braking from drops and tops must stay clean and responsive. On technical descents, mechanics pre-set lever reach 1–2 mm closer than dry setup to account for gloved-hand reach.
Cuff overlap of 25–35 mm past the wrist crease is the one waterproofing detail you can't skip. No external straps either — they snag other riders' bars in a tight peloton.
Three Price Tiers
Level | Option | Key Spec |
|---|---|---|
Pro | Castelli Perfetto RoS Glove | Gore-Tex Infinium shell, DWR silicone palm, ~30 mm cuff overlap |
Intermediate | Pearl Izumi Quest WP / Rapha wet-weather | Membrane + synthetic leather palm, modest gel, sealed cuff |
Entry | Van Rysel 900 / Specialized Deflect | Water-repellent membrane, silicone stripe palm, 40–60% below premium pricing |
Core buying criteria: Look for silicone or high-friction print on the fingertips and central palm. The cuff needs to extend 25–35 mm past the wrist crease. Zero external closures. And check that one-finger brake modulation still works in a soaked glove before you race in it.
Foot & Cleat Protection: Cycling Overshoes & Wet Conditions Shoe Covers
Numb feet don't brake. That's the mechanical truth behind every overshoe choice a WorldTour soigneur makes on a cold, wet mountain stage.
Below 8°C with steady rain, foot numbness cuts your power output. Worse, it kills brake modulation on long technical descents. Teams don't treat overshoes as comfort accessories. They treat them as safety-critical equipment — ranked alongside brake pads and tire pressure on the pre-stage checklist.
What's Inside a Pro Rain Bag: Overshoe Specs
Soigneurs prep two thickness options per rider the night before:
Light rain bootie (2 mm neoprene or thin waterproof laminate): 5–12°C wet conditions, high-intensity stages where pedal sensitivity matters
Full neoprene bootie (3–4 mm): 0–8°C persistent rain, long mountain descents — the Stelvio, the Galibier, any stage where riders descend for 25+ minutes in sleet
Every WorldTour squad lands on the same construction checklist:
≥3 mm neoprene or waterproof laminated shell
Sealed YKK rear zip with internal storm flap — zipper sits at the rear ankle, clear of crank arms and cleat zones
Reinforced rubber or PU binding around the 3-bolt cleat window to stop fraying from repeated clip-in/out
High cuff extending above the malleolus , overlapping the bib tight leg to block shin runoff
Reflective rear tab for visibility in team car convoys
The Castelli Diluvio PRO (3–4 mm neoprene, ~€55–80) and Sealskinz All Weather road overshoes (3 mm neoprene, sealed seams, ~€60–80) show up most often on team kit lists for cold Grand Tour stages. Both tick every box on that checklist.
The Mid-Race Fitting Protocol
Mechanics almost never fit overshoes mid-race. But conditions can shift fast — a long neutralization before a sleet-soaked descent forces a quick change. Mechanics have a set routine for this. Staff hold the bike. The rider stays clipped in on one foot. The overshoe goes on toe-first, then zips in one motion. Sub-30 seconds per foot. That's why mechanics skip zipless aero designs for race day. A clean rear zip is non-negotiable under time pressure.
Before key climbs, mechanics also spray cleat and pedal interfaces with water or light solvent. This clears grit packed under the overshoe's cleat window — the same routine used on cobbled Classics.
Three Price Tiers
Level | Option | Key Spec |
|---|---|---|
Pro | Castelli Diluvio PRO / Sealskinz All Weather | 3–4 mm neoprene, sealed zip, reinforced cleat window, €55–80 |
Intermediate | Endura Luminite II / Altura road covers | PU-coated stretch or light neoprene, high-vis panels, rear waterproof zip, €35–60 |
Entry | RockBros neoprene / Van Rysel 500-series | 2–3 mm neoprene, rear zip, basic cleat cutout, €15–30 |
Core buying criteria: Sealed rear zip with storm flap. Reinforced PU binding around the cleat window — not just a cut hole in raw neoprene. Cuff height above the ankle bone. Everything else — branding, aero shaping, colorways — comes second to those three points.
Visibility & Optics: Anti-Fog Cycling Glasses Rain & Lens Swaps
Fogged lenses at 60 km/h on a wet descent aren't an inconvenience. They're a blackout.
WorldTour mechanics treat eyewear with the same precision they bring to brake pad selection. The night before a rain-forecast Alpine stage, lens kits get pre-treated in the truck — hydrophobic and anti-fog spray goes on clear and low-light shields before anyone reaches the start line. A cold lens on a sweating face mid-race is the last thing a mechanic wants. A rider fumbling with a fogged-up shield through a hairpin sequence is worse.
The Fogging Problem: It's Physics, Not Bad Luck
Fogging starts when warm, moist air from your face hits a cold lens surface. On a slow, grinding 8 km/h climb in sleet, almost no airflow moves between lens and face. Coatings alone can't save you there.
The mechanics' answer is a two-layer system : anti-fog treatment on the inner lens surface, working alongside structural ventilation built into the frame. One without the other won't hold up.
What that structure looks like in practice:
- Top and bottom vent slots at lens edges create a pressure differential — warm air exits up, cooler air draws in from below
- Angled lens-to-face gaps on wraparound designs keep airflow moving, even with your head dropped into an aero position
- Ventilation channels cut into the upper frame pull moist air away from the lens interior before condensation gets a chance to build
Cycling gear factory anti-fog inner coatings handle the leftover moisture. Mechanics add spray treatments before each stage for extra protection — but those wear off after cleaning. Structural ventilation is what does the real work over time.
Hydrophobic Coatings: The Other Half
Rain doesn't just fog lenses. It beads on the outer surface and bends light, turning a fast descent into a blur of distorted color and false edges. A solid hydrophobic outer coating forces water droplets to sheet off instead of sitting there.
Pro-spec lenses use dual coatings : hydrophobic on the exterior to shed rain and road spray, oleophobic on the inside to repel sweat smearing from a gloved wipe. Here's the part that doesn't get enough attention — mechanics swap in clear lenses for darkening conditions, and those clear shields carry the same coating stack as primary tints. Going clear doesn't mean giving up rain performance.
One mechanic rule you almost never hear discussed: wipe the outer surface only . A gloved finger dragged across the anti-fog inner coating breaks down the treatment fast. Teams tell riders straight — outer wipe only, fingertip, one pass.
Grand Tour Scenario: The Alpine Fog Bank Swap
On high Alpine stages with summit fog banks — the kind that turns a lit peloton into grey shapes twenty meters ahead — service motos move up carrying pre-warmed clear shields . The warming step matters. A cold clear lens slipped onto a hot face fogs straight away. Mechanics keep shields in their jacket pockets before the hand-up window to avoid exactly that.
The swap follows a practiced sequence. For GC riders and breakaway members, mechanics stand roadside at the fog-line entry point with frames already set up in clear configuration. Full glasses exchange — not a bare lens swap. No dropping hardware into standing water or grit-packed road surface. The tinted pair goes back to the car for cleaning. Total time: under fifteen seconds.
Modern pro glasses make this work. Magnetic or snap-in shields — no screws, no tools, one motion. Mechanics drill 10–20 second exchanges at the car door during training camps. By race day, it's automatic.
Frame Retention: The Detail That Doesn't Get Enough Discussion
At 70 km/h in a crosswind, wet frame surfaces and helmet strap pressure can lift glasses right off the nose bridge. That's why WorldTour mechanics check glasses fit in the exact helmet model a rider races — not a similar one, that specific one. Aero road shells can interfere with oversized shields in ways that only show up at speed.
TR-90 polymer frames handle this best. They're light and flexible enough to absorb wind shear without deforming. They also hold consistent nose bridge pressure even when wet. Rubberized nose pads and temple tips add grip on a sweating face. Adjustable nose bridges let mechanics set the exact lens-to-face distance — close enough to block spray, far enough to keep airflow moving.
Three Price Tiers
Level | Option | Key Spec |
|---|---|---|
Pro | 100% Speedcraft / Rudy Project Cutline | Hydrophobic + oleophobic dual coating, top/bottom vent slots, magnetic or quick-release lens swap, TR-90 frame, multiple nose bridge options |
Intermediate | Oakley Sutro Lite / POC Devour | Prizm / Clarity low-light lenses, Unobtainium or adjustable grip retention, oleophobic coating, partial-frame upper ventilation |
Entry | 720 Armour Armis / clear-lens road shields | Large shield with basic hydrophobic coat, adjustable nose piece, manual snap lens swap — enough for club-pace rain rides |
Core buying criteria — four things that matter regardless of budget:
Verified hydrophobic outer coating — check the product spec sheet, not just the marketing copy
Top or lower lens vents , not just a large open frame — vents need to create directional airflow, not just gaps
Adjustable nose bridge — lens-to-face distance is your main tool for managing fog
Tool-less lens swap , or run two identical frames pre-configured for tinted and clear conditions
Everything else — colorways, branding, aero shaping — comes after those four. The Rudy Project Cutline's ImpactX Photochromic 2 lenses take a different approach to the swap problem. They auto-adjust across shifting Alpine light conditions. For riders who don't want to deal with lens exchanges mid-ride, photochromic is the closest thing to a one-lens solution in real Grand Tour conditions.
Wet Descents Traction: Wet Road Cycling Tires Grip & Compound Management
Grip on a wet alpine descent doesn't come from tread. That's the first thing WorldTour mechanics will tell you — and it goes against almost everything casual riders believe about rain tires.
Road contact patches are small and curved. They can't channel water the way a car tire does. What keeps a rider on line at 70 km/h through a soaked hairpin is compound chemistry, casing compliance, and pressure management. Tread depth matters very little. One industry-wide technical consensus puts it plainly: "Great rubber with no tread will be a lot more effective than poor compound and deep tread." Mechanics don't stock separate rain-tread road tires. They stock multiple wheels pre-mounted with the same rim, a high-TPI wet-optimized compound in 25–28 mm, and a set pressure reduction. That's the whole system.
Compound First: What to Look For on the Label
Silica-rich and advanced hybrid compounds lead wet race performance. They improve hysteresis — the rubber's energy-absorption on cold, smooth asphalt — and hold chemical adhesion even with a water film present. Look for these compound labels:
Continental Black Chili (GP 5000 S TR)
Vittoria Graphene 2.0 (Corsa G2.0, Corsa Control G2.0)
Pirelli SmartNET Silica (Cinturato Velo TLR)
Schwalbe ADDIX SpeedGrip (Pro One)
Skip high-durometer "TT-only" rubber in wet conditions. Those compounds put rolling resistance ahead of hysteresis. On a near-freezing Col de l'Iseran descent, that trade-off turns dangerous fast.
Casing matters almost as much. High-TPI constructions (250–320 TPI preferred; 120 TPI minimum) flex more readily into wet asphalt micro-texture. That physical contact with the road surface breaks the water film between rubber and road. A stiff commuter casing with a good compound still loses out to a supple race casing at the same compound and pressure.
Pressure Management: The Mechanic's Pit Sheet
The standard WorldTour wet-descent protocol is a 10% pressure reduction from dry baseline . Mechanics apply it before the stage start if rain is forecast all day, or at an intermediate service point if weather turns mid-race.
Here's what that looks like in practice for a 70–75 kg rider:
25 mm tires:
- Dry baseline: 80 psi front / 85 psi rear
- Conservative wet: 75F / 80R
- Aggressive wet descent: 70F / 75R
28 mm tires:
- Dry baseline: 70 psi front / 75 psi rear
- Conservative wet: 65F / 70R
- Aggressive wet descent: 60F / 65R
Mechanics adjust in 1–2 psi increments using a digital gauge — never by feel. Heavier riders add 2–4 psi above these figures. Lighter riders subtract 2–4 psi. The front tire usually runs 3–5 psi lower than the rear. Front-end grip comes first. Losing the front on a wet descent is the scenario teams fear most.
Tubeless setup adds a real margin. Going tubeless lets mechanics drop pressure an extra 2–5 psi compared to tubed setups, with the same pinch-flat risk. On a sleet-soaked Col d'Izoard descent, that extra compliance is what separates confident braking from guesswork.
Three Price Tiers
Level | Option | Key Spec |
|---|---|---|
Pro | Continental GP 5000 S TR / Vittoria Corsa G2.0 | Black Chili or Graphene 2.0 compound; 220–320 TPI casing; tubeless-ready; 250–290 g in 25–28 mm |
Intermediate | Pirelli Cinturato Velo TLR / Schwalbe Pro One | SmartNET Silica or ADDIX race compound; reinforced casing; higher puncture resistance; a bit heavier |
Entry | Continental Ultra Sport III | PureGrip silica-based compound; lower TPI; solid wet traction at sensible pressures for training use |
Core buying criteria — four non-negotiables regardless of budget:
Silica-rich or advanced hybrid compound — check the spec label, not the marketing headline
High-TPI casing — 120 TPI minimum; 250+ TPI is the clear choice for alpine wet conditions
25–28 mm width — 28 mm is now the WorldTour standard; go wider or run lower pressure up front if mixing sizes
Tubeless-ready construction — the extra pressure range it gives you is a direct wet-traction upgrade
Everything else is secondary. A $40 tire with a genuine silica compound and a supple 120-TPI casing, run 10% below dry pressure, will out-grip a $90 tire on a stiff casing with a TT-spec compound in standing water. Every time.
Wet Descents Modulation: Disc Brakes Wet Weather Performance & Pad Selection
Controlled road testing gives a real number to what WorldTour mechanics already know by feel. Disc brakes are 25 seconds faster over a 5 km wet descent . Stopping distances from 50 km/h run 5 meters shorter than rim brakes in standing water. That gap doesn't close as a rider builds confidence. It's physics, not technique.
The weight argument against discs falls apart on mixed mountain stages. An extra 500 g costs 5 seconds on a 5 km climb . A 25-second descent advantage covers that penalty five times over. Mechanics doing the math before a wet Alpine stage aren't debating disc versus rim anymore.
Pad Compound: The Decision That Happens the Night Before
Two pad types. One clear protocol.
Organic/resin pads give you smoother modulation and a quieter lever feel. The bite builds gradually — exactly what riders want for precise speed control through switchbacks. The trade-off is durability. Wet weather and sustained heat wear resin pads down fast.
Metallic/sintered pads stand up to water and rotor heat without breaking down. The initial bite is less gradual, but they hold steady performance across a 25-minute Galibier descent in sleet. That consistency is what mechanics count on when the forecast goes cold and wet.
The split is simple: resin for dry and short-effort days; metallic for wet, steep, or long-descent stages. Mechanics check pad selection against the stage profile the night before — not at the sign-on.
Pre-Stage Rotor and Caliper Protocol
Every mechanic runs the same three checks before a rain-forecast stage:
Wipe rotors with isopropyl alcohol — clears oil from chain lube splash, restores bite, cuts squeal under the first braking load
Confirm caliper alignment — loosen mounting bolts, squeeze the lever to center the caliper, retighten; this removes drag that builds up under heat cycling in rain
Check lever feel — a spongy lever means hydraulic bleed is needed before the stage, not during it
Pads can glaze from previous heat cycles — that's a shiny, hardened surface. Mechanics sand it back to recover friction before the start. Glazed pads feel fine on flat roads. On a steep wet descent, that false confidence causes real problems.
Rotor Sizing and Heat Management
Standard WorldTour road-disc setups use 160/180 mm rotors . A larger diameter means more surface area to shed heat. That matters a lot on 20+ minutes of technical descent with repeated braking. On wet or muddy stages, mechanics go with 180 mm where the frame allows it.
Three Price Tiers
Level | Option | Key Spec |
|---|---|---|
Pro | Shimano Dura-Ace BR-R9170 / SRAM Red eTap AXS Hydraulic | Premium hydraulic feel, consistent modulation curve, full metallic pad compatibility |
Intermediate | Shimano Ultegra / SRAM Force AXS | Near-pro lever feel, broad pad compound availability, better heat handling than entry systems |
Entry | Shimano 105 / Tektro HD-E745 | Solid hydraulic platform, accepts metallic pads, reliable modulation for training-pace wet descents |
Core buying criteria: hydraulic systems — cable-actuated disc brakes don't deliver the steady wet modulation that the data above is built on. Check metallic pad availability for your caliper model before you buy. Go with 160 mm rotors at minimum. Choose 180 mm if your frame accepts it and your descents run long.
Post-Finish Recovery: Skincare, Chamois Care & Professional Cycling Rain Clothing Maintenance
The finish line is not the end of the work. For WorldTour soigneurs, a rider crossing after five hours in cold rain marks the start of the next stage.
Saturated kit comes off within the first thirty minutes — no exceptions. Wet chamois against skin past that window stops being uncomfortable and starts causing real damage. Maceration, folliculitis, saddle sores — these build across three weeks. Mechanics and soigneurs treat this window with the same urgency as tire pressure before a descent.
The 30-Minute Post-Stage Protocol
Strip, flush, rack — in that order.
Soaked bibs, base layers, and rain jackets come off right away. Flush the chamois with cold water before anything dries in. Road grit, salt, urine, embrocation residue, chamois cream — all of it turns abrasive or breeds bacteria once it cures into the foam. Teams don't let that happen.
Wet kit goes onto forced-air drying racks at 25–35°C . High airflow, not high heat. Heat destroys elastic, breaks down laminate bonds, and kills DWR treatments faster than repeated wash cycles ever will. Every WorldTour truck carries this setup. No team infrastructure? Hang saturated shells in front of a box fan before you do anything else.
Dedicated wet-weather trunks on the team bus hold at least two to three complete spare kit sets per rider — bibs, base layers, rain jackets. Soigneurs can run full finish-line swaps without waiting on laundry. Wet and muddy kit goes straight into sealed crates. Staff handle badly soiled shorts with nitrile gloves. The infection-control reason is simple — contaminated kit carries real risk.
Skin and Chamois Area Care
The soigneur sequence runs like this:
Lukewarm shower with mild, non-fragranced cleanser across saddle and armpit zones. This removes grit, sweat salts, and chamois cream residue before folliculitis gets a foothold.
Pat dry — gluteal fold, perineum, all of it. No rubbing. The skin has already taken enough friction.
Barrier application on soaked zones: zinc-oxide or petrolatum-based barrier for riders with existing irritation or maceration history. Use a lighter pH-balanced emollient on intact skin.
Visible maceration (whitened, wrinkled skin from long wet exposure) needs breathable, pH-balanced emollients. Use nothing occlusive or perfumed until the skin barrier recovers.
Early-stage saddle sores get topical antiseptic, hydrocolloid dressings overnight, and non-irritant chamois cream at the next start.
Chamois Cream: Three Price Tiers
Level | Product | Key Spec |
|---|---|---|
Pro | Assos Chamois Crème (~€19–25 / 140 ml) | pH 5.0–5.5, matte finish, menthol cooling, micro-tear protection |
Intermediate | Mad Alchemy / Madefresh | Non-petroleum base, low-allergen fragrance, shea or beeswax formula |
Entry | Chamois Butt'r Original (~US$18–20 / 8 oz) | pH-balanced, non-mentholated, single-use sachets available for stage racing |
Application rule: thin, even layer straight onto the chamois pad. Too much promotes slip and kills saddle stability — a real problem at race pace.
Washing Gore-Tex & Technical Rain Clothing
This is where most riders — and some amateur team managers — destroy expensive kit for no good reason.
Core wash parameters:
- 30°C , delicate or synthetic cycle, slow spin at 600–800 rpm
- Turn shorts inside out so the chamois foam gets full contact with water and detergent
- No fabric softener, no bleach — softener coats DWR-treated fibers and wipes out water-bead performance for good
- Gore-Tex shells: normal powder detergent at 40°C works fine. For other technical membranes, use Nikwax Tech Wash — 100 ml per load in soft water, 150 ml in hard water, two garments per cycle maximum
- Never store wet kit in a sealed bag beyond a few hours. Bacterial growth spikes fast inside closed, damp nylon
DWR restoration — the step most riders skip until it's too late:
Reproof once water stops beading and the face fabric soaks through. The protocol:
- Spray reproofer onto a clean, damp garment . Focus on collar, shoulders, seat, and forearms — the zones that take the most friction and rain contact
- Gore-Tex: spray-on only — wash-in reproofers risk blocking membrane pores
- Non-Gore technical shells: Nikwax TX.Direct wash-in works at 100 ml per garment, same 30°C / 600 rpm settings
- After spraying, tumble dry at medium heat to reactivate DWR chemistry, then hang for fifteen minutes
Field repairs that hold:
- Peeling seam tape: iron-on seam tape from outdoor apparel and repair suppliers — clean the area, press it on
- Small tears in rain capes or jackets: Gore-Tex fabric patches on the interior, or standard tent-repair adhesive patches
- Mid-race emergency: Gorilla Tape pressed to the inside surface makes a solid waterproof patch that holds through finish-line conditions
Core buying criteria for skincare in wet conditions: go with zinc-oxide or dimethicone-based formulas for riders with a maceration or saddle-sore history in rain. Intact skin does well with pH-balanced, non-occlusive emulsions. Skip high menthol, strong fragrance, or lanolin for riders prone to contact dermatitis — that irritation stacks up across three weeks faster than any saddle sore will.
Conclusion
Pro mechanics don't guess. Every layer, every compound, every lens tint used in a Grand Tour rain stage gets stress-tested against brutal conditions. Most riders never face those extremes — but now you have that knowledge in your hands.
Take three non-negotiables from this guide:
A breathable waterproof cycling jacket that keeps you dry without overheating
A tire compound built for wet asphalt, not dry-road performance
Overshoes that seal tight at the cuff
Everything else — anti-fog glasses, hydrophobic base layer, post-ride skin care — builds on top of those three.
Your next wet ride isn't something to just survive. It's a systems test. Run it well.
Start simple. Check your local forecast, match the gear tiers to your budget, and pick one category to upgrade first. Pro pelotons didn't build their rain kits in a single day. You don't need to either. But they always showed up ready — and so can you.