Nobody talks about this part of cycling. But almost every woman who rides has Googled it at 11pm, wincing on the couch after a long ride.
The soreness. The swelling. The numbness that lingers for days. Or that frustrating cycle of infections that makes you wonder if your body is just incompatible with this sport you love.
It isn't.
The problem isn't you — it's the equipment. Many riders switching to custom women's cycling shorts notice immediate improvements in pressure distribution and ride comfort.Most gear was built around male anatomy. It doesn't account for the specific pressure points of the female perineum in the saddle.
This guide tackles that head-on. A women's padded cycling shorts fit specialist and sports medicine expert break it down together:
Why soft tissue pain happens in the first place
How to read your own symptom patterns as a diagnostic tool
A five-tier action system for finding the best bike saddle for women based on your actual sit bone width
How to adjust saddle tilt to measurable, real-world parameters
How to build a hygiene and protection routine that makes long miles comfortable again
Symptom Diagnosis: Mapping Pain, Numbness & Recurrent Infection Patterns
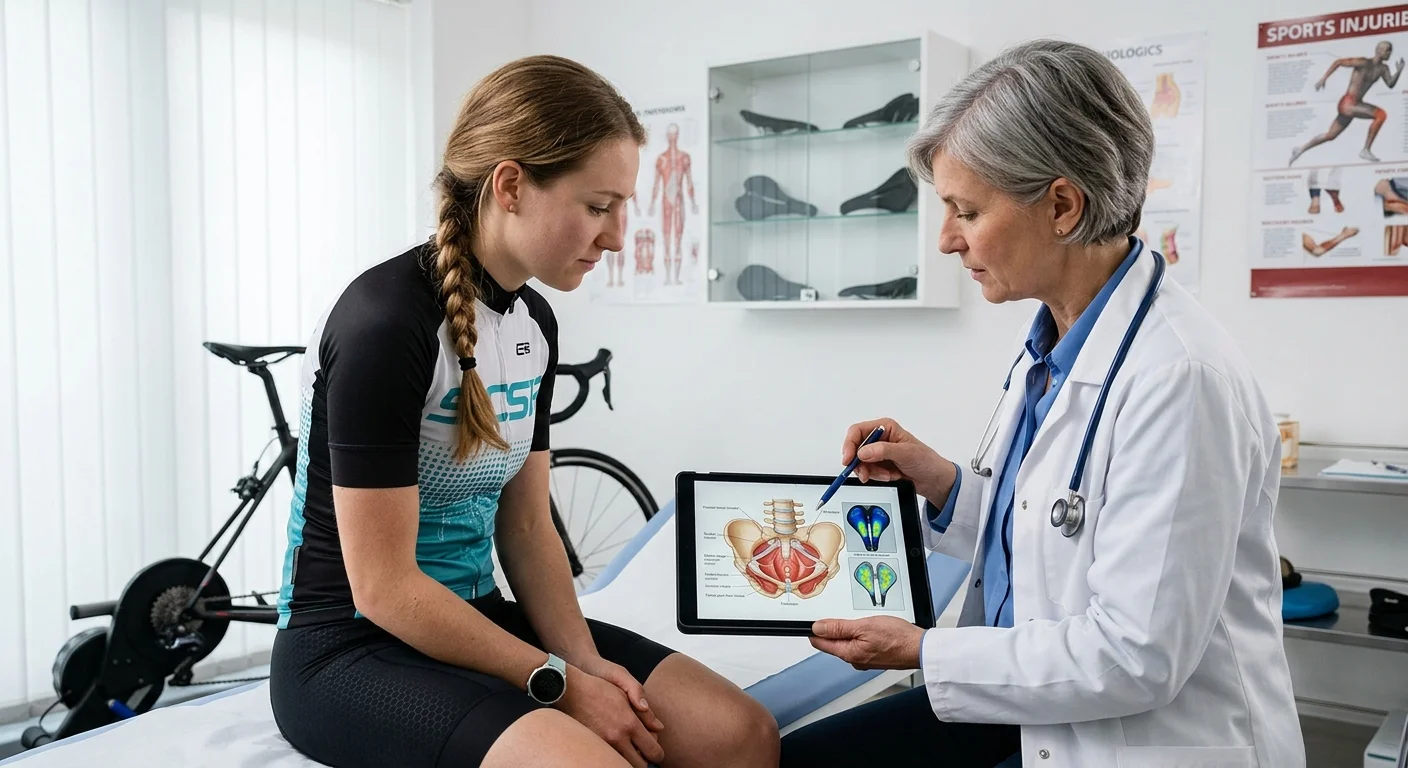
Three distinct pain patterns show up among female cyclists. Each one points to something different.
Where it hurts matters more than how much it hurts.
The Three Core Symptom Clusters
1. Soft Tissue Pain (Localized, Mechanical)
Aching or rawness concentrated at the sit bones or labia majora. It worsens during the ride and eases within 24 hours of rest. This is pressure and friction. A better saddle fit and chamois upgrade can fix it.
2. Numbness & Tingling (Nerve Compression)
That "dead zone" feeling that lingers hours after you dismount? It follows a specific nerve pathway — not a scattered ache, but one region going quiet. In female riders, cycling numbness traces to pudendal nerve compression. Sustained saddle pressure on soft tissue is the direct cause.
3. Recurrent Infections (UTI / Yeast)
Infections appearing within 48–72 hours of long rides are not random. Moisture, friction, and a weakened skin barrier are the trigger. The timing is the tell.
Track it like data. Note where discomfort begins, when it peaks, and whether it follows your mileage. Experienced cycling apparel suppliers often recommend symptom tracking before changing saddle or chamois setups.Patterns reveal root causes faster than any single symptom alone.
Anatomical Analysis: Why Soft Tissue Pressure Cycling Hits Women Harder
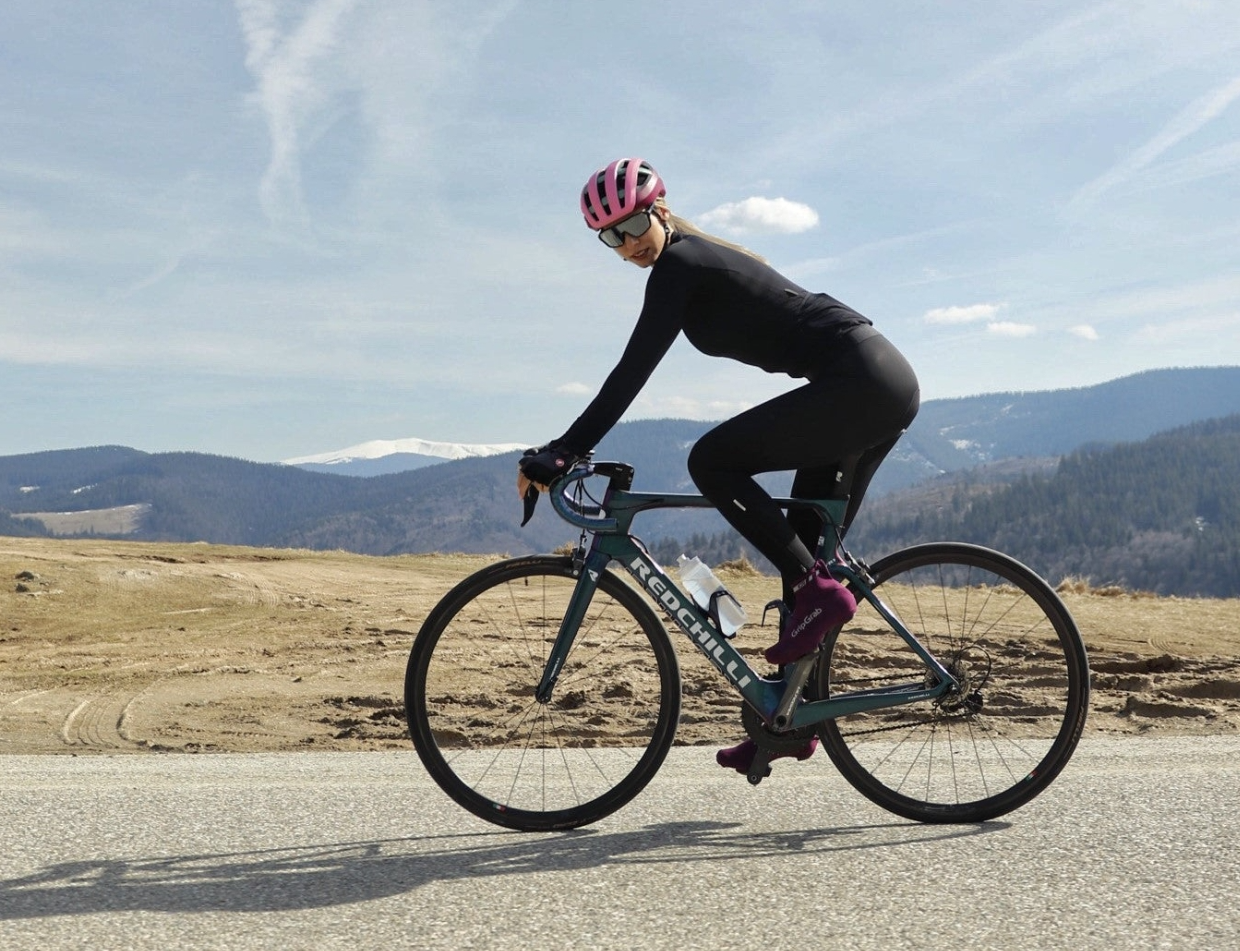
Here's a number that should stop you cold: conventional saddles can reduce blood flow to perineal tissues by 82% during cycling . Pressure hotspots often exceed 100–150 kPa — close to double the ~60 kPa threshold where arterial occlusion and nerve compression start.
This isn't about comfort. It's a circulation and compression problem. It's built into how female anatomy physically contacts a saddle.
The Pelvic Architecture Problem
Male and female cyclists don't just differ in sit-bone width. They load the saddle in completely different ways.
In male riders, peak pressure tends to shift forward during pedaling. In female riders, pressure stays concentrated in the center . It bears down on both sides of the ischium — and straight onto the vulva, labia, and perineum.
The cause is structural. Women tend to have a wider, shallower pelvic arch . That shape leaves little to no clearance between the vulvar area and the saddle nose. The average female sit-bone width is 15.5 cm — but width alone doesn't tell the full story.
Soft tissue distribution does.
A saddle can match your sit-bone measurement and still overload the labia and perineum. That's because pressure mapping follows pelvic rotation and torso angle , not width alone. In aggressive riding positions, forward pelvic tilt pushes loading toward the pubic symphysis. The inferior pubic rami — the V/U-shaped skeletal structure between the sit bones — loses its ability to carry that load. Soft tissue ends up absorbing pressure that bone was built to handle.
The data backs this up:
58% of female cyclists report genital numbness
Around half deal with persistent soft tissue swelling
44% report vulva- or labia-specific pain
Why "Women's Saddles" Don't Always Solve It
Cutouts seem like an obvious fix. But pressure mapping tells a different story. In some fits, cutouts pull surrounding tissue inward — shifting pressure into the labia, not away from it.
Thick padding is another trap. Saddles with uniform padding over 20 mm raise labial pressure by an average of 35% compared to firmer saddles with targeted 10–12 mm padding zones . More cushion doesn't equal less compression. It can make things worse.
The "women's-specific" label, without a proper fit assessment behind it, is mostly marketing.Leading OEM/ODM cycling wear brands increasingly focus on anatomy-based pressure mapping instead of generic gender labeling.
Tier 1: Immediate Posture Correction & Saddle Tilt Adjustment Female Parameters
Start here. Before you buy anything.
Most women assume the fix requires spending money — a new saddle, a new chamois, a new everything. But the adjustment that changes everything costs $0 and takes under 15 minutes. It's the angle of the saddle you're already sitting on.
A single degree matters more than you think.
Why Saddle Tilt Is the First Lever to Pull
A saddle nose tilted even a little upward presses straight into the vulva and perineum. That's not just discomfort. It's a mechanical force hitting soft tissue with no bone beneath it to absorb the load. Tilt the nose too far down, and you slide forward onto the narrowest part of the saddle. You've traded one pressure problem for another — and your hands and wrists end up carrying extra weight.
The range that works is narrow. Most women find relief within 0° to -2° of tilt — measured along the sit-bone platform, not the extreme nose tip.
That distinction matters. A lot of riders are measuring tilt in the wrong spot.
The Calibration Protocol (< 15 Minutes, Zero Cost)
You need two things: a level bike and a smartphone with an inclinometer app.
Step 1: Level the bike first.
Check that both wheel axles are even. Any floor slope corrupts your tilt reading before you start.
Step 2: Place the inclinometer on the sit-bone platform — the rear two-thirds of the saddle where your sit bones make contact. Not the nose. Set your baseline to 0° .
Step 3: Test ride for 5–10 minutes at your normal pace. Then ask yourself three questions:
- Is there front soft tissue pressure or numbness?
- Am I fighting the urge to slide forward?
- Are my hands carrying more weight than usual?
Step 4: Adjust in 1° steps — not larger.
- Vulvar or perineal pressure → try -1° , then -2° if needed.
- Do not exceed -3° without a fitter's guidance. Past that point, forward sliding and hand loading increase fast.
- Sliding forward persists after reaching -2° ? Move the saddle rearward 5 mm and retest. Repeat once more — up to 8–10 mm total — before concluding tilt alone isn't the issue.
One adjustment per test session. Changing tilt and fore–aft position at the same time makes it impossible to know which change helped.
The Bar Drop Equation
Here's something most riders miss. The more your handlebars drop below your saddle, the more your pelvis rotates forward. More forward rotation means more perineal pressure on the saddle nose. A steep bar drop undoes whatever tilt adjustment you just made — without you realizing it.
The fix doesn't require a new stem.
Add 10–15 mm of spacers beneath your stem. That small raise reduces your torso angle enough to decrease forward pelvic rotation. Most fitters reduce bar drop before pushing saddle tilt to its limits. Fixing the source of pelvic rotation beats compensating for it later.
A stem longer than 100 mm is worth swapping to 80–90 mm . A shorter stem improves pelvic stability and reduces the forward-sliding feeling that looks like a tilt problem.
Pelvic Floor & Posture Cues That Work Mid-Ride
Equipment adjustments only hold if your posture supports them.
A slumped lower back pushes the sacrum and soft tissue straight into the saddle channel. The fix isn't to sit bolt-upright. Find a slight anterior pelvic tilt with low abdominal engagement . Think: lengthen the front of your hip, not arch your lower back.
Try this quick stability check. Your tilt is set right and your bar reach isn't too long? You should be able to lift your hands off the bars for a moment without sliding forward. Can't do it? Either the nose is still too low, or the bar reach is pulling your pelvis into rotation.
Every 10–15 km, stand up and pedal easy for 15–20 seconds. This isn't optional rest — it's active pudendal nerve recovery. Sustained saddle pressure with no breaks is how numbness builds up over a long ride. Before sitting back down, do one gentle glute squeeze to reset pelvic alignment.
What to Expect
Most women report a clear reduction in perineal pressure within 1–3 rides after correcting tilt to the -1° to -2° range , setting height for a slight knee bend at full extension, and reducing bar drop.
Worked through the full protocol — tilt dialed, fore–aft adjusted, bar drop reduced — and anterior soft tissue pain or cycling numbness still shows up after three test rides? The saddle shape itself needs a second look. Tilt adjustments can only do so much. At that point, saddle shape, cutout design, and sit bone width matching become the next steps.
But start here first. Most women who do are surprised by how much changes before they spend a single dollar.Several private label cycling apparel brands now design women's bib shorts around pelvic stability and long-distance comfort research.
Tier 2: Sit Bone Measurement & Ergonomic Women's Bike Seat Architecture
Your sit bones are the starting point. Everything else — saddle width, cutout shape, foam density — builds around that single measurement. Get it wrong, and no amount of chamois cream or tilt adjustment will fix the problem.
Measuring Your Sit Bones (And Why the Label on Your Saddle Doesn't Count)
The most reliable method costs nothing. Place corrugated cardboard or a foam block on a hard chair. Sit on it for 60 seconds with your feet flat on the floor. Then measure center-to-center between the two deepest imprints. That number falls between 110–145 mm for most women, with a study-cited average of 134.9 mm . That's your foundation.
Hip circumference calculators offer a shortcut, and brands like Ergon use them. You get a working estimate — nothing more. For a precise reading, visit a local bike shop and ask for a 3D sit bone measurement before buying any saddle.
Translating That Number Into Saddle Width
The formula is simple: saddle width = sit bone width + 20–40 mm , adjusted for riding position.
Upright riding posture : add 30–40 mm
Aggressive or aero position : add 20–30 mm
So, sit bones at 130 mm put your target saddle width somewhere between 150–170 mm , depending on how you ride. Research confirms that saddles at least 1 cm wider than your ischium improve pressure distribution and pedaling symmetry. One Taiwanese study found 160 mm as the practical average for women.
The goal is direct: both sit bones get full skeletal support , and the soft tissue in the center channel stays pressure-free.
Cutout vs. Channel vs. Solid: What the Pressure Data Shows
A central void reduces soft-tissue loading. That part is settled. What changes is how much void your anatomy and riding position need.
A central channel or cutout of 18–25 mm covers most women's needs. It relieves pressure without making the saddle platform unstable. Wider cutouts create instability. Narrower ones may not relieve enough tissue pressure in upright riding positions.
One point worth repeating: foam around a cutout can be too soft or too thick. Under load, it collapses inward. That narrows the relief zone and pulls tissue into the gap instead of away from it — the opposite of what you want.
Shell, Cover & Wear: The Details That Get Ignored
Nylon-composite shells flex a little and absorb road vibration. This matters because repeated micro-loading over 60+ km builds up tissue irritation — even when pressure mapping looks fine.
Microfiber covers cut shear and stay cooler than synthetic leather. Synthetic leather traps heat and moisture, especially in warm conditions.
Foam degrades over time. Most saddles lose real support between 2,000–3,000 km . Check for a flattened rear platform, a compressed channel, or pain returning on a saddle that used to work fine. Those are signs the foam has changed shape — even if the shell still looks good. That's a replacement signal, not a fit problem.
The label "women's specific" means nothing without a sit bone measurement behind it. Buy to your number, not the marketing category.
Professional cycling clothing manufacturers increasingly use sit-bone data and rider feedback to improve women's endurance fit systems.
Tier 3: Seam Placement, Density Zoning & Women's Padded Cycling Shorts Selection
The saddle does half the work. The chamois does the other half — and most women ride in shorts that were never built for it.
Density Zoning: What's Inside the Pad
Budget women's padded cycling shorts use single-density foam at 40–50 kg/m³ across the whole chamois. That uniform cushion feels soft in your hand. Under load, it's useless. It compresses at the same rate everywhere — so it fails everywhere at once.
Mid-range pads use multi-density construction at 70–120 kg/m³. High-end chamois reaches up to 200 kg/m³ at targeted zones. That gap isn't about luxury. It's about structure.
A well-built women's chamois follows a three-zone logic:
High-density core (120–200 kg/m³) — sits beneath the sit bones, the main load-bearing zone
Medium-density surround (60–90 kg/m³) — fills the transition area for support without edge pressure
Thinned or minimal padding at the front perineum — kept thin on purpose to avoid pressing soft tissue against the saddle nose
That last point is what most "women's-specific" marketing never mentions.
Seam Architecture: Where the Stitching Sits Decides Everything
A seam through the saddle contact zone creates a friction ridge. It presses into soft tissue on every pedal stroke. Over 60 km, that's not discomfort — it's a slow-motion injury.
Here's what matters for vulvar pain cycling prevention:
Non-negotiable : No central vertical seam through the chamois. Flatlock or bonded construction on inner thighs.
Worth prioritizing : External flat seams where panels meet near the contact zone. Look for 3D-molded chamois edges with curved sit-bone transitions — no sharp ridges as your pelvis rotates.
For long rides and high-wattage efforts : The full saddle-contact patch should be seam-free. All panel joins should move to the sides. Inner thigh seams run parallel to the pedal stroke — not across it.
Fabric, Bibs & Replacement Timing
Fabric composition drives moisture control. Look for 50–80% nylon with 20–30% elastane. Four-way stretch keeps the chamois locked in place as your position shifts. Also check for antimicrobial treatment on the pad surface. Silver-ion finishes are standard on premium options. They cut the bacterial load that causes post-ride infections.
Bib construction beats waistbands on any ride over 90 minutes. Bib straps hold the chamois in position through hoods, drops, and climbs. Waistband shorts shift. That small movement pulls the density zones away from where your sit bones land — which defeats the whole point.
On replacement: soreness at distances that used to feel easy is a clear sign. So is compressing the sit-bone zone nearly flat with light finger pressure. Both mean the chamois has lost its structure. Riders doing 200+ km per week tend to hit that point within 6–12 months — around 1,500–3,000 km per pair.
Quick selection checklist : multi-density 3D-molded pad marked women-specific ✓ — no central seam through saddle contact zone ✓ — flatlock inner thigh construction ✓ — bib design for rides over 90 minutes ✓ — antimicrobial, perforated or "waffle-structure" foam for moisture control ✓
Tier 4: Barrier Protection & Cycling Hygiene Tips Women Routine Protocol
The chamois does its job. The saddle is dialed. And then you sit in damp shorts for two hours after your ride, and undo all of it.
Most saddle sore flare-ups, recurring yeast infections, and post-ride UTIs don't trace back to equipment failure. They trace back to what happens — or doesn't happen — in the 15 minutes after you dismount. That window is where the routine either holds or falls apart.
Before You Clip In
Start dry. Your perineal area needs to be clean, bone-dry, and low-friction before you touch the saddle. Skip heavy occlusive body lotions on any skin the chamois will cover. They trap sweat and speed up skin breakdown under load.
Use a barrier product? Put it only where friction hits : inner thighs, labial folds, and the direct saddle-contact zones. Spreading it everywhere defeats the point.
Dealing with recurring irritation, yeast infections, or UTIs? The prevention formula is simple: dry skin + dry shorts + fast post-ride cleanup. That trio beats most topical treatments.
On the Bike: Moisture Management
Cotton underlayers are a firm no. They soak up moisture and hold it against your skin. Stick to moisture-wicking cycling shorts or bibs , full stop.
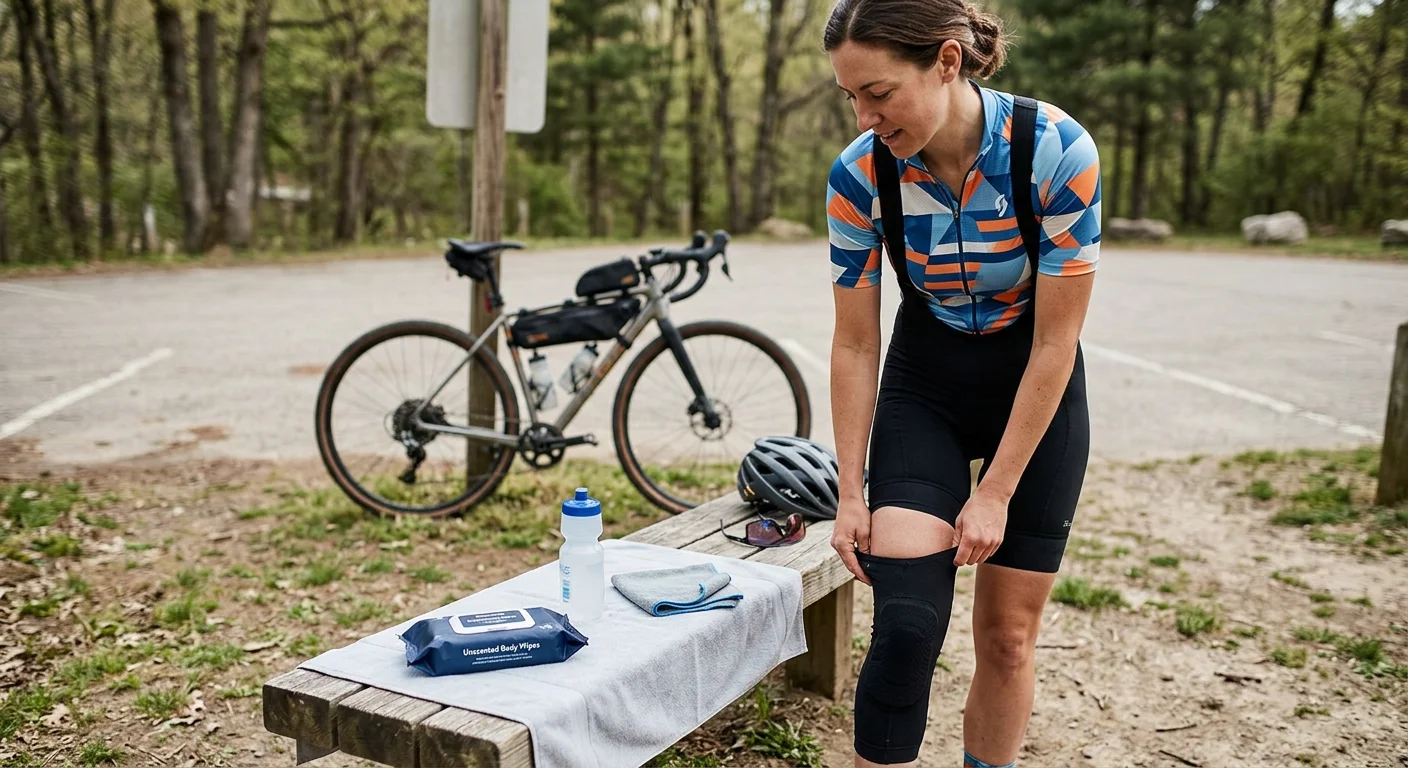
On rides past two hours , treat moisture control as an active task — not a passive hope. Plan dry wipe-downs at rest stops. Carry unscented, alcohol-free wipes or a small packable rinse bottle. Change out of damp shorts mid-ride if you can.
For menstrual rides: tuck tampon strings forward to stop rubbing. A menstrual cup is a cleaner choice for longer efforts — as long as you've practiced with it before race day.
The Post-Ride Protocol (Non-Negotiable)
Get out of your shorts fast. Not after the cooldown stretch. Not after the coffee. Right away. Aim for under 10–15 minutes post-ride. A damp chamois pressed against irritated skin is the perfect warm, sealed environment for bacterial overgrowth to start.
Then:
Rinse with cool or lukewarm water — not hot, which makes inflammation worse on sensitive tissue
Use a gentle, fragrance-free external cleanser — target pH 4.5–5.5 for vulvar-safe cleansing
Pat fully dry before re-dressing. Covering damp skin is not the same as clean skin
Got micro-trauma — small abrasions or early saddle sores? Put zinc oxide barrier cream on the affected external skin. It cuts both friction and moisture exposure before your next ride. For folliculitis-prone spots, a small dab of chlorhexidine 0.05% on intact skin can break the cycle. Keep alcohol-based wipes off vulvar or perineal skin. They sting, strip moisture, and leave tissue more vulnerable — not less.
Laundry Is Part of the Protocol
Rewearing damp shorts the next morning is, as one cycling hygiene guide puts it, a petri dish scenario. That's not an exaggeration.
Wash shorts separately from regular laundry
Use mild, enzyme-free, fragrance-free detergent — skip fabric softener, which leaves residue and kills wicking performance
30°C maximum wash temperature , then air dry only
Never machine-dry technical chamois fabric — heat breaks down both the foam structure and antimicrobial treatments faster than mileage ever will
On tour or multi-day trips: sink-wash with plain camp soap and dry the shorts all the way through before the next ride. A little damp is not dry enough.
Quick Carry Kit
Pack light, but pack this:
Unscented, alcohol-free wipes
Packable rinse bottle or bidet-style tool
Spare shorts or underwear for long stops
Zinc oxide or chamois-specific barrier cream
Menstrual supplies + sealable disposal bag
The non-negotiable rule, distilled: finish ride → remove shorts fast → rinse, cleanse, dry → stay out of damp chamois. Riders with recurring saddle sores, UTIs, or yeast infections who stick to a strict sub-5-minute post-ride change protocol report fewer flare-ups than those who rely on equipment changes alone. The routine is the intervention.
Tier 5: Chamois Ingredient Screening & Application Technique for Long Rides
Read the label on most chamois creams and you'll find a reassuring list — shea butter, tea tree oil, aloe, beeswax. But there's no guidance on what those ingredients do to your skin across six hours of heat, sweat, and friction.
That gap matters more on long rides.
What's in the Tube
Most modern chamois creams are water-based emulsions. They combine plant oils and butters with an antibacterial or antifungal active. That formula works well — if the ingredients are balanced for long contact near sensitive skin.
Here's what to look for, and what to avoid:
Ingredients that earn their place on long rides:
Shea butter + beeswax — the structural backbone of any high-performance formula. Beeswax holds up against sweat breakdown. It seals moisture in and locks bacteria out. That's why slip persists at hour four, not just hour one.
Panthenol (1–5%) — repairs the skin barrier, cuts moisture loss, and keeps the outer skin layer flexible under hours of pressure. Pairs well with glycerin and occlusives.
Aloe vera (0.5–10%) — cooling, lightly anti-inflammatory, and useful for sensitive skin formulas.
Tea tree oil (≤1%) — strong antibacterial and antifungal, but the dosage limit matters. Above 1% on sensitive skin, irritation risk climbs fast. Pair it with witch hazel or low-percentage zinc oxide — don't lean on it alone.
Bisabolol (0.1–0.5%) — anti-inflammatory and soothing on small skin tears. It's underused in cycling products, but common in barrier and after-sun formulas for this exact type of repeated physical stress.
Ingredients to cut for rides over four hours:
High menthol or peppermint oil — fine for a 45-minute ride, but irritating after long contact near sensitive tissue
Parabens and artificial fragrance — high irritation risk in high-friction, high-sweat zones with no real benefit to justify it
Pure petroleum jelly as the base — some ultra-distance riders still use it, but it traps heat and sweat, resists washing out, and can make folliculitis worse on long gravel rides in warm weather
One formula detail most riders never check: pH.
Vulvar skin works best in the pH 4.5–5.5 range . Alkaline bases above pH 7 break down skin barrier lipids and push the local microbiome toward irritation and infection. A chamois cream with a clean ingredient list but a pH of 8 is working against you the whole ride.
Application Protocol
Most people get the quantity wrong — not the direction. A thick layer doesn't mean better protection. It means more heat buildup and faster breakdown.
The standard load: one pea-sized amount per zone — perineum, labia majora, inner upper thighs, sit-bone contact area. Three to six total, depending on body size and chamois coverage.
The sequence:
1. Make sure both skin and chamois are clean and dry before you start. No product fixes a damp starting surface.
2. Drop the cream into your palm. Rub both hands together for a few seconds to warm it up. This step matters for beeswax-heavy formulas — they spread unevenly when cold.
3. Apply a thin, even layer over high-friction zones. For rides over four hours, add a light smear straight onto the chamois foam at the sit-bone and nose area.
4. Wait 5–10 minutes before pulling your shorts on. That window lets the humectants and panthenol absorb while leaving a lubricating film on the surface.
Reapplication by ride duration:
- Under 2.5 hours — no reapplication needed unless you have a history of extreme sensitivity
- 2.5–5 hours — one reapplication around the midpoint; carry a single-use sachet
- Over 5 hours — reapply every 3–4 hours, or as soon as slip drops off; aim for a bathroom stop with a quick wipe-down first
Removal: The Step That Gets Skipped
Getting out of your shorts fast is covered in Tier 4. What happens in the shower is a separate problem.
Don't scrub. That skin has been under physical load for hours. Rough cloths or hard rubbing add more stress to tissue that's already worn down.
Two-pass approach: first, rinse with water alone — open hands, no cloth — to clear the bulk of cream and sweat. Second pass with a fragrance-free, low-pH cleanser (≈5–5.5) using fingertips only. Pat dry with a soft towel.
For visible redness or sore spots after washing: apply a thin layer of zinc oxide or panthenol-rich barrier cream overnight. Both work well for irritation and skin barrier repair. It's the same reason they're standard in diaper formulas — the mechanism fits here too.
Garment Care Note
Oil- and wax-rich formulas perform well on the bike, but they leave residue. Shea, beeswax, and coconut oil hold up against sweat during your ride — and hold up against washing after it.
Cold pre-rinse first, then enzymatic sports detergent on a gentle cycle
Turn shorts inside-out
Air dry only — heat sets oil stains and breaks down the foam faster
Water-based or light-emulsion creams leave little residue. Standard sports detergent clears them within 24 hours with no staining.
The Tier 5 screening checklist in short: water or water+silicone base — shea + beeswax for lasting slip — panthenol 1–5%, aloe 0.5–10%, tea tree ≤1% — pH 5.0–5.5 confirmed — free from parabens, artificial fragrance, high menthol, and heavy petroleum for hot long efforts.
Product Comparison: Cutout Saddles, Noseless Designs & Skin-Safe Chamois Creams
Three saddle categories lead the female-specific fit conversation right now. Each one tackles pressure in its own way — and each comes with real trade-offs worth knowing before you spend.
Cutout Saddles: Three Tiers, Three Approaches
The Liv Contact SL (~$89) is the entry point. It measures 270 × 155 mm with a full-length central cutout. The 3-density foam is firmer under the sit bones and softer toward the nose. This setup covers most endurance and fitness riders without asking anything unusual from your position.
Step up to the Specialized Power Expert with MIMIC (~$170) and the design logic shifts. The short 240 mm nose changes how pressure spreads in aggressive riding positions. The MIMIC insert is worth knowing about: it's a multi-density, gel-like foam that firms up under high-pressure zones and stays soft everywhere else. You get three width options — 143, 155, and 168 mm. That extra $20 over the Liv buys you adaptive foam engineering, not just a wider cutout.
For chronic or one-sided perineal issues, the BiSaddle SRT 2.0 (~$210–250) stands apart. Two independent side wings slide and rotate across a ~130–185 mm width range. You can dial in anything from a narrow channel to a near-noseless gap. No other saddle here does that. Yes, the hardware adds weight — 260–320 g total. But for riders who've tried multiple fixed-geometry saddles with no relief, that adjustability is worth it.
Noseless & Split-Nose: When the Cutout Isn't Enough
Noseless platforms like the VSEAT can preserve up to 80% of perineal blood flow compared to standard saddles. The trade-off is real: drop the nose, and you lose inner-thigh contact. Technical handling can drop 15–20%. That matters on descents or fast corners.
ISM Adamo split-nose saddles land in the middle ground. The twin-prong design shifts soft tissue onto the pubic rami. You still get enough nose geometry to hold steering feel. Most riders report little to no handling penalty after a proper fit — which makes this the more practical choice for road and triathlon use.
The SMP Drakon (~$155–180 on sale) goes a different direction. It uses a steeply dropped nose with a deep channel. This removes perineal load without cutting the nose off. Fitters often say it reaches near-zero perineal pressure in a neutral setup — with far less stability loss than a true noseless design.
Chamois Creams: Ingredient Match by Ride Length
Three products, three use profiles:
Assos Chamois Crème C2 (~$22, rated 4.6/5 for skin compatibility): Water-based formula, pH 5.0–5.5, absorbs clean with no greasy residue. This is the top pick for sensitive skin, folliculitis-prone riders, or anyone who struggles with post-ride cleanup.
Chamois Butt'r Original (~$18, ~4.1–4.3/5 for sensitive skin feel): Thicker, more occlusive dimethicone base. You get maximum lubrication at the lowest price. Plan on using a cloth wipe for full removal after your ride. It works well for most riders — less so if residue sensitivity is an issue for you.
Muc-Off Luxury (~$20): Shea butter, aloe, and tea tree oil at ≤1%. This is the botanical option for riders who want light antibacterial protection without a petroleum feel. Mid-residue, mild herbal scent, paraben-free.
Cost reality check: At 3 g per ride from a standard 200 ml tub, you spend $0.33–0.38 per ride on skin protection. A fitted saddle at $200 plus a $150 professional fitting session totals around $350 . At the benchmark of 3.2 symptom-free rides per dollar invested, that covers you through 1,120 rides before you hit neutral ROI. At three rides per week, that's seven years of coverage.
The math makes a stronger case for investing in fit than most riders expect.
Medical Intervention Signals: Persistent Vulvar Pain Cycling & Pelvic Floor Red Flags
There's a point where self-managing becomes self-neglecting. Most female cyclists cross that line without noticing.
Equipment fixes, chamois cream, saddle swaps — these tools solve mechanical problems. They don't solve nerve damage. They don't solve vulvodynia. They don't solve a pelvic floor that has stopped working the way it should. Knowing the difference between "this needs a better saddle" and "this needs a doctor" is one of the most practical things a female cyclist can have in her kit.
Go to the ER Today
Some symptoms can't wait for a scheduled appointment.
Go to the emergency room for:
Sudden, severe pelvic or vulvar pain that is unbearable, or stops you from standing or walking
Heavy vaginal bleeding — soaking through protection fast, large clots, or any bleeding after menopause
Blood in urine, or rectal bleeding alongside pelvic or vulvar pain
Fever above 38.3°C (101°F) with spreading redness, swelling, or worsening pain in the perineum or vulva
New loss of bladder or bowel control , or sudden numbness across the perineal region ("saddle anesthesia")
Severe pelvic pain with any possibility of pregnancy — doctors need to rule out ectopic pregnancy
None of these are "maybe wait and see" situations.
See a Doctor Soon (Within Days, Not Weeks)
Not every problem is an emergency. But some symptoms still need a clinical look — just not the ER.
Book a GP or gynecologist appointment for any of these:
Pain that keeps getting worse over weeks or months, or pain that now needs medication to function, ride, work, or sleep
Pain that saddle changes, bike fit adjustments, and rest haven't touched — this pattern points to pudendal nerve or pelvic floor involvement, not a mechanical fit issue
Spotting between periods, bleeding after sex, or period pain that has clearly gotten worse alongside pelvic pain
Recurrent UTIs or yeast infections — the clinical threshold for "recurrent UTI" is two or more confirmed infections per year. For cyclists, two or more per season despite hygiene and equipment changes is a good reason to seek specialist review
Chronic vulvar itching, burning, white patches, or unexplained tearing — these need examination to rule out lichen sclerosus and other skin conditions
Unexplained weight loss or body-wide symptoms appearing alongside pelvic pain
Pelvic Floor Red Flags: A Separate Checklist
Pelvic floor dysfunction in cyclists gets under-reported far too often. Symptoms don't always feel linked to riding. Plus, nobody tells you to watch for them.
These symptoms point to pelvic floor involvement. Each one is a reason to see a pelvic floor physical therapist:
Urinary urgency, frequency, or pain with no infection to explain it
Stress incontinence during sprints, hill climbs, or cadence spikes — leaking on exertion is a clear pelvic floor dysfunction signal, not a normal training side effect
Constipation or pain with bowel movements
Pain during intercourse, tampon insertion, or pelvic examination
Pelvic heaviness or pressure that builds over long rides and doesn't go away with rest
Perineal or vulvar burning that eases when you stand but doesn't clear off the bike — this pattern, especially when saddle changes make no difference, raises concern for pudendal neuralgia or vulvodynia
The Nerve Threshold: When Numbness Stops Being Normal
Post-ride numbness gets treated as normal in cycling culture. It isn't.
Numbness lasting 30–60 minutes after dismounting is a warning signal. Adjust your saddle and fit before the next ride.
Numbness or sensory loss lasting more than 4 hours post-ride , or a deficit that builds across multiple rides, needs evaluation by a sports gynecologist, neurologist, or pelvic floor PT.
Numbness paired with reduced genital sensation, difficulty with orgasm, or any change in bladder or bowel control — that raises the urgency level fast. Don't wait.
After a Flare: Returning to the Saddle
Had an acute infection — UTI, vulvovaginitis, Bartholin's abscess, or perineal cellulitis? Sports medicine's standard approach is complete off-saddle rest for at least 7 days after symptoms clear .
Returning to the saddle looks like this:
Week one back : cap mileage at 30–40% of your prior weekly average, easy intensity only, no intervals
Use shorter rides with built-in breaks rather than long, continuous saddle time
Track each day: pain level (0–10), post-ride numbness duration, any bleeding, discharge, or bladder and bowel changes
Pain returns to pre-treatment levels? Numbness goes past 4 hours? Any red flag comes back? Stop riding and call your clinician
The clearest signal: pain has changed how you live — not just how you ride. That's already past the point of self-management. That's the line.
Conclusion
Your body was never the problem — the setup was.
Every ride that left you sore, numb, or dreading the saddle was sending you a message. Now you have the tools to fix it. Match your saddle width to your actual sit bones. Choose shorts with seams that go around problem areas, not through them. Apply chamois cream before friction starts, not after it hurts. Adjust your saddle tilt in degrees — not guesswork.
None of this means suffering alone or searching symptoms at midnight, too embarrassed to ask anyone.
Start with one thing. Fix the saddle angle this weekend. Order the right women's padded cycling shorts next. Comparing women's cycling shorts wholesale price options can also help teams, clubs, and retailers source better long-distance comfort gear at scale.Build the small ritual that turns your next ride — and the one after that — into something you look forward to.
Pain still there after two weeks of real adjustments? That's not a willpower problem. That's a doctor visit. Book it.
You deserve to ride far. In comfort. No apology needed.